 serin labs
The Serin Link is a desktop control for your heat pump. It sends commands through the Serin Controller, a small module at the heat pump. The two devices exchange data through their own wireless connection. Daily operation does not need home Wi-Fi. One Serin Link can control up to seven rooms, called zones. Each zone has its own Serin Controller.
The firmware user interface generates every image in this manual. These images
are not hand-drawn. The animated images (anim-*.png) use the animated PNG
format. If your viewer cannot show animation, these images show only their
first frame.
First power-on and pairing
At first power-on, Serin Link has no paired Serin Controller. The screen shows that it is ready for pairing:
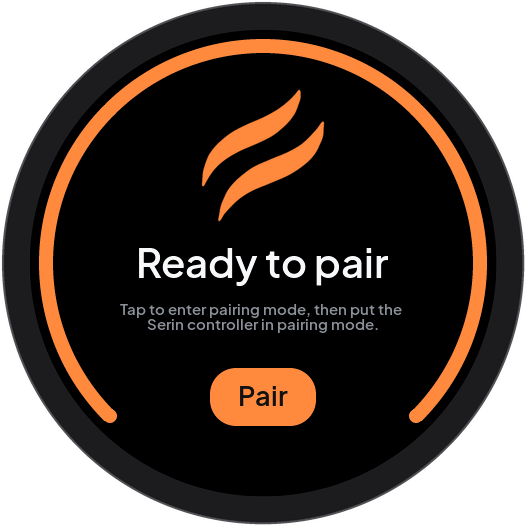
- Start pairing on the intended Serin Controller with the applicable instruction:
- With HomeKit-compatible or Matter-compatible firmware, select Pair in the controller web interface’s Link card.
- With ESPHome, select Pair Serin Link in Home Assistant or in the enabled ESPHome web interface.
- On Serin Link, touch Pair briefly or push the knob. A brief touch on the screen is a tap.

Keep the controller pairing window open until pairing is complete. If the window closes, open it again at the controller.
During the search, an indicator moves around the ring on the screen. The screen also shows a countdown. To stop the search at any time, tap Cancel.
When pairing is complete, the screen shows this message:
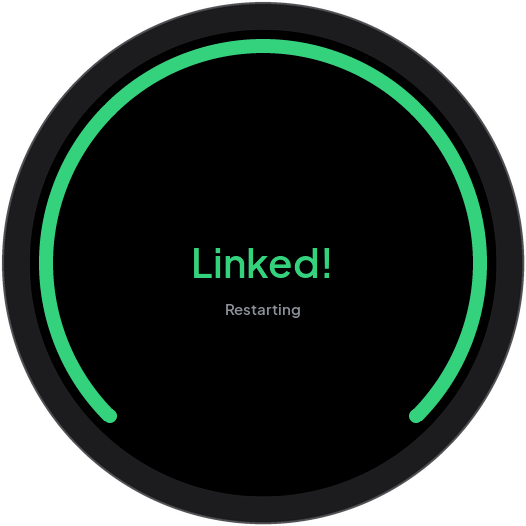
Serin Link restarts briefly. The screen then shows the current state of your heat pump. To add more zones, refer to Zones.
The home screen
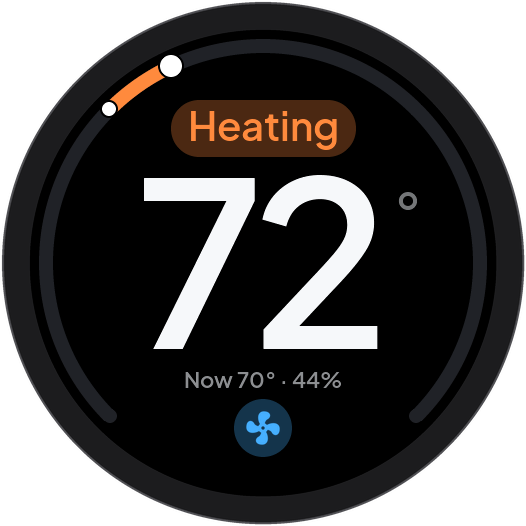
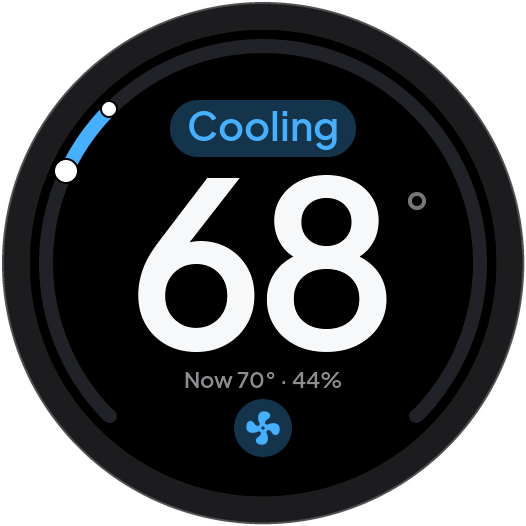
The home screen shows the temperature and heat pump controls for daily use:
-
The large number shows the target temperature. Turn the knob to change the target temperature. The number has a highlight during adjustment. When you stop, Serin Link automatically sends the change to the heat pump. Alternatively, move your finger along the ring to change the target temperature.

- The bright marker on the ring shows the target temperature within the available range. During heat pump operation, the arc behind this marker fills toward the marker. The smaller marker shows the current room temperature on the same ring.
- The status label above the large number shows the current heat pump operation, for example, Heating or Cooling. When the heat pump is idle, the label shows the current mode. Tap the status label to open the mode selection screen. The status label also shows warnings. Refer to When something needs attention.
- The “Now” line below the large number shows the measured room temperature and humidity.
- The small fan button at the bottom opens the Airflow controls when you tap it. If Serin Link has more than one zone, the current zone name shows in this position instead.

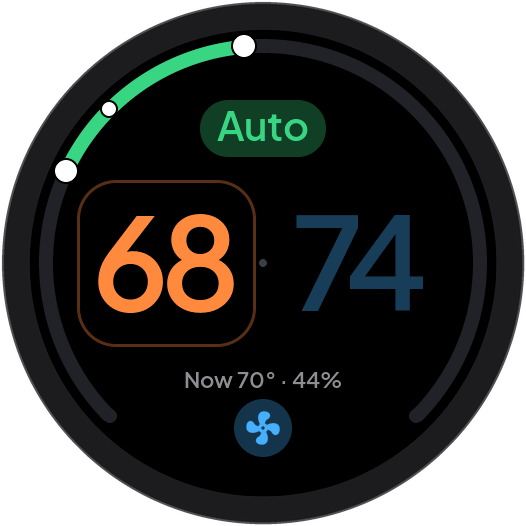
In Heat/Cool mode, the heat pump keeps the room temperature between two limits. The home screen shows both temperatures.
- Tap the temperature that you want to change.
- Turn the knob to change that temperature.
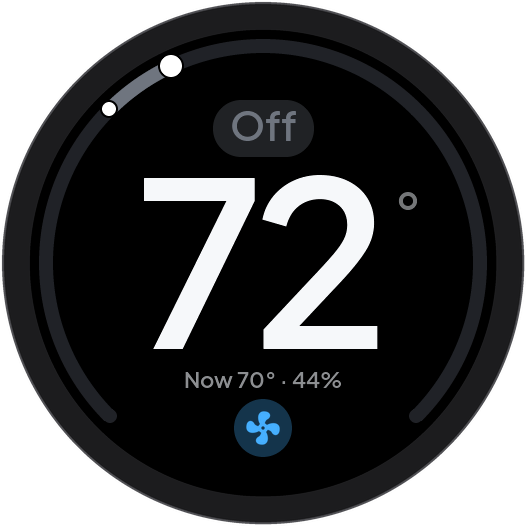
When the system is Off, the screen shows Off. The ring does not move:
Screen dimming and idle display
After approximately 30 seconds without activity, supported displays become dim. After approximately two minutes, the Idle screen setting applies. Glance shows a dim room temperature display. Off makes the screen dark. Refer to Advanced settings for the display differences.
This figure shows Glance:
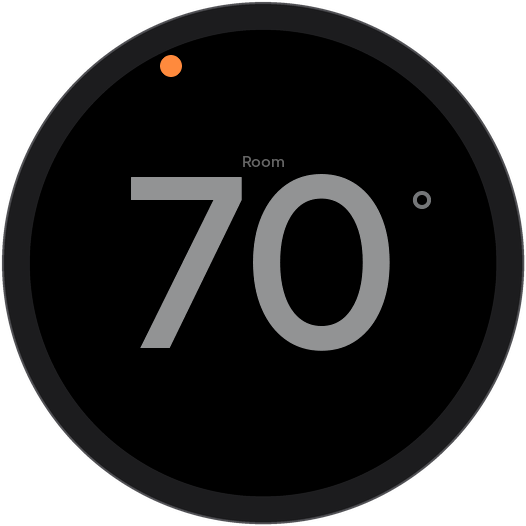
When the screen is dim or shows the idle display, the first touch, knob turn, or knob push activates the screen. This first action does not change a setting.
- Touch the screen, turn the knob, or push the knob to activate the screen.
- Then, do the action that you want.
Knob and touchscreen controls
The result of a control action depends on the screen and the selected item:
| Gesture | What it does |
|---|---|
| Turn the knob | Changes the target temperature on the home screen or the highlighted item in a menu. Changes the fan or vane setting when the control is ready for adjustment. Does not open another screen. |
| Tap, or push the knob | Opens an item, selects an item, or applies a change. On the home screen, a knob push opens the Menu. |
| Hold (approximately 0.6 seconds) | Usually returns home. On Home, opens Zones when available. The exceptions below take priority. |
| Long hold with a confirmation arc | Unlocks controls, forgets a zone, changes a working network, suppresses the Wi-Fi offer, or opens reset confirmation. Early release cancels. |
| Flick up on the home screen | Opens the Airflow controls. |
| Flick down on the Airflow screen | Returns to the home screen. |
| Swipe left or right on the home screen | Changes the selected zone. |
To hold, keep the knob pushed or keep your finger on the touchscreen. Use the knob for the hold procedures in this manual. Touch holds depend on the screen and the touched area. A flick is a quick finger movement across the touchscreen. A swipe is a finger movement across the touchscreen to the left or right.
A hold can instead cancel a pairing search, cancel an update, close a dialog, or leave Wi-Fi setup. During update verification or restart, a hold does not cancel the update. Follow each screen’s instructions.
Protected actions use a longer hold. Keep the knob pushed until the confirmation arc is complete. Release early to cancel the hold. For Reset Link, the complete arc opens a second confirmation dialog. The arc alone does not erase anything.

The Menu has a ring of controls for temperature, mode, airflow, and settings.
- On the home screen, push the knob to open the Menu.
- Turn the knob to highlight a control.
- Push the knob or tap the control to open it.
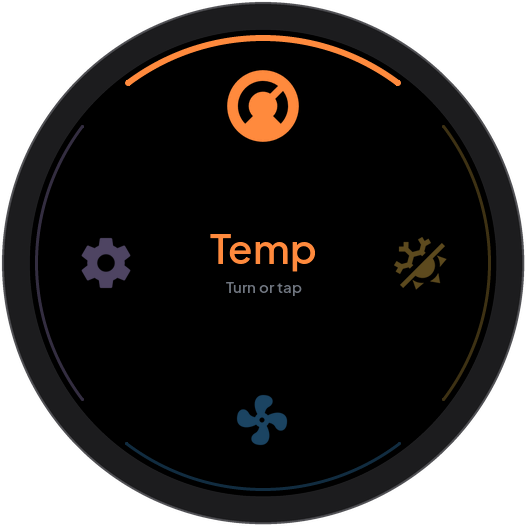
Choosing a mode
- Open the mode selection screen from the Menu or tap the status label on the home screen.
- Turn the knob to highlight a mode.
- Push the knob or tap the mode icon to select that mode.
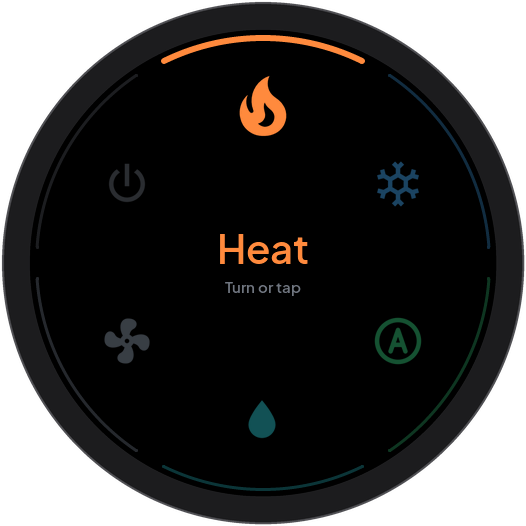
Some Serin Controllers have both Heat/Cool and Auto modes. Heat/Cool uses a temperature range. Auto is the automatic mode of the Serin Controller. The mode selection screen shows separate names for these modes. A flame and a snowflake together identify Heat/Cool.
To stop heat pump operation, select Off from the mode selection screen. There is no separate power button.
Airflow
To open the Airflow controls, flick up on the home screen or tap the small fan button at the bottom.
The selected control shows in the center. The ring shows controls for fan speed and each available vane. A vane is a part of the heat pump that changes the airflow direction.
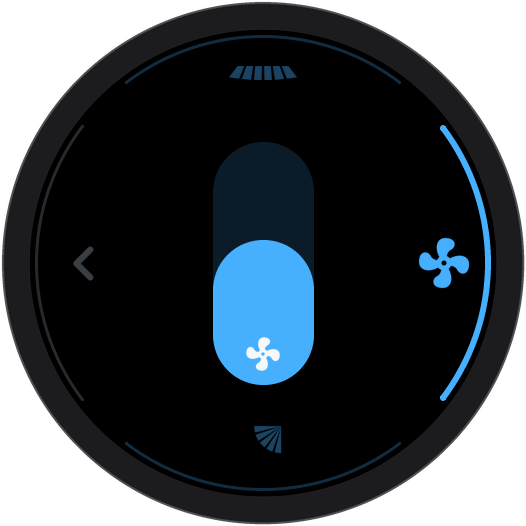
The first available control is already in adjustment mode when Airflow opens. A knob turn immediately changes its value, even when several controls are available.
If only one control is available, turn the knob to adjust it. Push the knob to return home.
If several controls are available, use this procedure to change controls:
- Push the knob to leave the initial adjustment mode.
- Turn the knob to highlight the required control.
- Push the knob to enter adjustment mode.
- Turn the knob to change the value.
- Push the knob to leave adjustment mode.
- Fan speed: move your finger along the center bar. Alternatively, turn the knob when the fan control is ready for adjustment. The height of the filled area shows the fan speed. If Auto is available, tap the active fan control to switch between Auto and manual speed. A tap on an inactive fan control first selects it for adjustment.
- Vanes: tap a vane tile to make it ready for adjustment. Then, turn the knob to change the vane angle. Alternatively, tap the tile repeatedly to move through the available positions. Each tile controls a vane that your heat pump has.
With an Auto setting, the heat pump automatically controls the fan speed or vane position. The control becomes dim and shows an AUTO label:
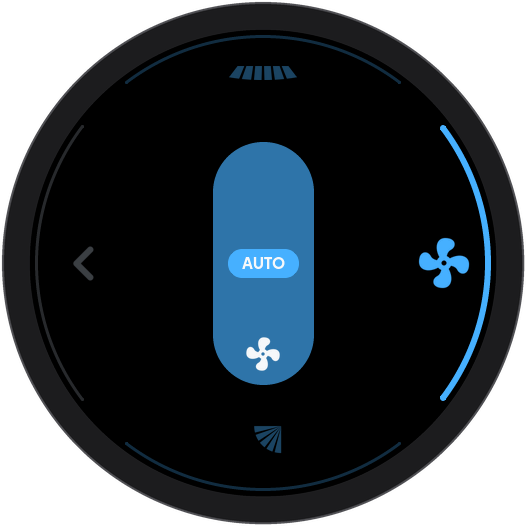
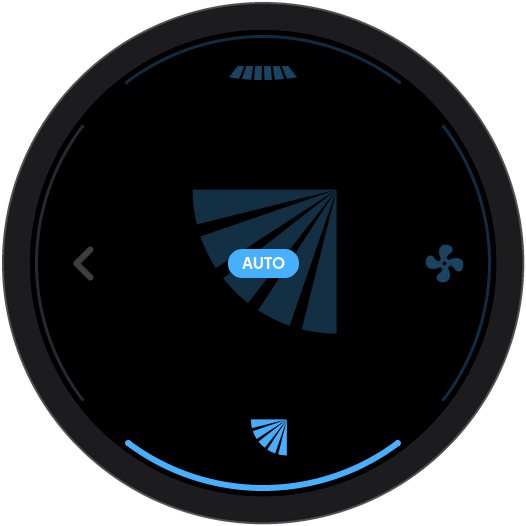
To return to the home screen, flick down outside the tiles or hold. If more than one control is available, you can also select Back on the ring.
Zones (more than one room)
Serin Link can pair with more than one Serin Controller. With multiple zones, the home screen shows the selected zone name at the bottom:
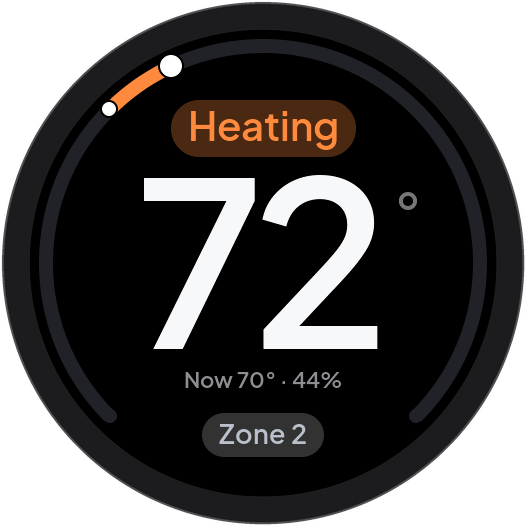
Swipe left or right on the home screen to change the selected zone.
Alternatively, use the zone selection screen:
- On the home screen, hold or tap the zone name to open the zone selection screen.
- Turn the knob to highlight a zone.
- Push the knob to select that zone.
The zone selection screen shows all zones on the ring. The temperature and state of the highlighted zone show in the center.
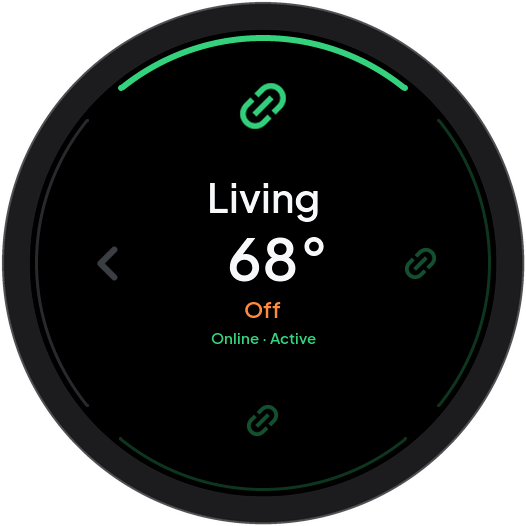
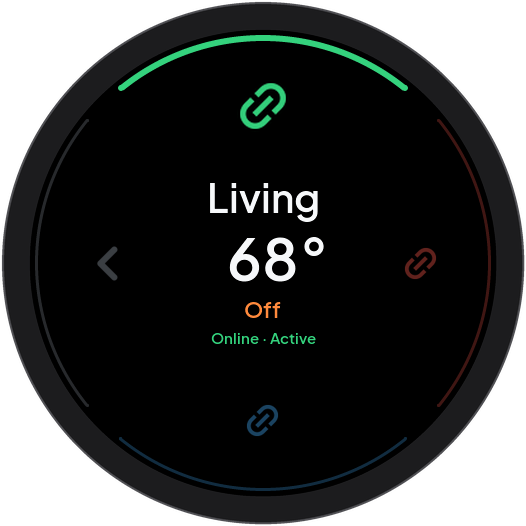
Each zone marker has a color that shows the connection state:
- Green: Serin Link can exchange data with the Serin Controller in that zone.
- Blue, with Checking: Serin Link tries to contact the Serin Controller in that zone.
- Red, with Offline: Serin Link cannot exchange data with the Serin Controller in that zone.
Add or forget a zone
To add a zone:
- Open pairing on the intended controller as described in First power-on and pairing.
- On Serin Link, open Settings.
- Turn the knob to highlight Link.
- Push the knob to start add zone.
- Keep the controller pairing window open until the search completes.
There is no separate Pair menu item inside Settings. With an unpaired Link, the knob action is pair. With a paired Link, it is add zone.
To forget one zone:
- Select the zone that you want to remove.
- Open Settings.
- Turn the knob to highlight Link.
- Check the zone name in the center of the screen.
- Keep the knob pushed until the confirmation arc is complete.
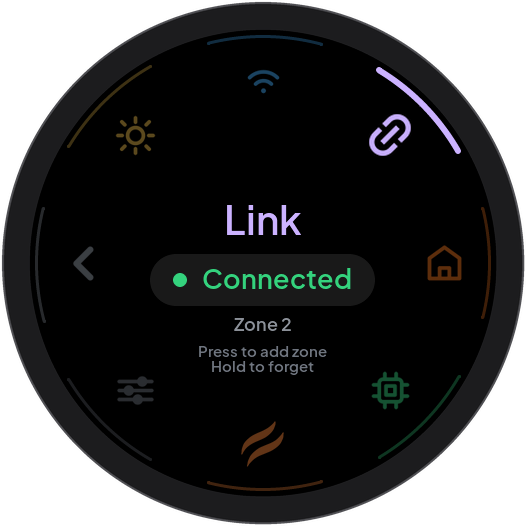
Serin Link removes the active zone pairing and restarts. Other zone pairings remain. Release the knob before the arc completes to cancel. To remove all zones and preferences, use Reset Link.
For pairing failures or a zone limit, see Pairing recovery.
Settings
In this manual, Settings means Home screen → push knob → Menu → Settings. In the Menu, highlight Settings. Push the knob to open it.
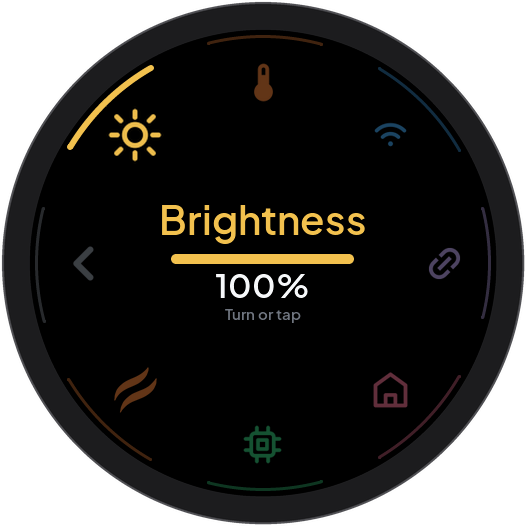
Turn the knob to highlight a Settings item. Then push the knob for the action shown in the center. Ring icons and central rows have different actions:
| Touch target | Result |
|---|---|
| Wi-Fi, HomeKit/Matter, Room Sensor, or About ring icon | Highlights the item. A tap does not open its next screen. |
| Brightness ring icon | Selects Brightness and enters adjustment mode. |
| Link ring icon | Selects Link. With no pairing, it also starts pairing. |
| Advanced or Back ring icon | Opens Advanced or returns to the Menu. |
| Wi-Fi central status row | Opens the available Wi-Fi action. The action depends on connection state. |
| HomeKit/Matter central status row | Opens pairing when online and unpaired. No link opens an explanation. |
| Room Sensor central status row | Opens the source list when available. Otherwise, opens the applicable status explanation. |
| Link central status row | Opens a connection explanation when the controller is unavailable. |
| About Details button | Opens the information list. |
Select Back to return from Settings to the Menu. Screens within Settings return to the item that opened them. For example, a source selection returns to Room Sensor.
Brightness
- In Settings, highlight Brightness.
- Push the knob to enter adjustment mode.
- Turn the knob to change brightness.
- Push the knob to leave adjustment mode.
The range is 10–100%. Each knob step changes brightness by five percentage points. Alternatively, touch the brightness track at the required position or move your finger along it. Idle and Night settings can reduce actual brightness below this value. Refer to Advanced settings.
Room and remote sensors
Room Sensor identifies the temperature source that the controller reports for heat pump control. Other measurements can appear in About → Details without controlling the heat pump.
| Source name | Meaning |
|---|---|
| Internal | The heat pump’s internal room temperature source. |
| Sensor | A remote sensor source supplied by the controller. |
| Link | A temperature source from a paired Serin Link with a sensor. |
| A controller-supplied name | The controller’s name for that source, such as a room name. |
The controller supplies the source list and names. The choices depend on its firmware, hardware, and configured sensors. The list can include other names and sources.
Select a temperature source
- Open Settings.
- Highlight Room Sensor.
- Push the knob to open the source list.
- Turn the knob to highlight the required source.
- Push the knob to send the selection to the controller.
- Check the source name and status after Link returns to Settings.
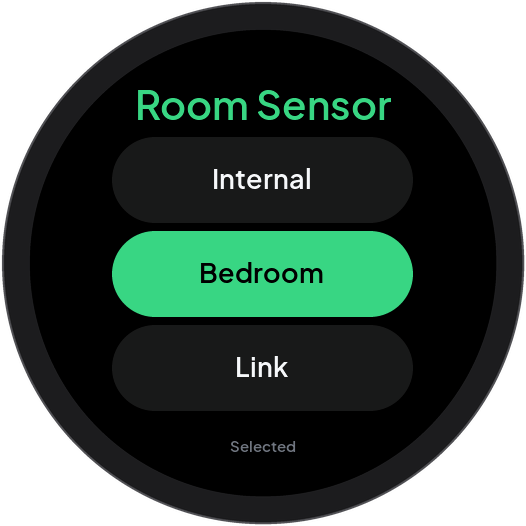
Alternatively, tap a source in the list to select it. Move your finger up or down within the list to see more sources. Knob selection scrolls the highlighted source into view. Selected identifies the applied source when the controller reports a valid reading. A highlight alone does not apply a new source.
To leave without a change, select Back at the end of the list. Link returns to Settings with Room Sensor highlighted.
Add or configure a remote sensor
Link has no sensor enrollment screen. Configure the sensor at the controller before you select it on Link.
For HomeKit-compatible or Matter-compatible controller firmware with a Room Sensor card and Bluetooth support:
- Supply power to a compatible Bluetooth thermometer.
- Open the controller web interface.
- Open its Room Sensor card.
- Enable Enable Remote Sensors if it is off.
- Select Add Sensor….
- Select your thermometer from the scan results.
- Check that the card shows a current temperature for the new sensor.
- On Link, use Select a temperature source.
If the scan does not find your sensor:
- Select Enter address manually… in the controller card.
- Enter the sensor’s Bluetooth address.
- Select Add.
- Check for a current temperature before you select the source on Link.
Use Manage Sensors in the controller web interface to rename or remove a sensor, or change its calibration offset. The controller firmware supplies these controls. They are not Link settings. See the controller’s remote sensor instructions for compatible sensor types and configuration details.
For ESPHome, configure the remote temperature entity with the Serin YAML generator. Install that configuration as instructed by the generator. Available Link source choices depend on that controller configuration.
For missing or old measurements, see Unavailable sensor readings.
Advanced settings
- Open Settings.
- Highlight Advanced.
- Push the knob to open Advanced.
- Turn the knob to highlight the required item.
Units, Idle screen, Night, and Transitions
These items use the same adjustment procedure:
- Highlight the item in Advanced.
- Push the knob to enter adjustment mode.
- Turn the knob to select an option.
- Push the knob to leave adjustment mode.
Alternatively, tap the item’s ring icon. Then tap the required option in the center. A touch selection also enters adjustment mode. Push the knob before you use knob turns to browse other items.
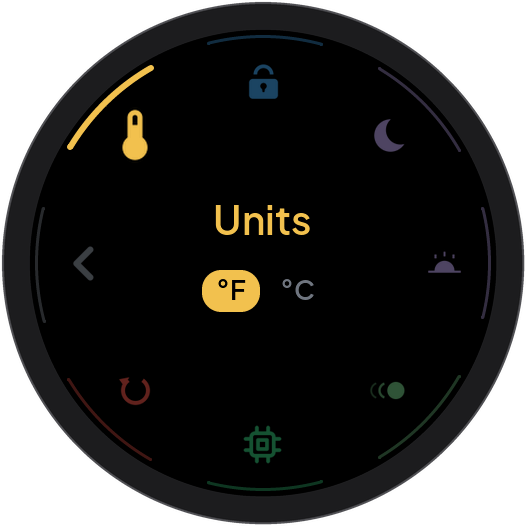
Units: select °F or °C. The selection takes effect during adjustment and sends the unit choice to the controller. The final push leaves adjustment mode. It is not a separate Save action.
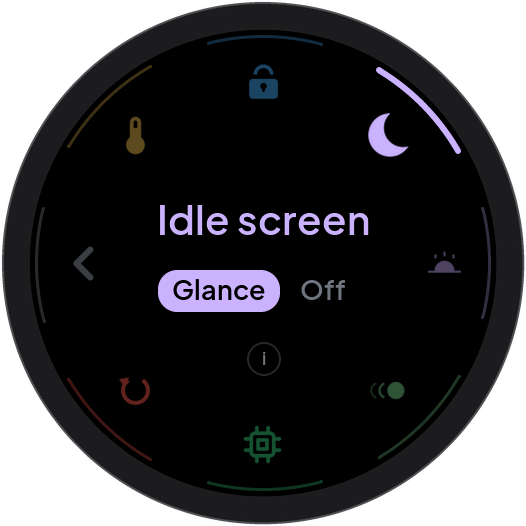
Idle screen: select Glance for a dim temperature display, or Off for a dark screen after inactivity. To wake either display, touch the screen, turn the knob, or push the knob. The first action wakes the screen without changing a setting. Do the required action afterward.
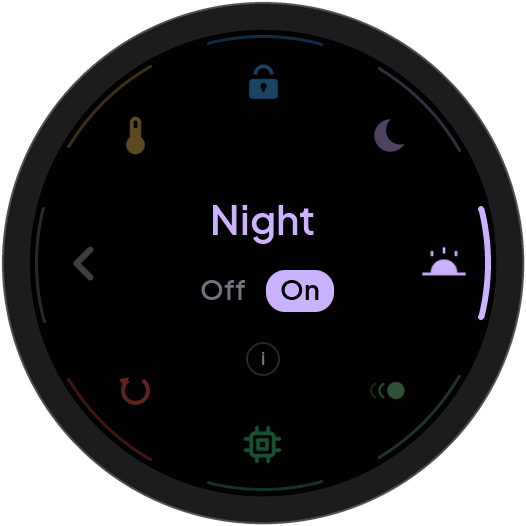
Night: select On to permit the controller’s night signal to limit brightness. Select Off to ignore that signal. Link receives the night-active state from the controller. This screen does not set night hours.
On the VIEWE 1.5 display, the limit is normally 20%. The controller can supply a different limit. A Brightness adjustment temporarily lifts the limit. Inactivity restores it. Ordinary knob activity wakes a dim display, but does not itself remove the night limit in this firmware revision.
The VIEWE 2.1 display does not use the same idle brightness ramp or night cap. Its Idle screen → Off option still makes the screen dark. Check the board name in About → Details → DIAL before comparing display behavior.
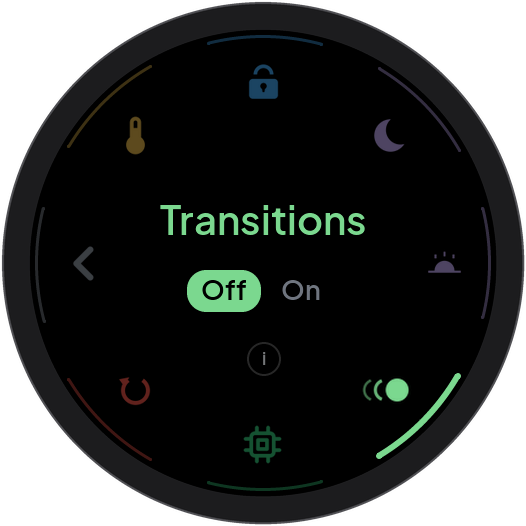
Transitions: select On for fades between screens. Select Off for immediate screen changes.
An i button appears below Child Lock, Idle screen, Night, and Transitions. Tap it for an explanation. Push the knob to close the explanation.
Child Lock
- In Advanced, highlight Child Lock.
- Push the knob to enter adjustment mode.
- Turn clockwise to select On.
- Push the knob to leave adjustment mode.
- Hold the knob to return home.
Alternatively, tap On in the center of the Child Lock screen.
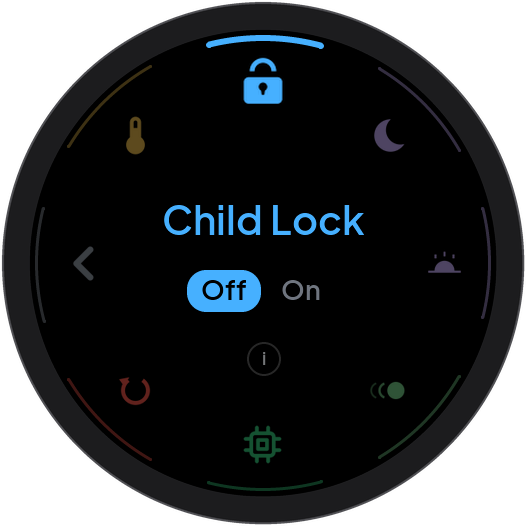
Child Lock blocks ordinary turns, pushes, taps, and swipes on the home screen. It prevents accidental changes to the heat pump controls and access to menus. A blocked action can show Hold to unlock.
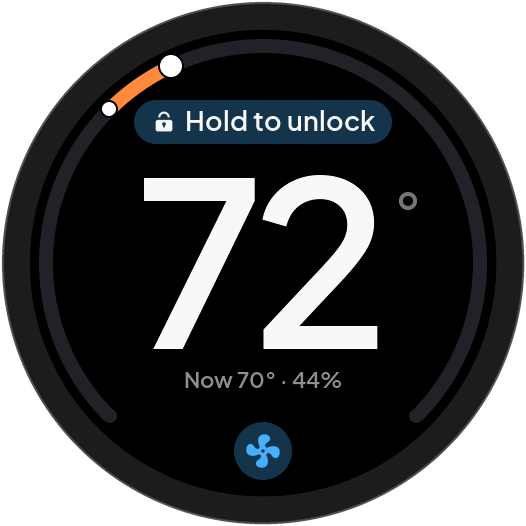
To unlock temporarily:
- Wake the home screen if necessary.
- Keep the knob pushed until the confirmation arc is complete.
- Release the knob.
- Operate the controls normally.
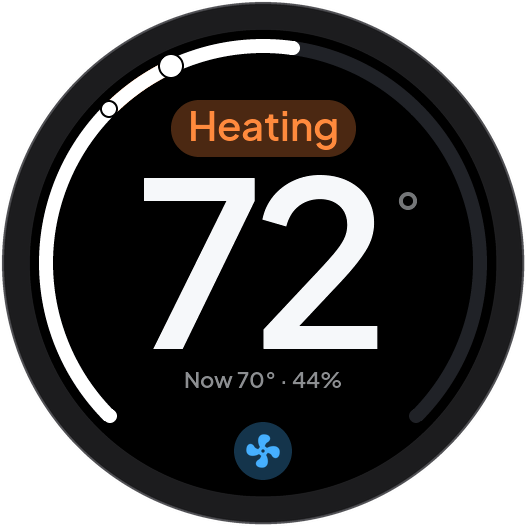
Temporary unlocking leaves Child Lock enabled. After approximately 30 seconds without activity, it locks again. To disable Child Lock permanently, unlock first. Return to Settings → Advanced → Child Lock. Tap Off. For knob operation:
- Push the knob to enter adjustment mode.
- Turn counterclockwise to select Off.
- Push the knob to leave adjustment mode.
Heat Pump status
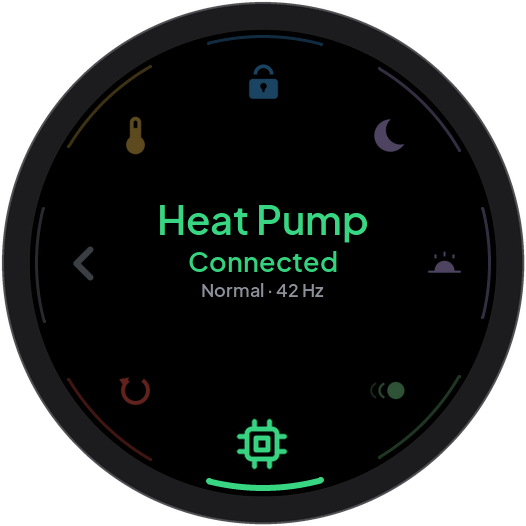
Heat Pump is a status display. It does not adjust the heat pump. Connected means that the controller reports CN105 communication. Not connected means that it reports no CN105 communication.
Fault with a code is a heat pump fault. A count such as 3 errors reports communication errors. Available operating details can include the operating stage, compressor frequency in Hz, and outdoor temperature. Missing details depend on what the controller and heat pump report.
With multiple zones, push the knob when choose appears to open zone selection. Select the required zone. In this firmware revision, zone selection returns home. Reopen Advanced to inspect that zone’s Heat Pump status.
Reset Link
CAUTION: Reset Link erases all Link zone pairings, Wi-Fi setup choices, and preferences. Link restarts. The heat pump keeps running. This action does not reset the controller’s home pairing or erase its Wi-Fi network.
- Open Settings → Advanced.
- Highlight Reset Link.
- Keep the knob pushed until the confirmation arc is complete.
- Release the knob when Reset link? appears.
- Tap Reset to erase Link, or Cancel to keep its settings.
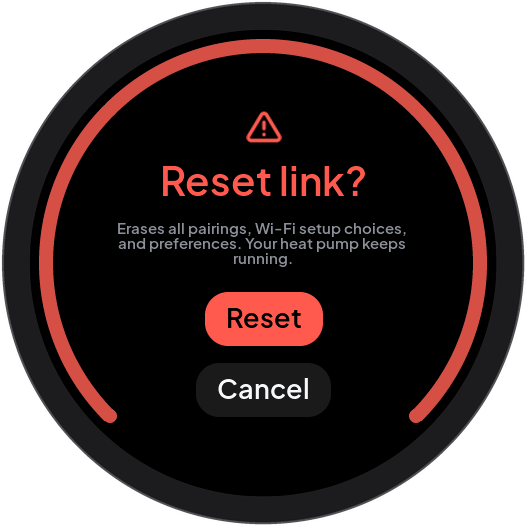
Alternatively, turn the knob to highlight Reset or Cancel in the dialog. Push the knob to apply that choice. An early release during the arc cancels before the dialog opens. After reset, use First power-on and pairing.
Do not keep the knob pushed while you connect power. This starts firmware download mode instead of the normal application. If this occurs, release the knob. Disconnect power. Connect power again with the knob released.
Wi-Fi setup
The Serin Controller uses home Wi-Fi for network functions. Link’s daily heat pump controls use a separate wireless connection. Wi-Fi setup and the available actions depend on the controller firmware.
Start setup or change a network
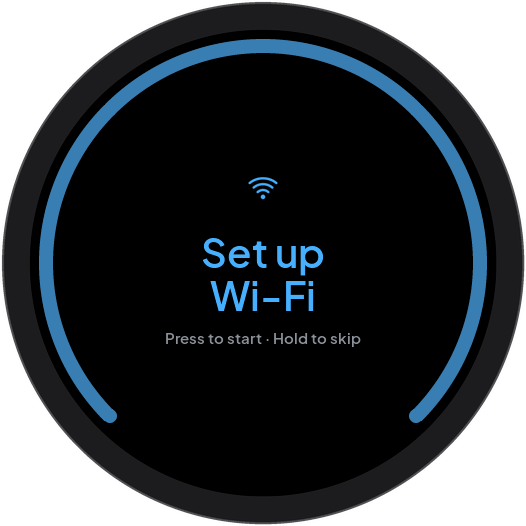
When the home screen offers Wi-Fi setup, push the knob to start. To suppress this offer, keep the knob pushed on this home-screen offer until the confirmation arc completes. This choice suppresses later automatic offers. You can still open Settings → Wi-Fi to configure the network later.
In Settings, highlight Wi-Fi. Follow the applicable case:
| Controller state | Action |
|---|---|
| No configured network, setup available | Push the knob to start setup. |
| Configured network disconnected, setup available | Push the knob to configure a network. |
| Working network with change network hint | Keep the knob pushed until the confirmation arc completes. This starts network change. |
| Working network with a reported IP address | A brief push opens the controller web QR code. It does not change the network. |
| No link, or setup unavailable | Restore the Link connection or use the controller firmware’s setup procedure. |
A network change can interrupt network functions. Release early during its confirmation arc to cancel the request.
Connect the controller to Wi-Fi
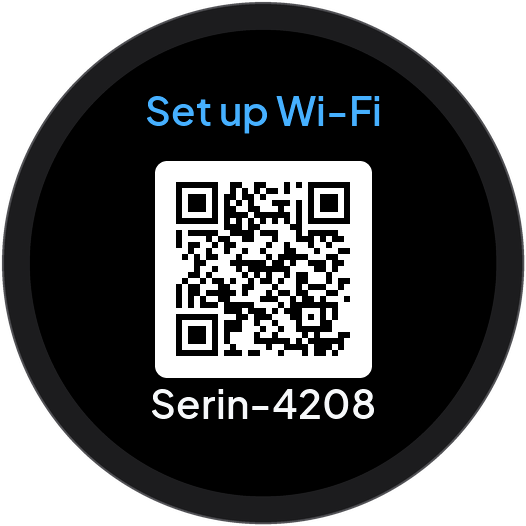
- Scan the setup QR code with your phone camera.
- Accept the phone’s request to join the displayed temporary Wi-Fi network.
- On the setup page, select your home network.
- Enter its password.
- Submit the network details with the page’s connection button.
- Wait for Wi-Fi connected on Link.
- Connect your phone to the home network again.
If scanning does not connect the phone, select the displayed Serin-XXXX
network in the phone’s Wi-Fi settings. Enter serinlabs as its password.
While connected to that hotspot, open http://192.168.4.1 if the setup page
does not open automatically. These hotspot details apply to the controller
firmware described in the Serin setup guide.
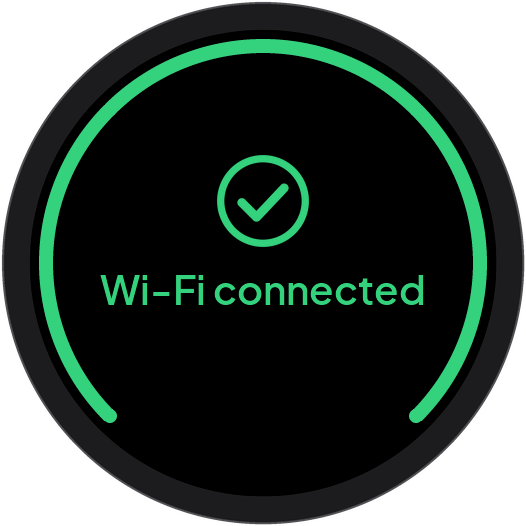
After first-time Wi-Fi setup, an unpaired controller can supply a HomeKit or Matter pairing code. Link shows that code after a short delay, or when you push the knob. Continue with HomeKit and Matter pairing. If no home pairing is needed, push the knob to finish. A network change started with the protected hold finishes without another home-pairing step. Setup started with a brief push can offer pairing if the controller has no home pairing.
A new Matter controller can instead receive Wi-Fi details from the home app during Matter pairing. A Wi-Fi offer on Link is not a prerequisite for that process. Use the controller’s setup instructions if Link offers no hotspot.
Cancel Wi-Fi setup
Hold the knob to cancel while the hotspot starts. On a network-change QR screen, push or hold the knob to return to Settings. On an initial setup QR screen, push or hold to leave the screen. Link returns to Settings if you started there, or home if you started from the offer.
Leaving the screen does not erase submitted network details. It also does not suppress the automatic offer. The long hold on the home-screen offer is the separate action that suppresses that offer.
For setup failures or screen timeouts, see Retry, cancel, or return later.
Open the controller web interface
The controller must be online, connected to Wi-Fi, and reporting an IP address.
- Connect your phone to the same home network as the controller.
- On Link, open Settings.
- Highlight Wi-Fi.
- Push the knob when show web UI appears.
- Scan the QR code with your phone camera.
- Open the web address offered by the phone.
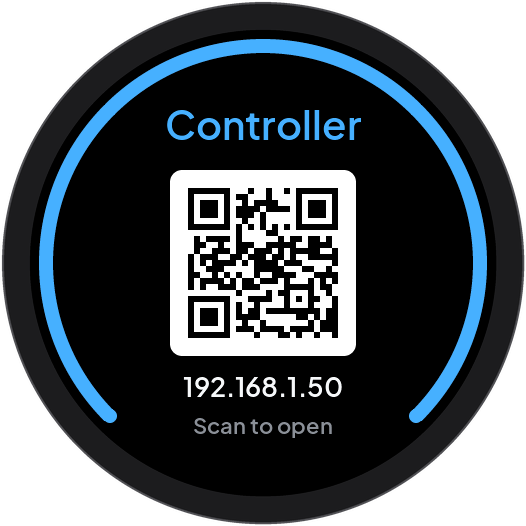
Alternatively, enter http:// followed by the displayed IP address in your
browser. For example, use http://192.168.1.50/ only if Link shows that address.
Push or hold the knob to return to Settings with Wi-Fi highlighted.
HomeKit and Matter pairing
These procedures add the controller to a home app. They are separate from pairing Serin Link with Serin Controller. Select the intended zone before you start. Use the code on your own device, not a code in a manual figure.
Add HomeKit-compatible firmware to Apple Home
Use an iPhone or iPad with the Home app. Connect the controller and phone to the same home network. The controller must be online and unpaired with a home.
- On Link, open Settings.
- Highlight HomeKit.
- Push the knob to display the setup QR code.
- On the phone, open Home.
- Tap +.
- Tap Add Accessory.
- Scan the QR code on Link.
- Select the accessory when the app finds it.
- Complete the app’s room and name prompts.
- Tap Done when the app completes setup.
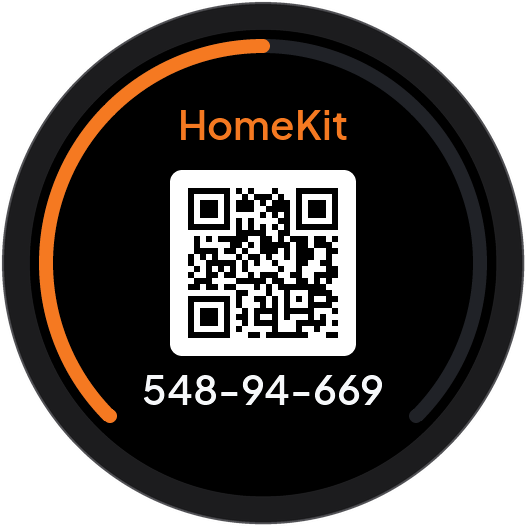
If scanning fails, use the app’s manual setup option. Enter the eight-digit HomeKit code shown on Link. The HomeKit-compatible firmware is not Apple certified. The app can show an uncertified-accessory message during setup. Refer to Apple’s accessory setup instructions and manual code entry.
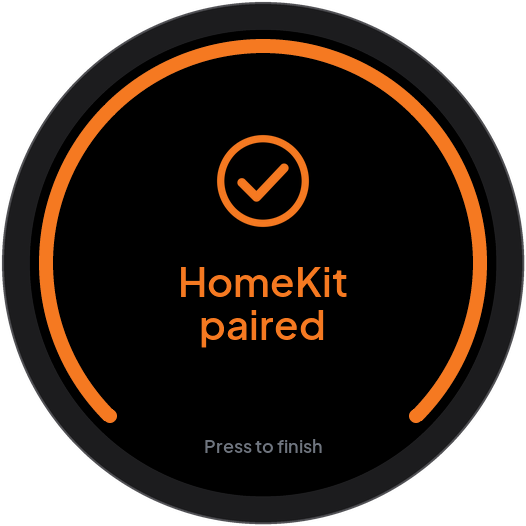
When the controller reports success, Link shows HomeKit paired. Push the knob to finish. Entry from Settings returns to Settings. Entry after setup from the home-screen offer returns home.
Add Matter-compatible firmware to a home app
Use a Matter-capable home app and its required hub. Enable Bluetooth on the phone for initial setup. The Serin Matter-compatible firmware uses Wi-Fi, not Thread. The controller must accept pairing, and Link must have an online connection to it. Normal entry from Settings requires an unpaired controller.
- On Link, open Settings.
- Highlight Matter.
- Push the knob to display the Matter setup QR code.
- Open your home app on the phone.
- Use its procedure below to add the controller.
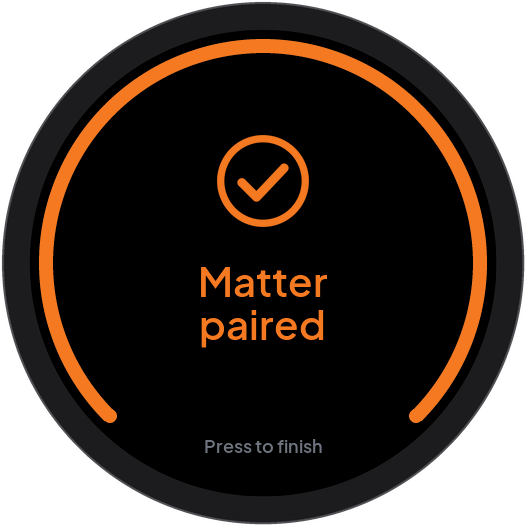
- Wait for Matter paired on Link.
- Push the knob to finish.
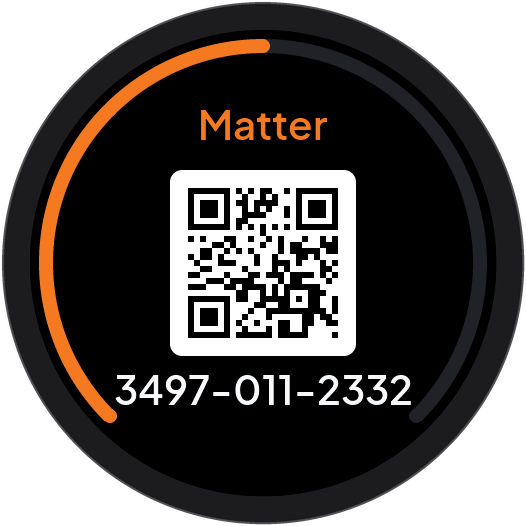
For Apple Home, use + → Add Accessory. Scan Link’s Matter QR code. Alternatively, enter its Matter setup code with the app’s manual option. Complete the room and name prompts. See Apple’s Matter instructions.
For Google Home, first prepare a compatible Matter hub and enable IPv6 on
the home network. This controller’s test firmware also needs a Google
Developer Console Matter integration with matching device identifiers. Check
the controller web interface’s About → Matter ID before configuration.
The audited firmware uses Vendor ID 0xFFF1 and Product ID 0x8000.
Use the same Google account for the developer project and the Home app. Follow Google’s test-device setup instructions. Then open Google Home. Select Add → Device and scan the QR code on Link. Complete the app’s setup prompts. App versions can offer Set up without QR code for manual entry. Follow Google’s current pairing instructions if the labels differ.
For another Matter app, follow that app’s instructions for adding an accessory. Check its requirements for uncertified firmware before pairing. Do not assume that every app accepts the controller without additional configuration.
Continue after Wi-Fi setup or return later
When Wi-Fi setup continues to a pairing code, start with the phone steps in the applicable procedure above. You do not need to reopen Settings first.
To leave the pairing code, push or hold the knob. You can return through Settings → HomeKit or Settings → Matter while the controller remains unpaired. After success, push the knob to finish. A screen timeout returns home without removing a pairing.
For unavailable codes or pairing options, see Pairing status and missing codes.
Add another home app or remove a home pairing
These procedures use the controller web interface. They apply when its HomeKit or Matter card offers the named controls.
To add another Matter ecosystem:
- Open the controller web interface.
- Open its Matter card.
- Select Open Pairing Window.
- In the new home app, start its accessory-addition procedure.
- Scan the controller web interface’s QR code before the pairing window closes.
- Complete the new app’s setup prompts.
The already-paired Link Settings screen does not open this QR code.
CAUTION: Removing a home pairing removes that home’s access to the controller. It does not remove the Link zone pairing.
To remove one Matter ecosystem:
- Open the controller web interface’s Matter card.
- Find the home that you want to remove in the paired-home list.
- Select Remove beside that home.
- Check the home name in the confirmation dialog.
- Confirm removal, or cancel to keep it.
Other paired homes remain. If you intend to remove every Matter home, select Reset Matter Pairing instead. Read its warning before you confirm. This action removes all Matter pairings and restarts the controller.
To remove HomeKit pairings:
- Open the controller web interface’s HomeKit card.
- Select Reset HomeKit Pairing.
- Read the warning that all HomeKit pairings will be removed.
- Confirm removal, or cancel to keep them.
After removal, use the applicable home-pairing procedure again. If a home app retains an old accessory entry, follow that app’s removal instructions.
Checking for updates
About and Details
- Open Settings.
- Highlight About.
- Tap Details, or push the knob.
- Move your finger up within the list to see more information.
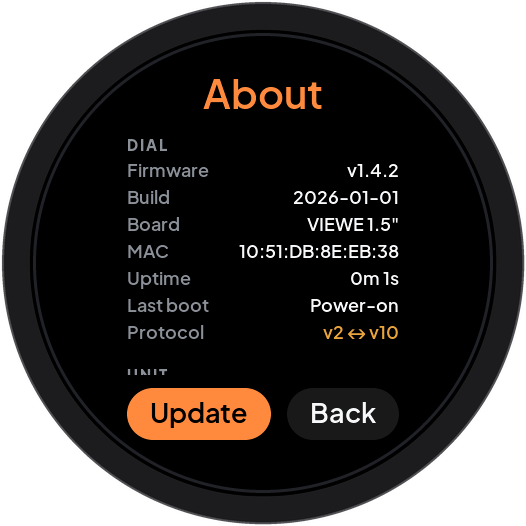
Alternatively, turn the knob clockwise to scroll toward the end of the list. After the list ends, further turns select Update, when available, then Back. Turn counterclockwise to return through the buttons to the list. Push the knob to use the selected button. Tap Back to return to Settings.
| Section | Information |
|---|---|
| DIAL | Serin Link firmware, build, board, MAC address, uptime, last restart reason, and wireless protocol versions. |
| UNIT | Serin Controller identity and available firmware, restart, and Wi-Fi details. |
| LINK | The wireless connection between Link and the controller, signal strength, and time since the last message. |
| HEAT PUMP | CN105 connection, available operating details, and reported heat pump faults. |
| SENSOR | Available remote sensor temperature, humidity, battery level, and signal strength. |
| LINK SENSOR | Available temperature and humidity measured by Link’s sensor. |
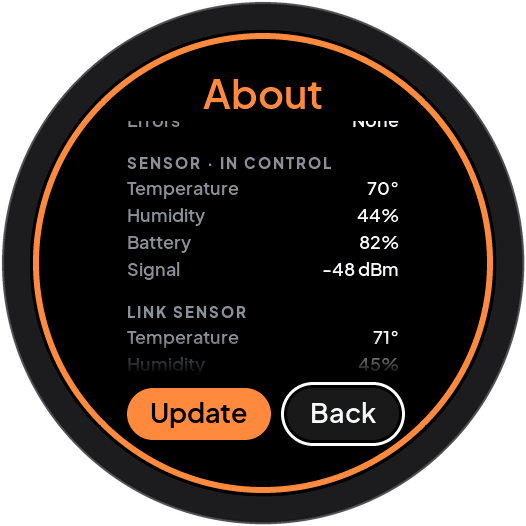
IN CONTROL marks a sensor source that the controller reports as selected with a valid reading. Other measurements can remain visible without controlling the heat pump. Unsupported sections or fields are absent. A dash means that a value is unavailable or no report arrived yet.
For support, record the selected zone, Link board, both firmware versions, connection status, and any fault code. Include the Last boot, Last seen, and signal fields when available. Describe the action and message that preceded the problem. Send these details through Serin support.
Update Serin Link
Update installs firmware on Serin Link. It does not update the controller. Use the controller web interface or its firmware instructions for controller updates.
The button appears when the controller is online and supports supplying Link’s update connection details. Complete controller Wi-Fi setup before you check. If Update is absent, check the Link connection and controller firmware support.
- Open Settings → About → Details.
- Tap Update.
- Wait while Checking appears.
- If an update is available, check the offered version.
- Tap Install, or push the knob to install.
- Keep Link powered during download, verification, and restart.
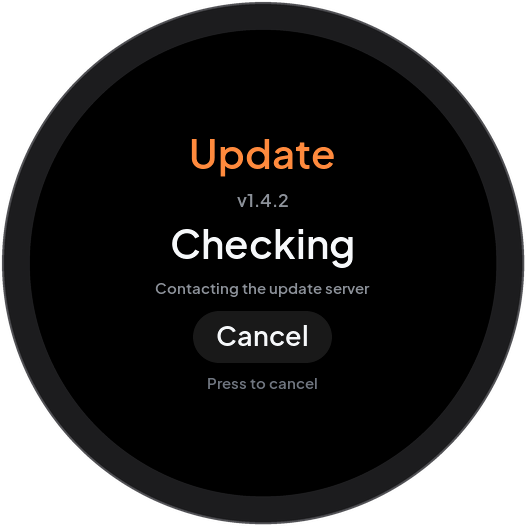
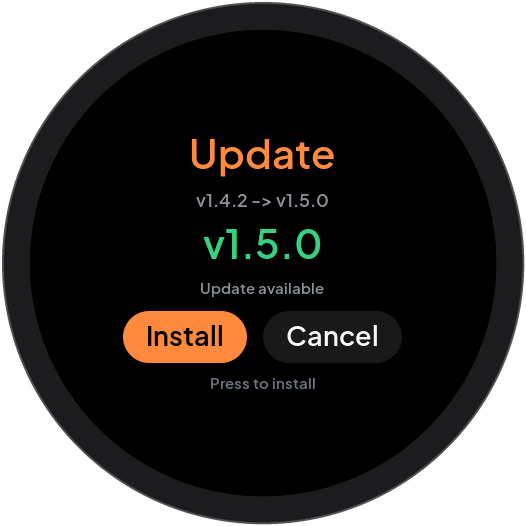
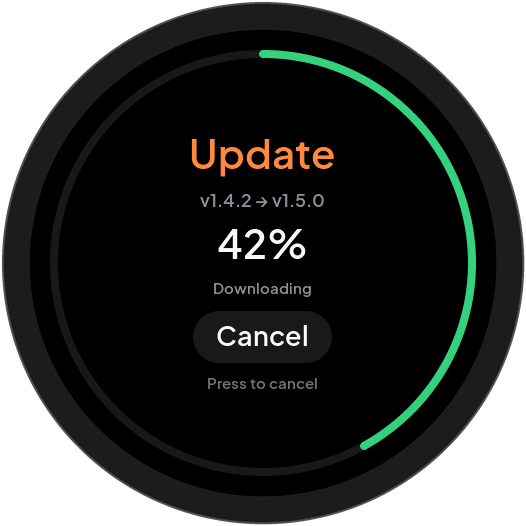
To cancel during Checking or Downloading, tap Cancel, push the knob, or hold the knob. On the version-confirmation screen, tap Cancel or hold the knob. A brief push on that screen starts installation.
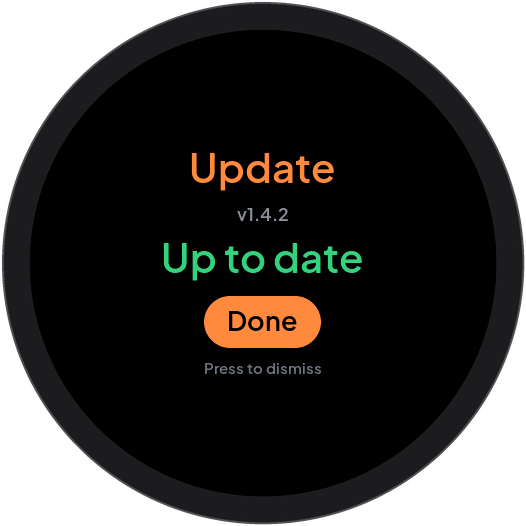
During Verifying and Installed / Restarting, cancellation is unavailable. Wait for Link to restart. If the firmware is current, tap Done or push the knob to dismiss Up to date.
If an update fails, see Update failure.