 serin labs
How to Control Your Mini-Split with Apple HomeKit in 2026
For Mitsubishi-family mini-splits
Add your heat pump to the Apple Home app as a thermostat, control it with Siri, and keep everything on your home Wi-Fi. A small controller plugs into the indoor unit; there is no Serin account, cloud service, or subscription.
- From $35
- About 20 minutes
- No soldering
- No monthly fee
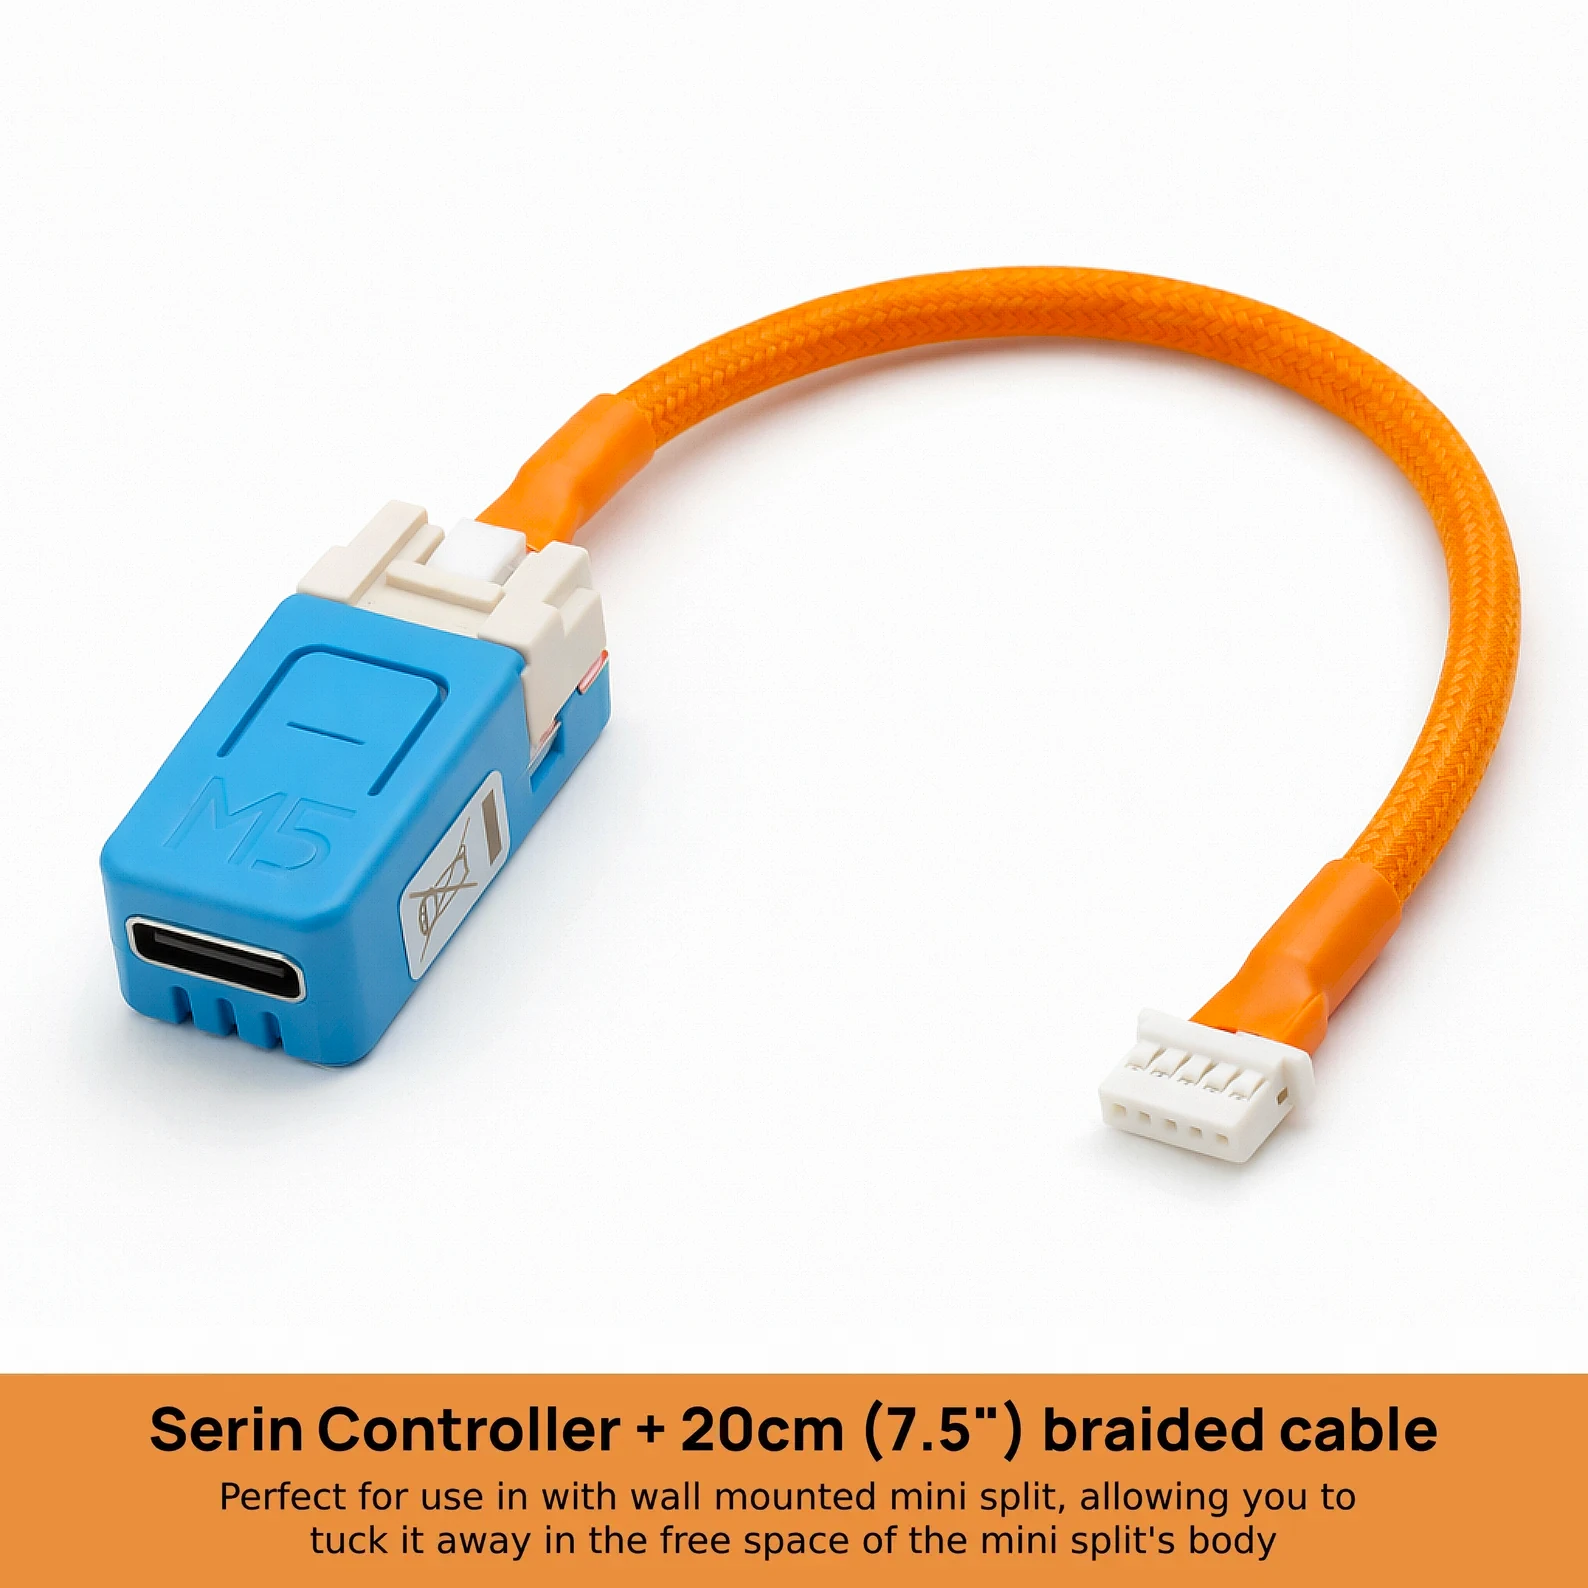 Plugs into the indoor unit
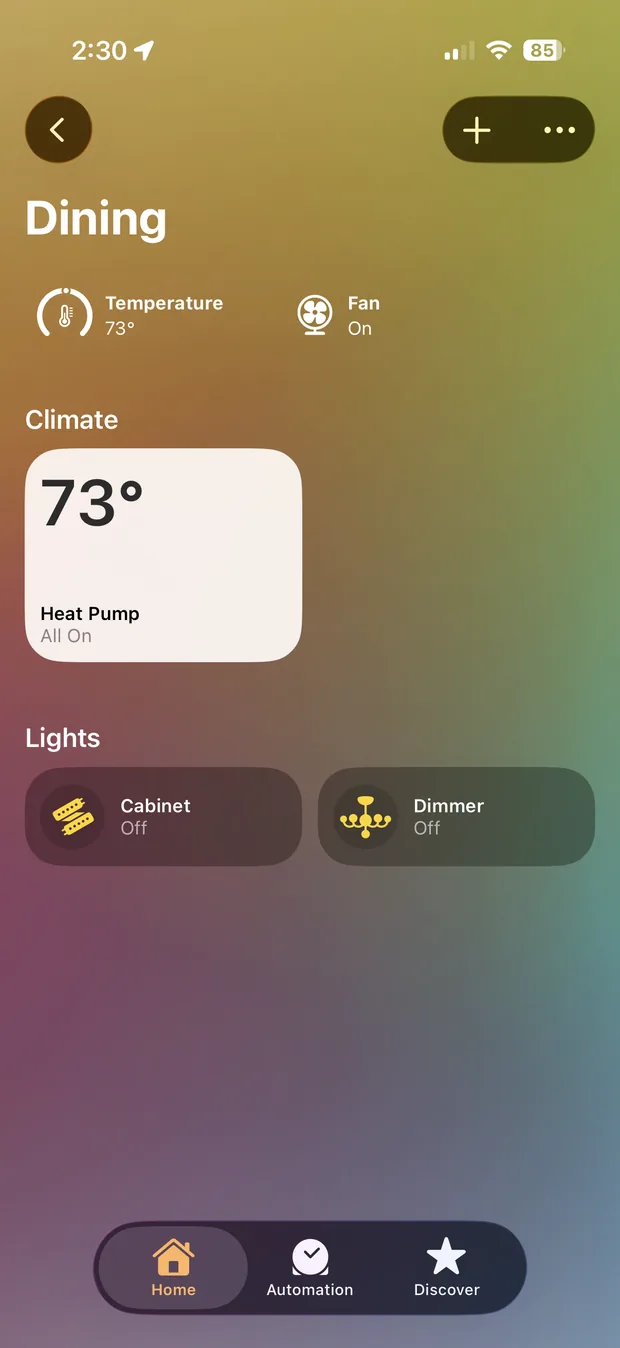 Becomes a thermostat in Apple Home
Can You Add a Mini-Split to Apple HomeKit?
Yes. Most mini-splits do not connect directly to Apple Home, but a controller can bridge the gap. The right controller depends on the brand printed on your indoor unit.
For most Mitsubishi Electric mini-splits, plus many Trane and American Standard ductless units built by Mitsubishi, the best route is a direct connection inside the indoor unit. The Serin Controller plugs into a service connector already on the control board and talks to the heat pump in both directions.
That last part matters. Apple Home can show what the unit is actually doing, and changes made with the handheld remote stay in sync. The controller appears as a thermostat tile with temperature, operating mode, fan control, Siri, scenes, and automations.
Which Mini-Split Brands Work with HomeKit?
Best fit for this guide
Mitsubishi Electric
Most wall units, floor units, cassettes, and ducted air handlers from roughly the last 15 years have the required service connector.
Often compatible
Trane and American Standard
Many of their ductless systems are rebadged Mitsubishi units with the same internal connection.
Use a different route
Daikin, Fujitsu, LG, Gree, Midea...
The Serin Controller does not fit these brands. Use a HomeKit- or Matter-compatible infrared controller such as Sensibo, Mysa, or Klima instead.
The quick proxy for a Mitsubishi unit: if it can use Kumo Cloud or MELCloud, it probably has the connector. A model check is still worth doing because a few older series have exceptions.
Before you buy
Will it work with your unit?
Most Mitsubishi Electric units made since about 2006 do. Enter the model number from the label on the indoor unit for an instant verdict before you buy anything.
Why Use a Direct Connection Instead of an IR Controller?
An infrared controller is a smart version of the handheld remote. It sends commands across the room, but the mini-split does not answer. If someone uses the original remote, the app can lose track of the current setting.
The Mitsubishi service connection is different. It lets the controller ask the unit for its current temperature, mode, fan state, and operating data. Think of it as a conversation instead of a remote shouting across the room.
Typical infrared controller
- Sends remote-control commands
- Needs line of sight and a power outlet
- Can drift out of sync with the handheld remote
- Works with many mini-split brands
Serin direct connection
- Reads and controls the actual unit
- Installs out of sight and is powered by the unit
- Stays in sync with the handheld remote
- Works with compatible Mitsubishi-family units
Infrared
Sends only
Out of sync It can send a command, but nothing comes back. Apple Home keeps showing the last setting the controller sent, not the one the unit is running.
Direct connection
Sends and reads back
In sync The same wire carries commands out and the unit's own state back, so a change made on the handheld remote shows up in Apple Home.
If opening the indoor unit is not something you want to do, an IR controller is the honest answer. It is easier to install and works across more brands. The detailed IR comparison covers the trade-offs.
Pre-assembled option
Serin Controller
The controller and tested cable arrive assembled. Nothing to crimp or solder; you install the free HomeKit-compatible firmware from a supported browser before connecting it to the mini-split.
From $35 · Free US shipping · 5.0 from 36 reviews
What You Need
A compatible indoor unit
Check the model number first. One controller is required for each indoor unit.
The controller and cable
Buy the pre-assembled version, or source a supported board and cable from the DIY parts list.
A computer and USB-C data cable
The one-time software installation needs Chrome, Edge, or Brave on a desktop or laptop. It cannot be done from an iPhone or iPad.
An Apple Home Hub, optionally
An Apple TV or HomePod is only required for remote access and automations. At home, your iPhone can control the unit directly.
There is no soldering, wire cutting, separate power supply, Serin account, or recurring fee. You do need to turn off the breaker and open the indoor unit's cover to make the plug-in connection. If you are not comfortable doing that, an HVAC technician can connect it.
-
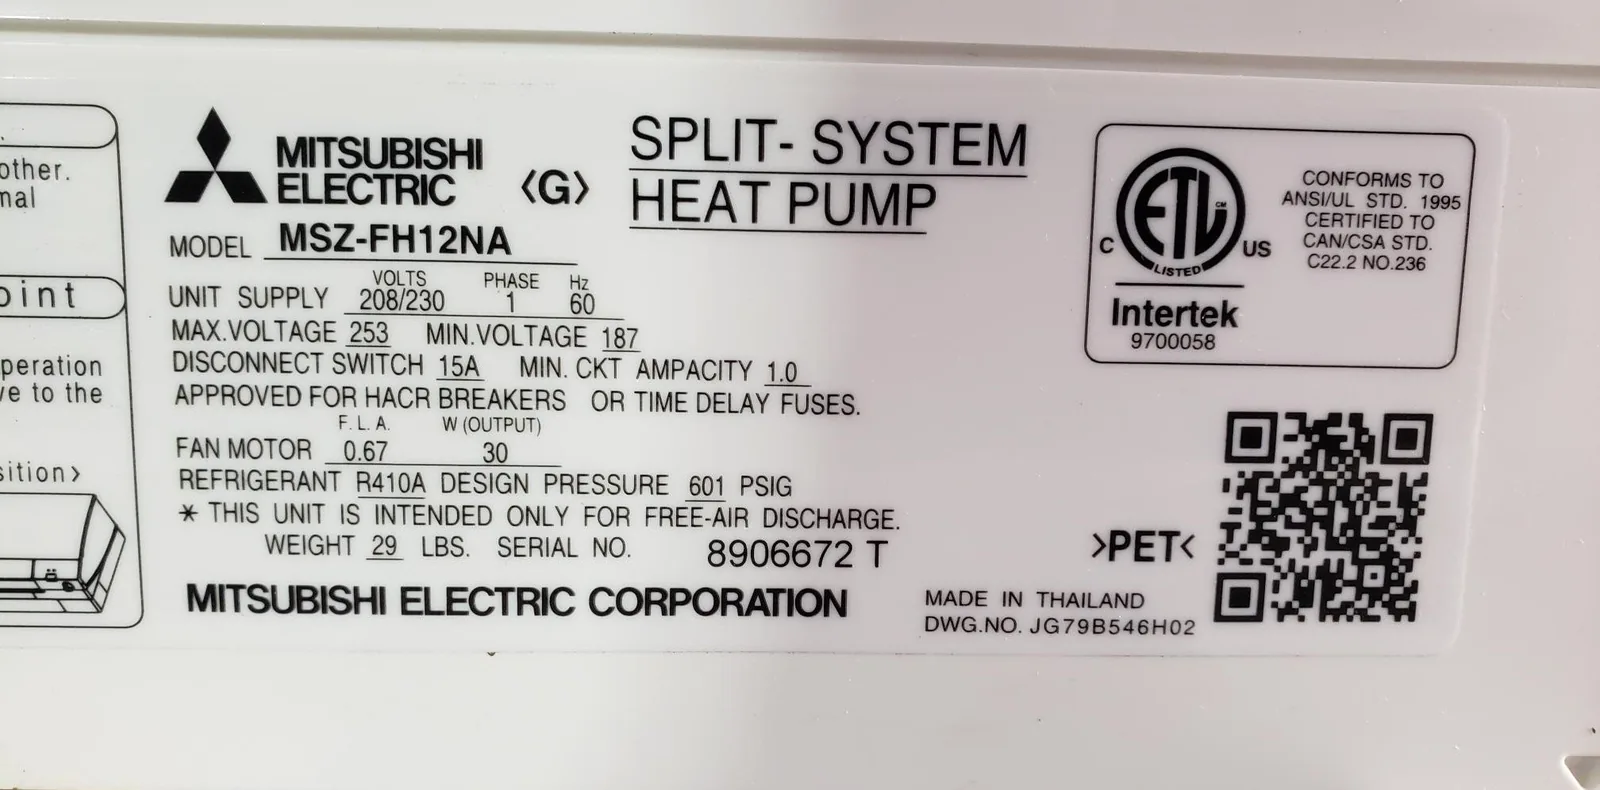 1
1
Check your model
The model number is on a label on the indoor unit, usually on the right side behind the front panel.
-
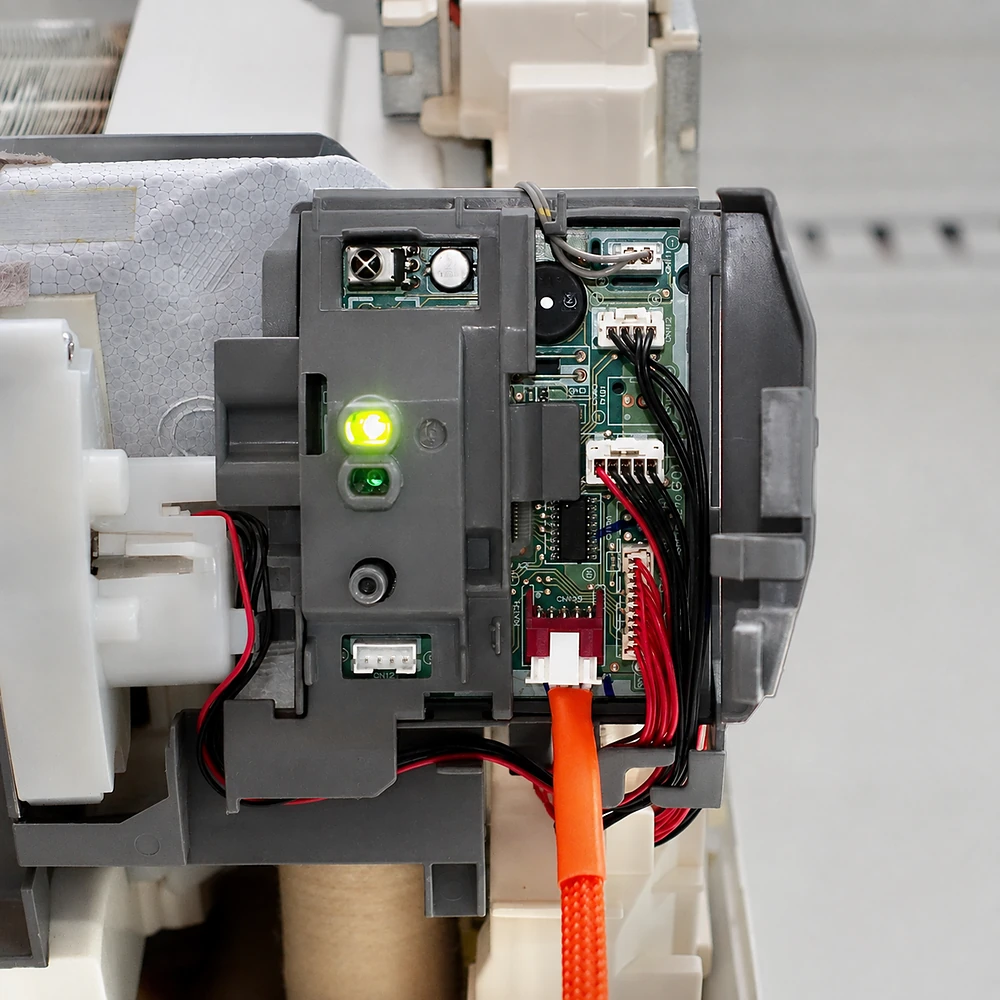 2
2
Plug in the controller
Turn off the breaker, then plug the cable into the CN105 connector. It only fits one way.
-
3
Pair with Apple Home
Scan the pairing code once and the mini-split becomes a thermostat you can ask Siri about.
The setup as you experience it. The full sequence, including the one-time firmware installation, is in the steps below.
How to Set Up Mini-Split HomeKit Control, Step by Step
Start to finish takes about 20 minutes for the first unit. The browser software installation itself is usually around two minutes.
- Install the free firmware. Connect the controller to your computer with a USB-C data cable and open the browser installer in Chrome, Edge, or Brave. Select the Apple Home-compatible build. Nothing needs to be downloaded or compiled.
- Connect it to the mini-split. Turn off power at the breaker, open the indoor unit, and plug the cable into the small service connector labelled CN105. It only fits one way. The wiring guide has photos for common unit types.
- Join it to your Wi-Fi. When first powered, the controller creates a temporary setup network. Join it from your phone and enter your home Wi-Fi details. The setup guide provides the QR code and screenshots.
- Add it to Apple Home. Open the Home app, tap Add Accessory, and scan the pairing QR code. Name the thermostat and assign it to a room; Siri picks up that room name automatically.
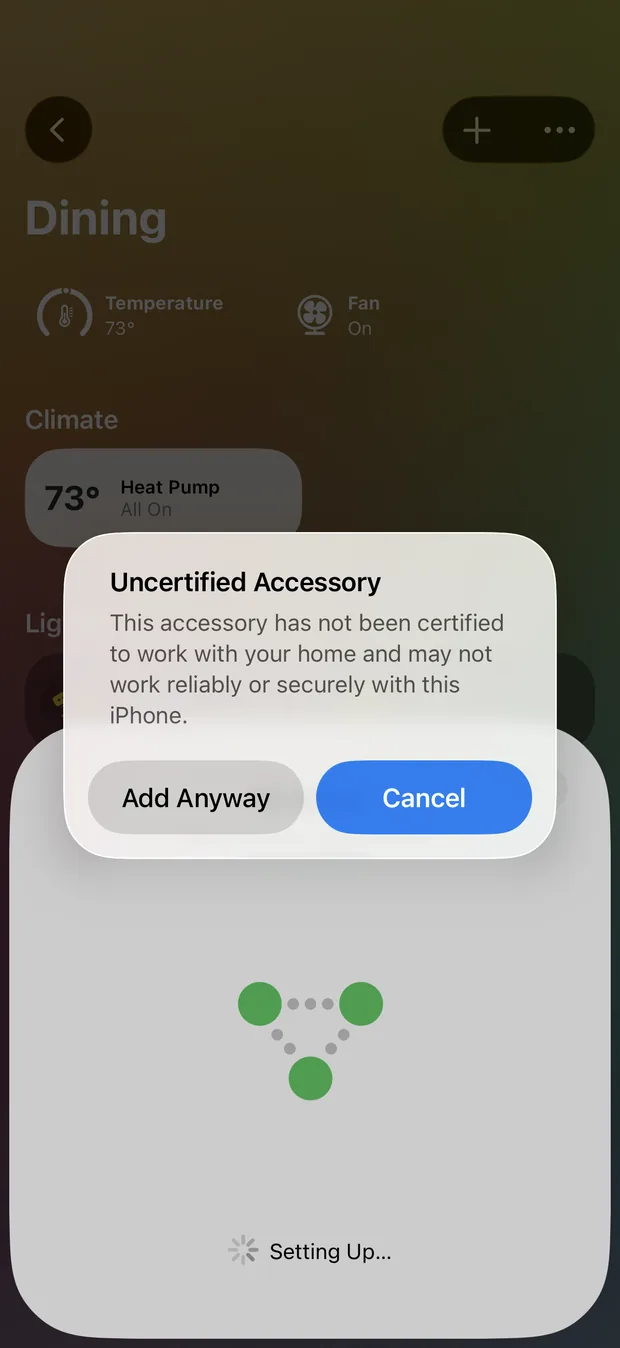
One message Apple will show
Tap “Add Anyway” once during pairing
The open-source firmware is not enrolled in Apple's MFi certification program, so Apple Home displays an “Uncertified Accessory” message. It appears during pairing; it is not a recurring alert. The firmware source and component licenses are public on the licenses page.
What Can You Do with a Mini-Split in HomeKit?
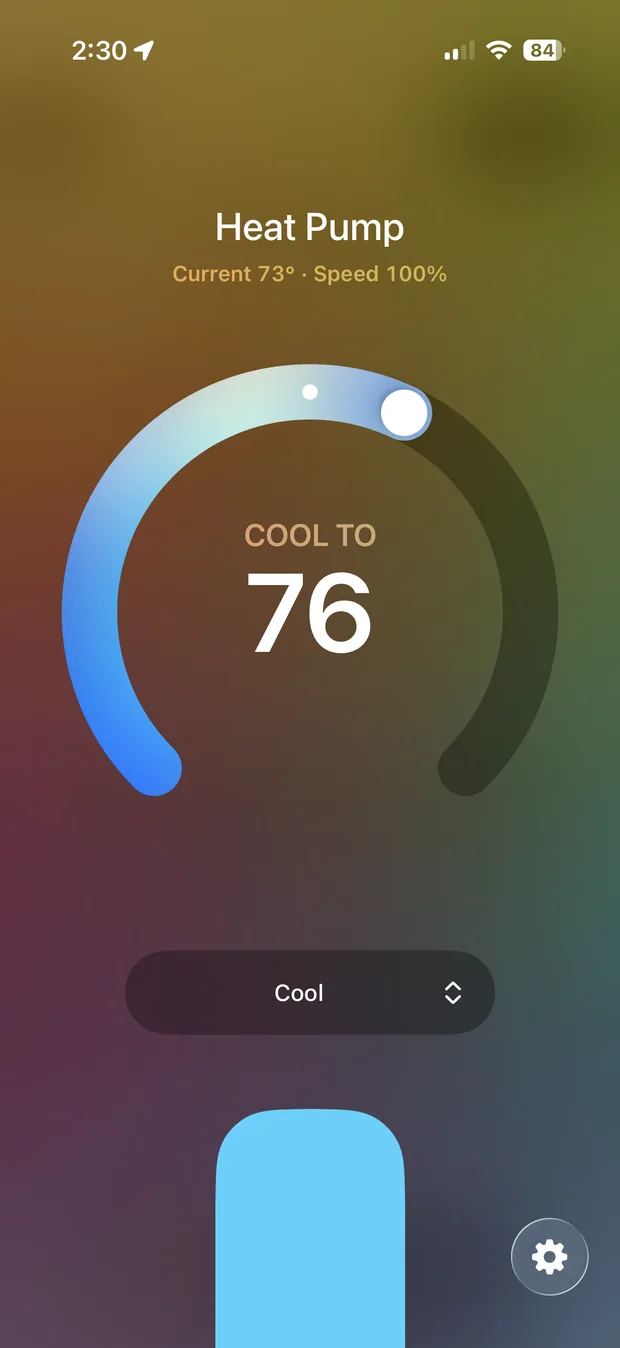
Ask Siri. “Set the bedroom to 70.” “Turn off the office AC.” Pairing is all the setup Siri needs.
Create scenes. Add the heat pump to Good Night or Leaving Home alongside lights, locks, and shades.
Run automations. Warm the house before an alarm, set back when the last person leaves, or resume when the first person returns.
Keep the handheld remote. It continues to work, and the direct connection sees the changes it makes so Apple Home stays in sync.
Use a room-height sensor. An optional Bluetooth thermometer can regulate from where you sit instead of from the warm return air near the ceiling. The room-sensor guide explains why that helps.
Do You Need a HomePod or Apple TV?
Only for remote access and automations. While you are at home, your iPhone communicates with the controller over your home network without a hub.
An Apple TV 4K, HomePod, or HomePod mini acting as an Apple Home Hub adds:
- Control away from home, such as changing the temperature before you return.
- Automations that run on their own, including schedules and location triggers.
There is no additional Serin service or fee.
Frequently Asked Questions
Does this replace Mitsubishi's Kumo Cloud adapter? Yes. They use the same service connection, so it is one or the other on a given indoor unit.
Will the handheld remote still work? Yes. It does not use the internal service connector, and the Serin Controller sees the changes it makes.
Does it work with multi-zone systems? Yes, with one controller per indoor unit. Each room appears as its own thermostat in Apple Home.
Does the pre-assembled controller arrive with Apple Home firmware installed? Normally, no. The generic controller can run several free firmware options, so you select and install the Apple Home-compatible build from the browser. The controller-and-room-sensor bundle is the current exception: it arrives with firmware installed and the sensor linked.
What if I get stuck? The site has illustrated setup, wiring, and troubleshooting guides. You can also use the contact form or ask in the Serin Labs Discord.
What if my unit does not have a usable CN105 connection? The Serin Controller will not work with it. Use an IR controller or review the remaining Mitsubishi options.
The Honest Limits
- It is for Mitsubishi-family systems. Daikin, Fujitsu, LG, Gree, Midea, and other brands need a different controller.
- You open the indoor unit once. Power must be off at the breaker while you make the connection. There is no soldering or wire splicing, but it is still work inside HVAC equipment.
- You install the firmware yourself. The browser flow is short, but it requires a desktop or laptop, a USB-C data cable, and Chrome, Edge, or Brave.
- Apple shows an “Add Anyway” message. The HomeKit-compatible firmware is open source and not MFi-certified.
- The controller uses the service port. It generally cannot share that connection with a Mitsubishi wired wall controller. The handheld infrared remote is unaffected.
Who Should Do This
- You own a compatible Mitsubishi, Trane, or American Standard ductless unit and use Apple Home. This is the direct, local route: a thermostat tile, Siri, scenes, and no cloud account.
- You own another mini-split brand or do not want to open the indoor unit. Buy a HomeKit- or Matter-compatible IR controller and accept the one-way-control trade-off.
- You already run Home Assistant as the center of your smart home. Use the ESPHome build on the same hardware and expose it to Apple Home through Home Assistant's bridge. The three-route comparison explains that path.
The shortest path from here:
- Check your indoor-unit model.
- Get the pre-assembled Serin Controller or the DIY parts, one per indoor unit.
- Install the free firmware in your browser and follow the Apple Home setup guide.
The result is the mini-split you already own, now sitting beside your lights and locks in Apple Home—and still working when the internet does not.
Related
- Check your unit for a CN105 port
- Get the hardware
- Apple Home setup guide
- Compare three Mitsubishi-to-Apple-Home routes
Next step
Check your unit first
Type your indoor unit's model number for a verdict in under a minute. If it fits, the firmware flashes in the browser in about two minutes.