 serin labs
Add Your Mitsubishi Mini-Split to Apple Home (HomeKit + Siri)
The first thing I tried was searching "Mitsubishi mini-split HomeKit" and hoping. If that's how you got here, let me save you the runaround: Mitsubishi heat pumps don't work with Apple Home out of the box. No HomeKit logo on the box, no accessory to add, nothing to pair. The factory app is Kumo Cloud, and Kumo Cloud is not HomeKit.
But you can get there, fully local, and it's a smaller job than you'd think. I did it to every unit in my house, and my parents' house after that.
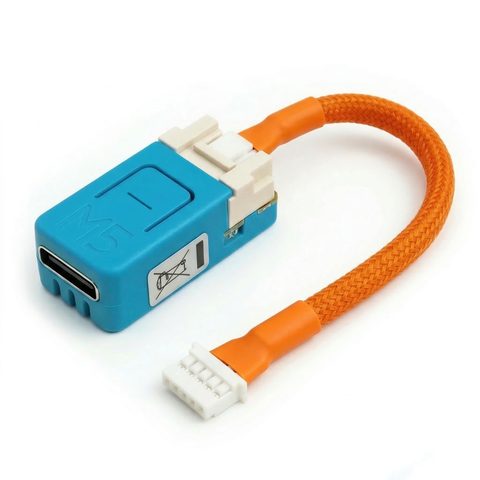
The whole thing hinges on a serial port already sitting inside the indoor unit: the CN105 port. A small ESP32 board, the Serin CN105 ESP32 controller, clips onto it and speaks the heat pump's own protocol. Flash it with free, open-source HomeKit-compatible firmware and your mini-split shows up in the Apple Home app like any other thermostat. Siri, scenes, automations, the lot. No account, no cloud, nothing between you and the unit but your own Wi-Fi.
Quick Facts
- What it is: an ESP32 controller that adds Apple Home (HomeKit) support to a Mitsubishi mini-split
- Boards: M5Stack NanoC6 or Atom S3 Lite (both ESP32); one per indoor unit
- Connects via: the CN105 serial port inside most Mitsubishi Electric indoor units
- Firmware: HomeKit-compatible, free and open source; you flash it yourself from a browser
- Pairs with: the Apple Home app over HAP (HomeKit Accessory Protocol) — Siri included
- Remote access / automations: need an Apple Home Hub (Apple TV or HomePod)
- Cloud / account: none, ever
- Price: ~$15–20 DIY, or pre-assembled
Does a Mitsubishi Mini-Split Work With Apple Home?
Not on its own. Mitsubishi never built HomeKit into their heat pumps or their app. Your options from the factory are the IR remote and Kumo Cloud (MELCloud in Europe), and neither one talks to Apple Home. So every "add my Mitsubishi to HomeKit" search runs into the same wall: there's no official path.
The unofficial one is better anyway. Instead of routing through a manufacturer cloud, you tap the control port the unit already exposes and run the HomeKit side yourself, on hardware you own. That's what the CN105 approach does. The heat pump thinks it's talking to a Mitsubishi accessory; Apple Home thinks it's talking to a normal thermostat; the little ESP32 board in the middle translates and keeps every command on your LAN.
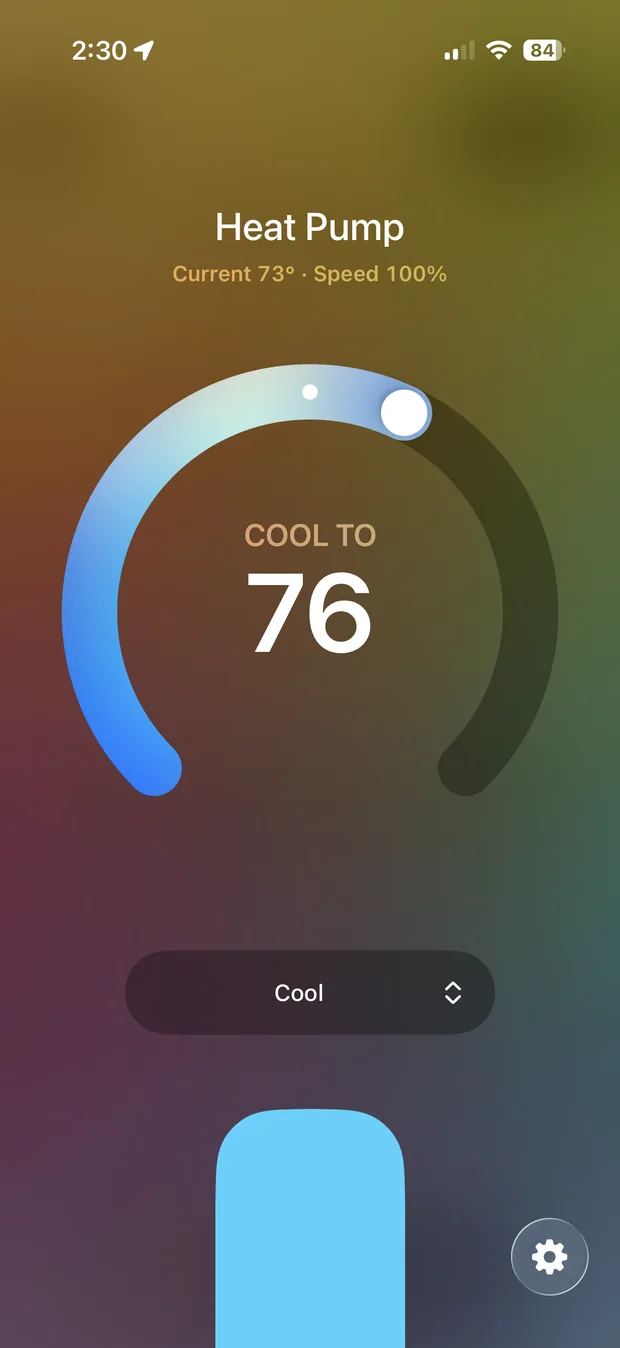
The result is a native Apple Home tile. Set the temperature, change modes, control the vane, ask Siri, drop it into a scene. All of it local.
Three Ways to Get a Mitsubishi Into Apple Home
There's more than one route, and which is right depends on what you already run. All three end with a thermostat tile in the Home app. They differ in what sits behind it.
1. Direct HomeKit-compatible firmware (this guide). The CN105 board runs firmware that speaks HomeKit's own protocol (HAP), so it pairs straight into Apple Home with nothing in between. No server to keep running, no cloud, no account. It's the simplest local path, and it's what the rest of this post walks through.
2. Home Assistant's HomeKit Bridge. Already run Home Assistant? Flash the same CN105 board with ESPHome instead. Home Assistant picks it up as a climate entity, and its built-in HomeKit Bridge exposes that entity to Apple Home. Same hardware, same local-only result, same one-time "Add Anyway" prompt at pairing. The catch is that you need a Home Assistant server running around the clock. Worth it if HA is already your hub and you want everything under one roof. Overkill if Apple Home is all you use.
3. Homebridge, with a cloud plugin. Homebridge is a Node.js server that bridges non-HomeKit gear into Apple Home. The Mitsubishi plugins for it, homebridge-kumo and homebridge-melcloud-control, talk to Kumo Cloud or MELCloud. So you still need Mitsubishi's Wi-Fi adapter bolted onto the unit and an account with the cloud, plus a machine to run Homebridge on. It does get you a HomeKit tile, but it keeps the exact cloud dependency most people are trying to shed, and the adapter alone often costs more than the entire CN105 approach. (homebridge-kumo can reach the adapter over your LAN once it's configured, which is faster than the cloud round-trip, but the adapter and the account are still required.)
| Direct firmware | HA HomeKit Bridge | Homebridge (Kumo/MELCloud) | |
|---|---|---|---|
| Extra hardware | CN105 board (~$15–40) | CN105 board (~$15–40) | Mitsubishi Wi-Fi adapter (~$227) |
| Always-on server | None | Home Assistant | Homebridge (Node.js) |
| Cloud / account | None | None | Kumo Cloud / MELCloud |
| Fully local | Yes | Yes | No — setup rides the cloud |
| Best for | Apple-only households | Existing HA users | You already have the adapter |
If Apple Home is your world and you want the least to run and nothing in the cloud, the direct firmware is the one. The rest of this guide sets it up.
What You Need
Three things, and you probably already have the third.
- The board and cable. An ESP32 board (M5Stack NanoC6 or Atom S3 Lite) plus a CN105-to-Grove cable, one per indoor unit. Buy them separately for around $15–20, or get one pre-assembled.
- A CN105 port on your unit. This is the one thing to confirm before you spend a cent. It's built into most Mitsubishi Electric indoor units. A quick proxy: if your unit runs on Kumo Cloud or MELCloud today, it almost certainly has CN105. Still, take five minutes and check your unit for the port for certain.
- An Apple Home Hub, for the full experience. An Apple TV or a HomePod. On your home Wi-Fi you can control the unit without one, but the Hub is what gives you remote access from outside the house and lets automations run when your phone isn't home. Most Apple households already have one sitting under the TV.
Setting It Up, Step by Step
Start to finish this is a coffee's worth of work, not an afternoon. No soldering, nothing to compile.
1. Clip it onto CN105. Power the unit down, pop the indoor unit's front cover, find the CN105 header on the control board, and plug in the cable. It only fits one way. Route the board somewhere it can breathe and close the cover back up.
2. Flash the firmware. Plug the board into your computer over USB and flash it from your browser. It's Web Serial, so there's no app to install — Chrome or Edge does the whole thing. Pick the HomeKit-compatible build.
3. Get it on Wi-Fi. On first boot the board creates its own Wi-Fi hotspot. Join it from your phone (the setup guide shows a QR code that connects you), and a portal opens to hand over your home network credentials. Prefer to do it over USB? The setup page has an Improv Serial option that sets Wi-Fi straight from the browser while it's still plugged in.
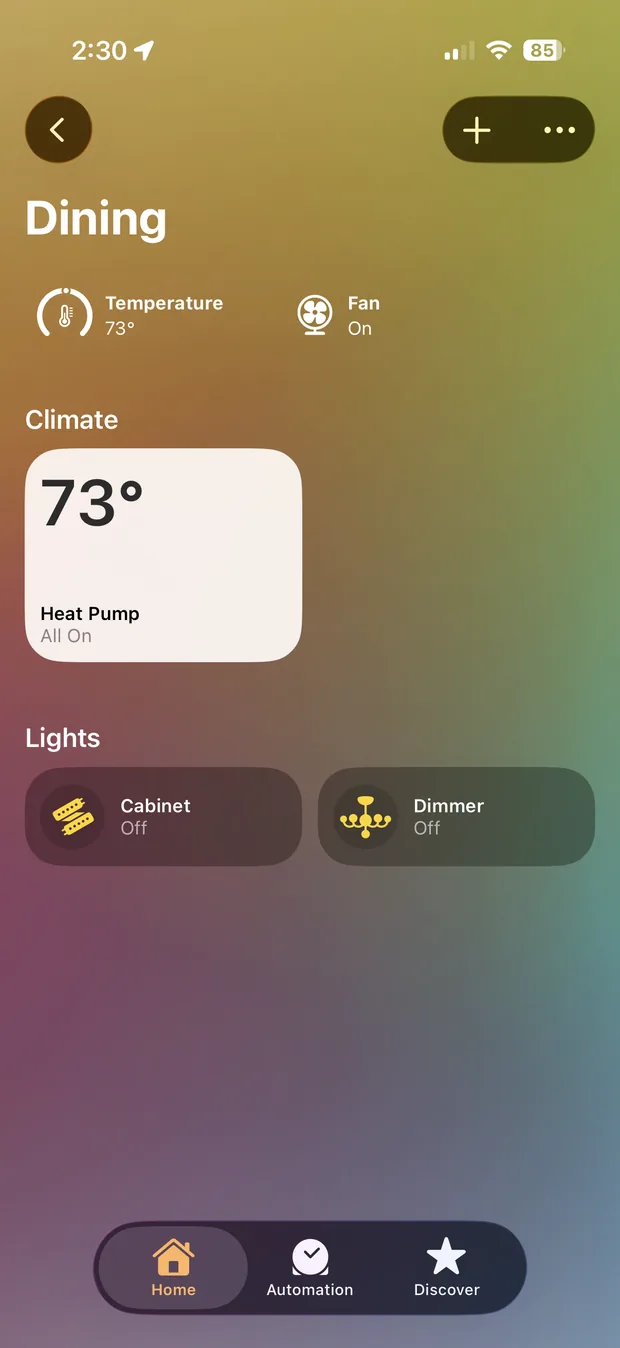
4. Add it to Apple Home. Open the Home app, tap Add Accessory, and scan the pairing QR code from the setup page (or type the setup code). Your mini-split lands in Apple Home as a thermostat.
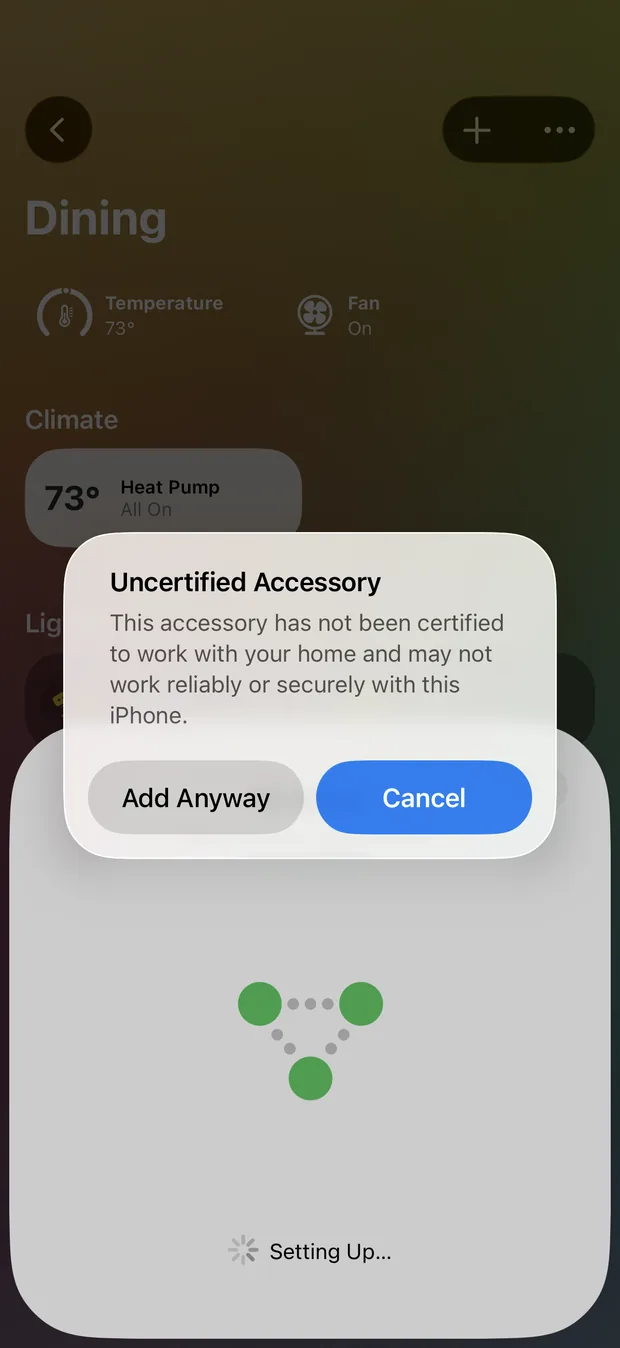
One thing to expect here, and I'd rather you hear it from me than be surprised by it: this firmware isn't MFi-certified, so Apple Home shows an "Uncertified Accessory" notice and asks you to tap Add Anyway. That prompt is normal. Tap it and pairing finishes. After that the accessory behaves like any other thermostat in the Home app — MFi is Apple's paid licensing and certification program, and this independent open-source project simply isn't enrolled in it.
Controlling a Mitsubishi Mini-Split from the Apple Home App
Once it's paired, it behaves like any Apple Home thermostat, which is the whole point.
Siri works immediately. "Hey Siri, set the bedroom to 70." "Hey Siri, turn off the office AC." No extra setup — pairing is all it takes.
Scenes and automations, if you have a Hub. Drop the heat pump into a "Good Night" scene that cools the bedroom and dims the lights in one tap. Or automate it: warm the house before your alarm, back it off when everyone leaves, nudge it at sunset. These run on the Apple Home Hub, so they keep working with your phone in your pocket or across the country.
A tile on every Apple screen. iPhone, iPad, Mac, Apple Watch, the HomePod you talk to. Because it pairs natively over HAP, there's no separate app to open and no login to remember. It's just there, next to your lights and locks.
The Upgrade That Actually Matters: A Room Sensor
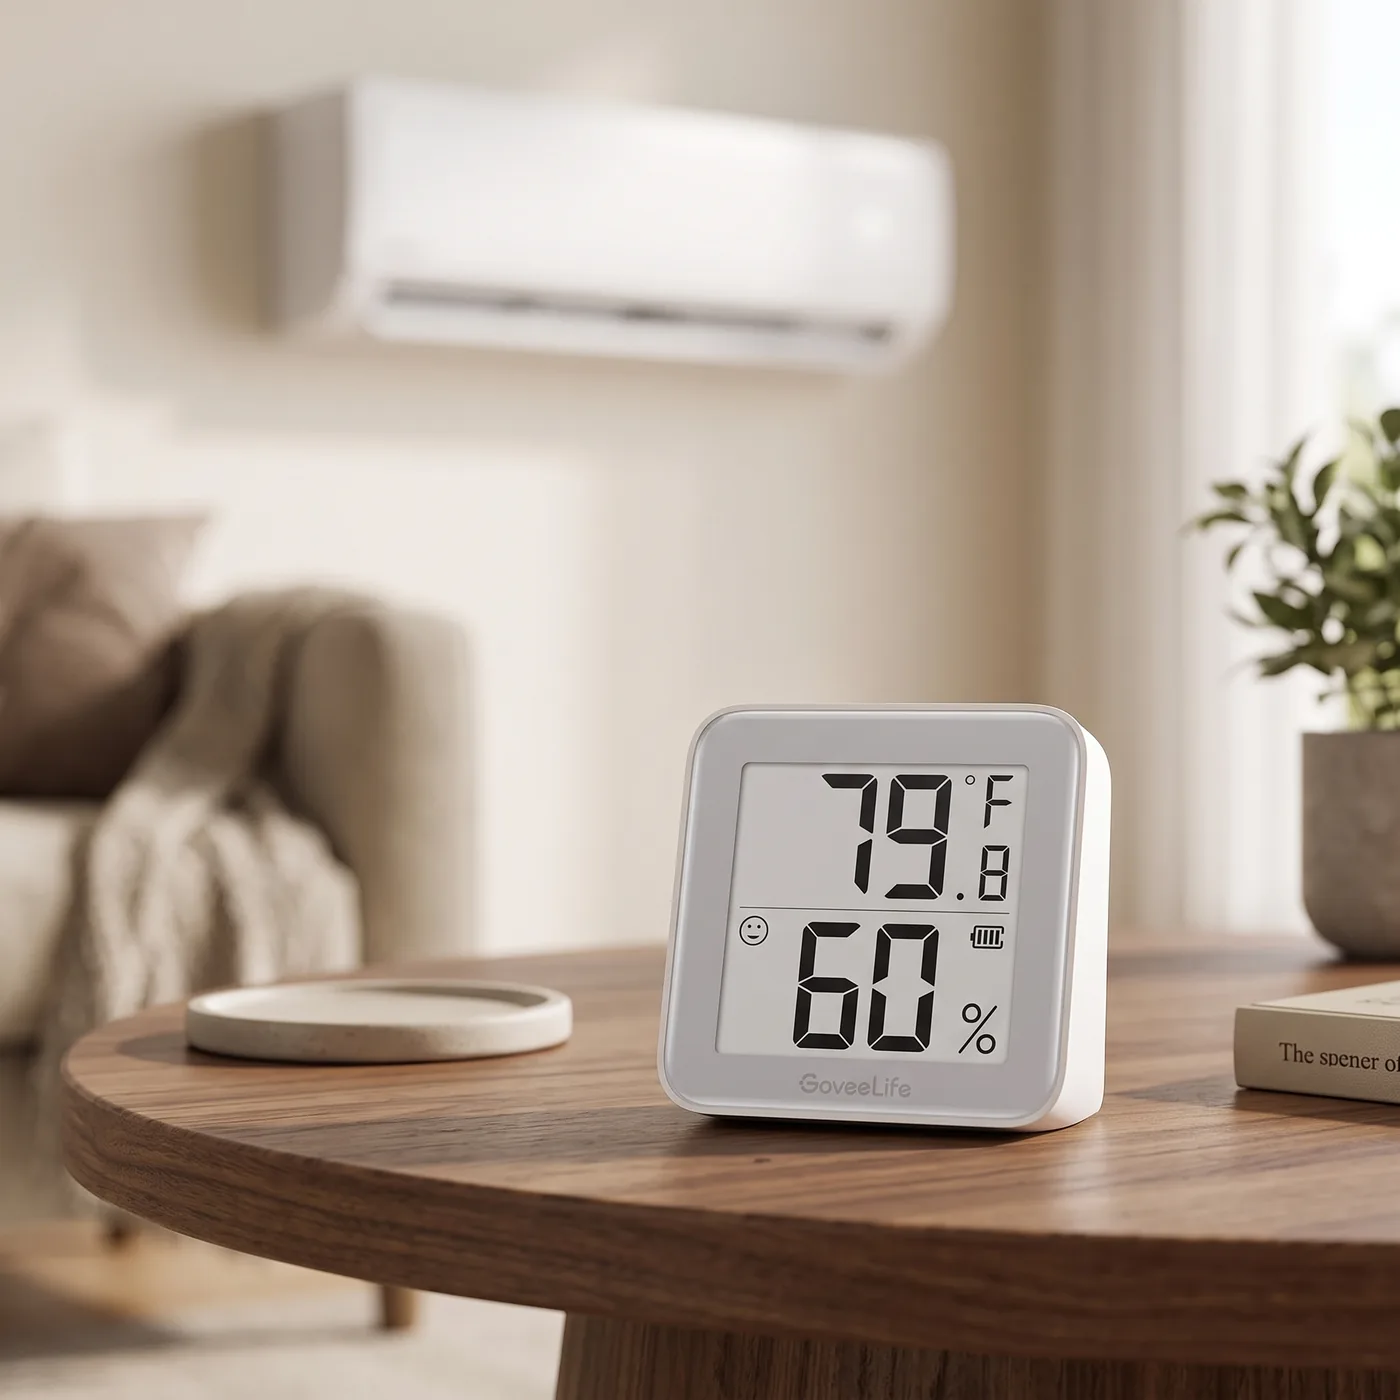
Here's the single change that made the biggest comfort difference for me, and it costs about $15.
A mini-split reads temperature up at the indoor unit, near the ceiling, where the air runs a few degrees warmer than where you actually sit. So "72" at the unit can feel like 68 on the couch. The firmware fixes this with an optional BLE room sensor: a cheap Bluetooth thermometer you place at seating height, and the heat pump regulates off that reading instead of the warm air at the ceiling.
It auto-detects the sensor from its Bluetooth advertisements, so there's no pairing dance. Supported thermometers include Govee (H5075, H5072, H5074 and similar), Xiaomi (LYWSD03MMC, CGG1 running PVVX firmware), SwitchBot meters, and anything speaking BTHome v2 (Shelly and other generic sensors). If the sensor goes quiet, the firmware falls back to the unit's internal thermistor on its own after a stale timeout — 10 minutes by default, adjustable down to 30 seconds — so a dead battery never leaves you without heat.
If you've ever priced a Mitsubishi wall thermostat to get room-height sensing, this is the same benefit for a fraction of the money, and you can put the sensor anywhere in the room, not just on one wall.
What You Also Get: The Web UI
Separate from Apple Home, the firmware serves its own web page on your network. Open the controller's IP in any browser and you see what the Home app and the factory remote both hide: compressor frequency, outside air temperature, runtime, live logs, and error codes. You can drive the thermostat and vane from there too. Phone dead, Hub unplugged, doesn't matter — the unit still answers on its own address.
The Honest Limits
I want you going in clear-eyed.
- Remote access and automations need an Apple Home Hub. On your home Wi-Fi you control the unit directly. To reach it from outside, or to run schedules while you're away, you need an Apple TV or HomePod acting as the hub. No hub, no remote.
- It's not MFi-certified. Expect the "Add Anyway" prompt when you pair. It's a one-time tap, not a recurring nag, and it doesn't limit anything.
- One CN105 per indoor unit. The controller owns that port. You generally can't run it alongside a wired Mitsubishi wall controller on the same unit, since there's a single port to give. The factory IR remote, on the other hand, keeps working right alongside it.
- You're flashing firmware yourself. It's browser-based and about as hard as filling in a Wi-Fi password, but it isn't install-an-app. If that's genuinely not for you, a pre-assembled controller shortens the job to plugging in and pairing.
Who Should Do This
- You live in Apple Home and want your heat pump in it. This is exactly the case it's built for. Native tile, Siri, scenes, all local, no monthly anything. Flash the HomeKit-compatible firmware and you're done.
- You want Siri and away-from-home control and already own an Apple TV or HomePod. You have everything you need. The hub you already own does the remote-access half.
- You run Home Assistant. You've got a choice. Flash ESPHome and the unit becomes a native HA climate entity; if you also want it in Apple Home, expose it through HA's HomeKit Bridge (option 2 above) rather than the direct firmware, so HA stays your single source of truth. Prefer the simplest Apple-only setup with no server to babysit? The direct firmware works for you too. Here's the ESPHome vs Apple Home breakdown, and you can reflash either direction later with the same browser tool.
The path is short:
- Check that your unit has a CN105 port. If it's on Kumo Cloud or MELCloud today, it almost certainly does.
- Get the board and cable, one per indoor unit, or the pre-assembled CN105 ESP32 controller.
- Flash the HomeKit-compatible firmware from your browser and follow the Apple Home setup guide.
Same heat pump, now with a real Siri thermostat in front of it, and not a line of it running through anyone's cloud.
Related
- Check your unit for a CN105 port
- Get the hardware
- Apple Home setup guide
- ESPHome vs Apple Home firmware
Next step
Check your unit first
Type your indoor unit's model number for a verdict in under a minute. If it fits, the firmware flashes in the browser in about two minutes.