 serin labs
ESPHome vs HomeKit (Apple Home) for a Mitsubishi Mini-Split
Two firmwares. Same board. Same port. The only real question is which app you want to control your heat pump from.
I went local because the factory app kept letting me down. It wasn't reliable, it couldn't reach every setting on the unit, and I was already living in the Apple Home app and didn't want another login for one more device. Cutting out the cloud fixed all three. The next decision was which firmware to flash, and that's the one this post is about.
If you're weighing ESPHome vs HomeKit for a Mitsubishi mini-split, here's the reassuring part: both are free, open source, run on the same ESP32 hardware, plug into the same CN105 port, and keep everything local. No Kumo Cloud, no MELCloud, no accounts. The hardware doesn't care which one you pick, and you can reflash from one to the other later. There's no wrong answer here. Pick the one that fits your house.
Quick Facts
- Cost: both firmwares are free and open source
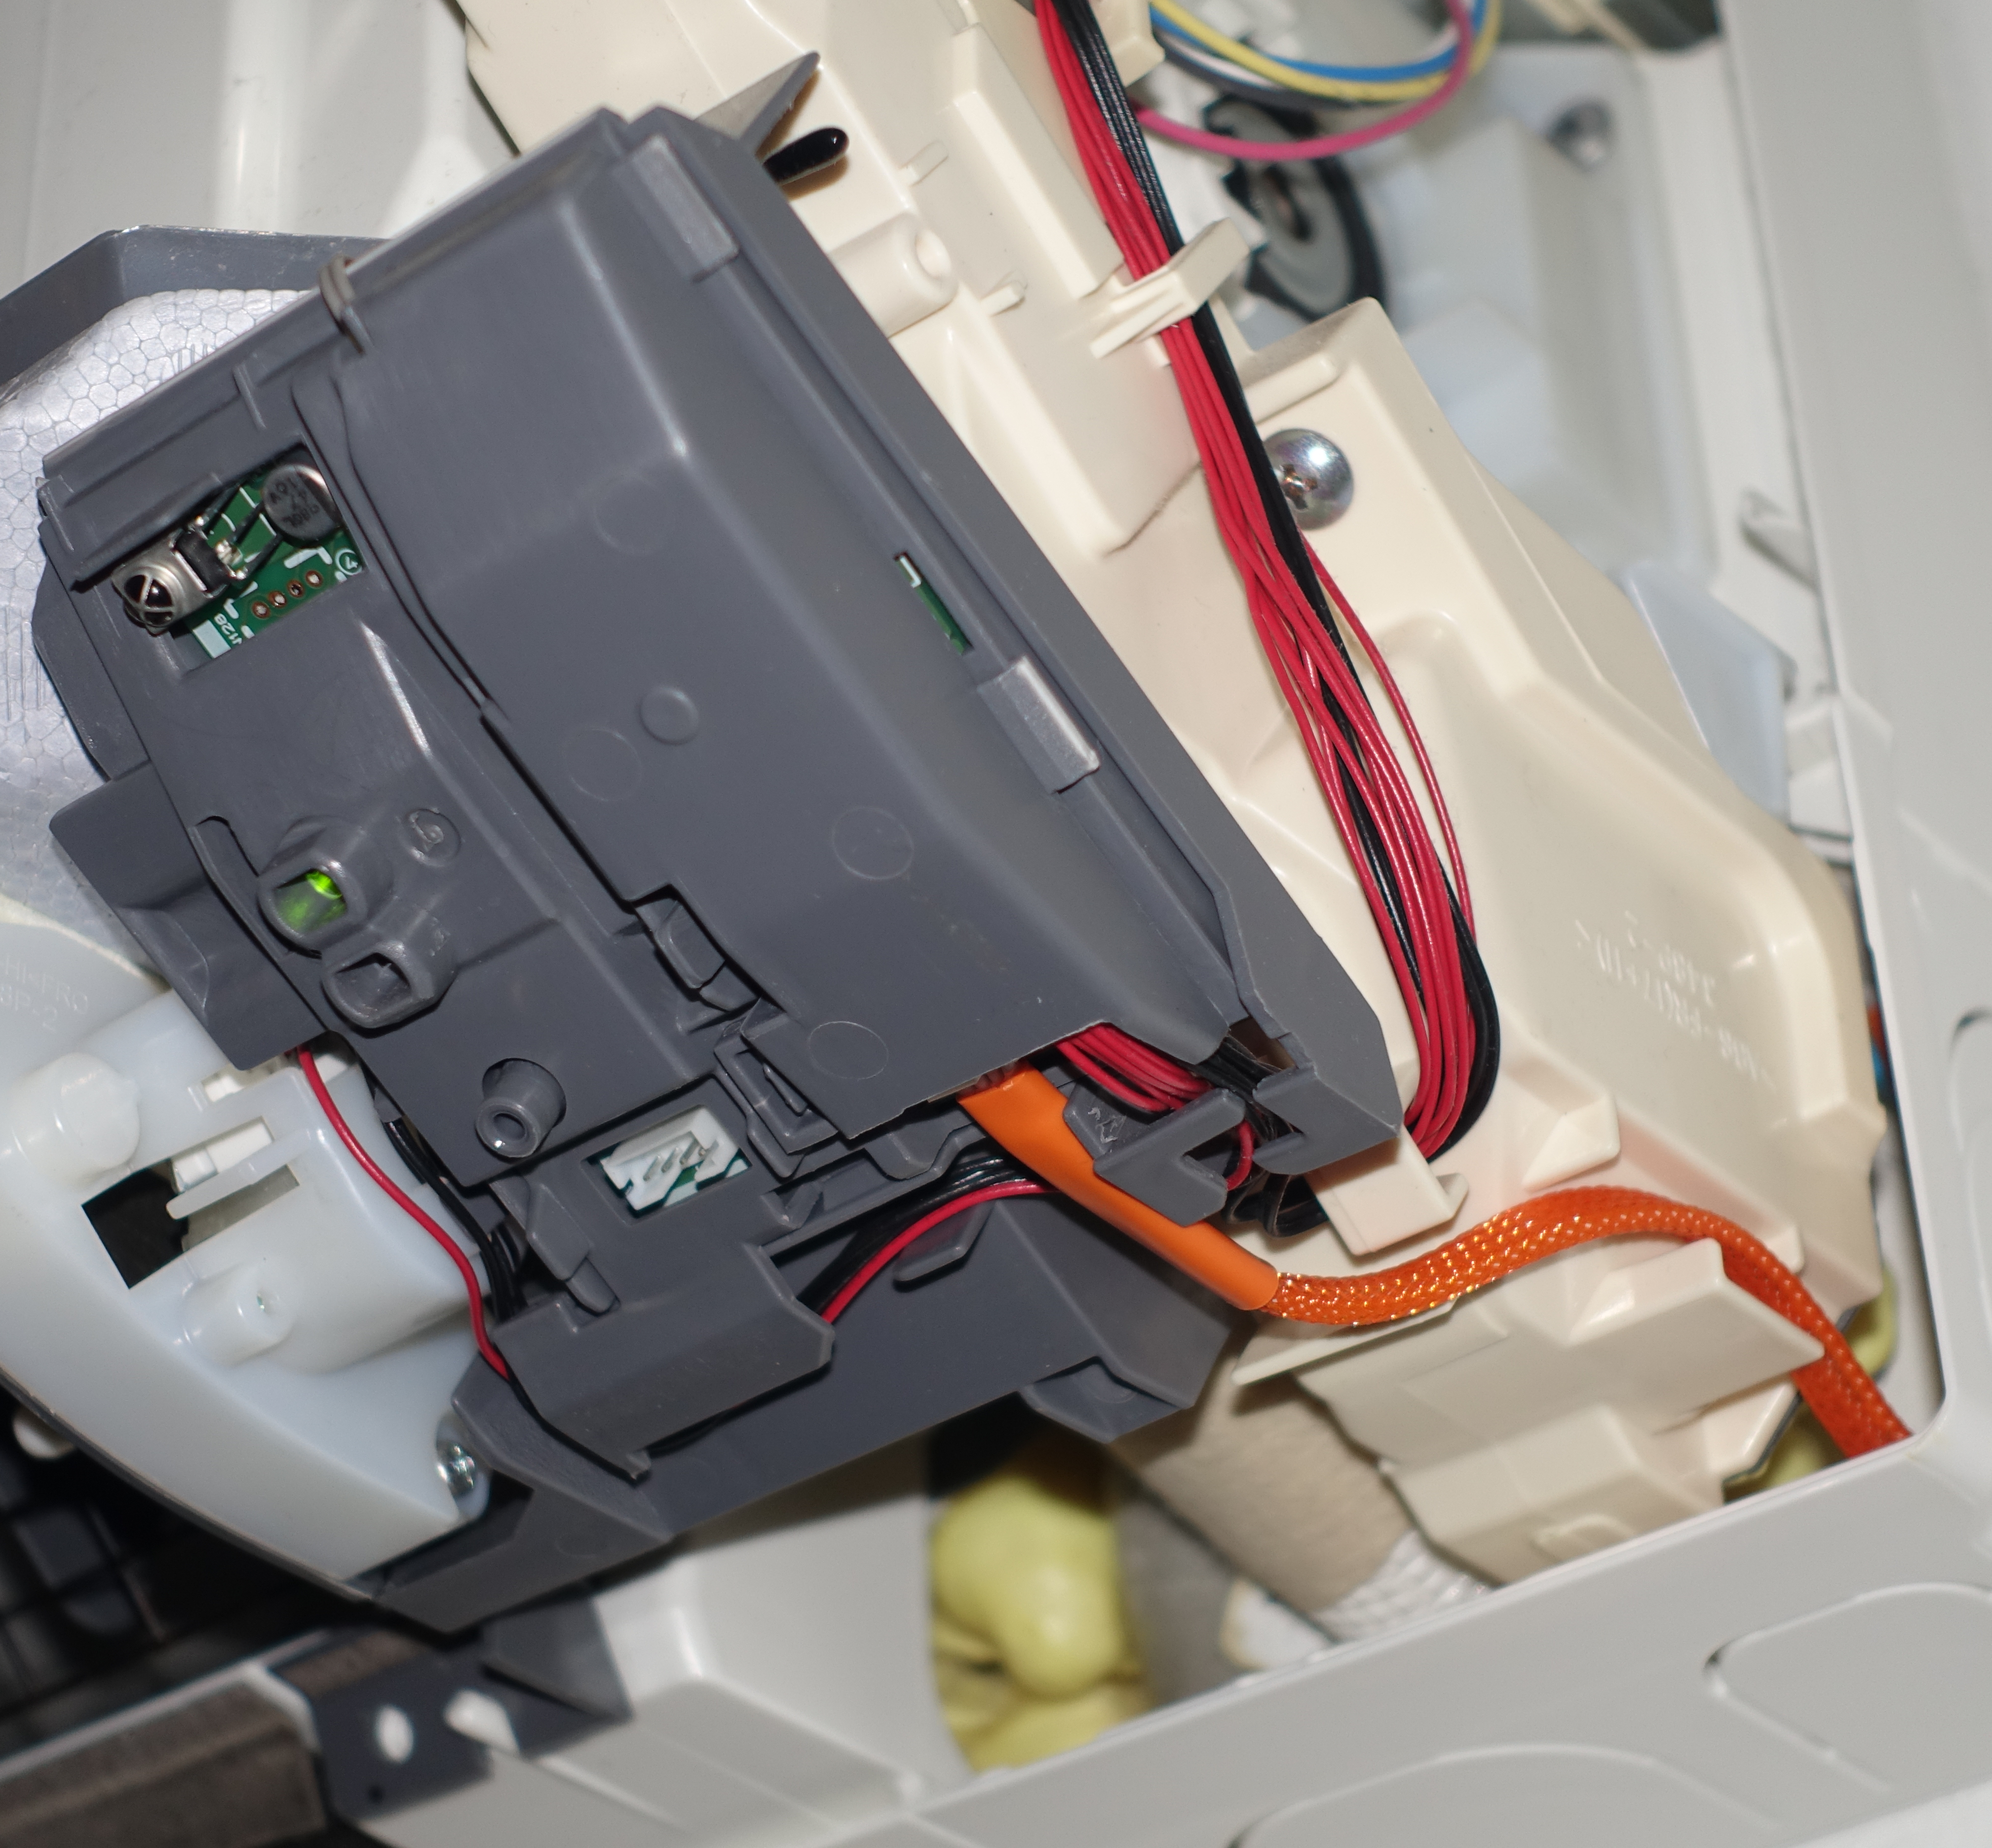
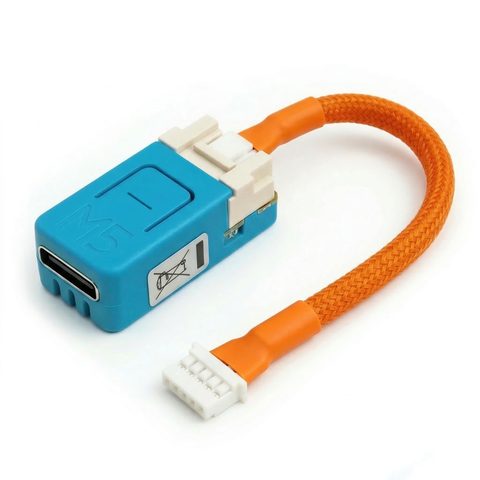
- Hardware: M5Stack NanoC6 or Atom S3 Lite (both ESP32); one board and one CN105 cable per indoor unit
- Connection: the CN105 serial port on most Mitsubishi Electric indoor units
- ESPHome: native Home Assistant climate entity, deepest automations, remote temperature from any HA sensor
- Apple Home firmware: native HAP pairing, Siri, BLE room sensors; an Apple Home Hub covers remote access and automations
- Flashing: browser-based over USB (Web Serial), and you can switch either direction anytime
The decision comes down to one question: where do you want to control your heat pump from?
- You run Home Assistant, or plan to. Flash ESPHome. Your mini-split becomes a native climate entity with the full weight of HA automations behind it.
- You're an Apple household with no Home Assistant and no desire to run a server. Flash the Apple Home compatible firmware. It pairs directly with Apple Home, and Siri works out of the box.
That's the short version. The rest of this post is what actually trips people up: remote access, temperature sensors, and how automations really work. A few of those details matter more than the feature checklists let on.
What's the Same on Both
Before we compare, let's be honest about how much is identical. Most of the marketing-sounding stuff applies to both firmwares equally, so it shouldn't sway your choice at all.
Both are fully local. Commands travel from your phone or hub to the ESP32 over your own network, then from the ESP32 to the heat pump over the CN105 serial connection. Neither firmware phones a cloud to operate. Internet goes out? Your thermostat keeps working.
Both run on the same hardware. The two supported boards, the M5Stack NanoC6 and the Atom S3 Lite, work with either firmware. The parts list is the same no matter which you choose. One board and one cable per indoor unit.
Both flash from your browser. The flash page installs either firmware over USB using Web Serial. Nothing to install, nothing compiles on your machine. (ESPHome does compile a personalized config later, but that happens inside Home Assistant.)
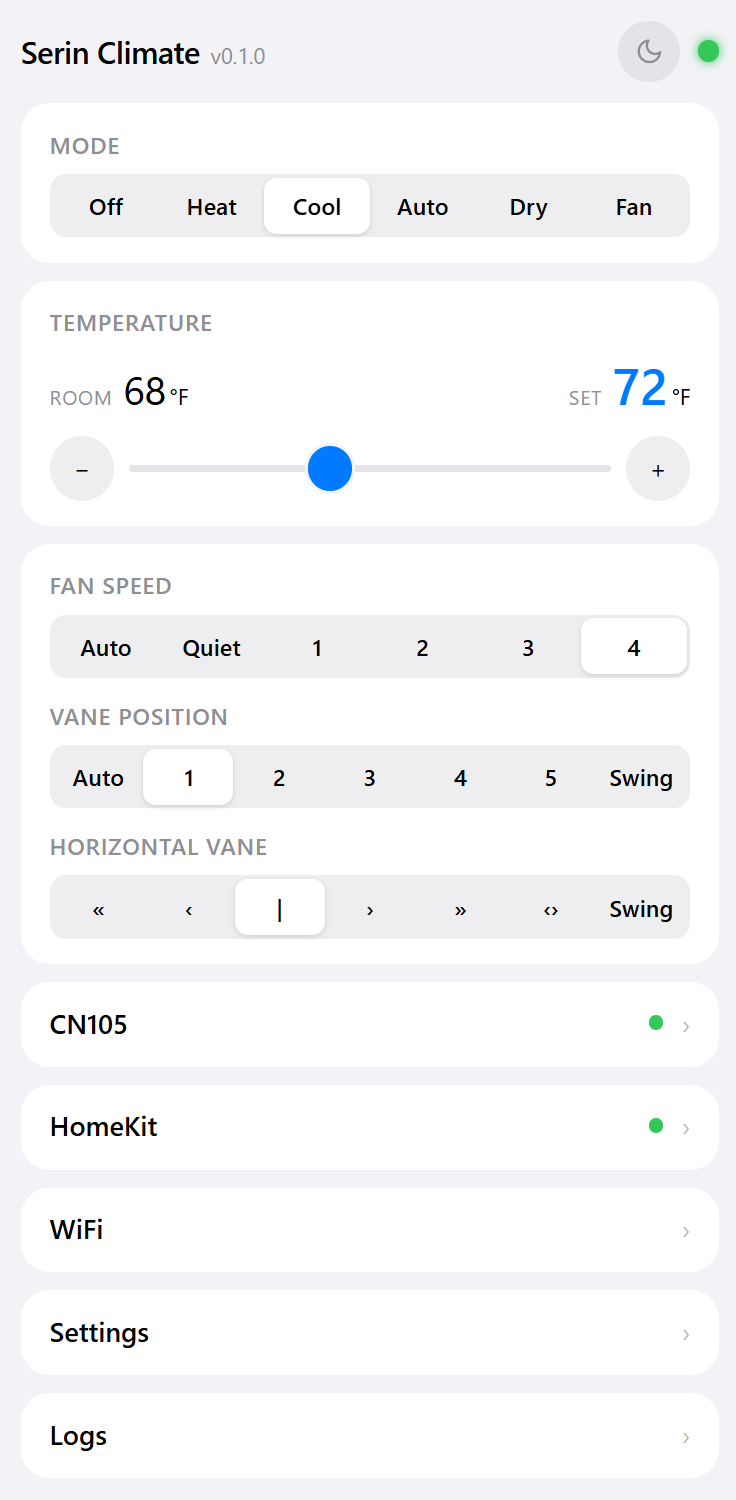
Both include a web interface. Even if your smart home platform is down, open the device's IP in a browser and control mode, temperature, fan, and vanes directly.
Both can read a room-level thermometer. This is the upgrade I'd tell anyone to do first. A mini-split measures temperature at the indoor unit, mounted high on the wall where the air sits a few degrees warmer than where you actually are. ESPHome pulls the reading from any Home Assistant sensor. The Apple Home compatible firmware listens for BLE thermometers directly. Different mechanism, same payoff, and letting the heat pump regulate off a sensor at seating height was the single biggest comfort improvement I made.
Both need a compatible unit. The controller talks to the CN105 port on most Mitsubishi Electric indoor units. Haven't confirmed yours has one? Start with the compatibility guide. Five minutes, and it saves you from buying hardware for a unit that can't use it.
Quick Comparison
| ESPHome | Apple Home compatible | |
|---|---|---|
| Best for | Home Assistant users | Apple households without HA |
| Control app | Home Assistant | Apple Home + Siri |
| Requires a server/hub | Home Assistant instance | Apple Home Hub (Apple TV or HomePod) for remote access and automations |
| Cloud dependency | None | None |
| Remote access | However you access HA remotely | Through your Apple Home Hub |
| Automations | Home Assistant (very deep) | Apple Home app |
| Remote temperature sensor | Any Home Assistant sensor, via the YAML generator | BLE thermometers (Govee, Xiaomi PVVX, BTHome v2), auto-detected |
| Customization | High; regenerate the YAML config anytime | Settings exposed in the web UI |
| Built-in web UI | Yes | Yes, with diagnostics and live logs |
| Setup steps | Flash → WiFi → adopt in ESPHome dashboard → HA discovers it | Flash → WiFi → scan a QR code in the Home app |
| Switching later | Reflash over USB | Reflash over USB |
Remote Access: The Part That Surprises People
"Local control" often gets misread as "no remote access." Wrong. Both firmwares let you control the mini-split from outside the house. They just get there differently.
With ESPHome, remote access is whatever remote access you already have for Home Assistant. If you can open your HA dashboard from your desk at work, you can nudge the heat pump from there too. The controller itself never needs to face the internet.
With the Apple Home compatible firmware, remote access runs through Apple's architecture. You need an Apple Home Hub, an Apple TV or a HomePod, on your home network. The hub relays commands from your iPhone when you're away, and it's also what runs automations. On your home Wi-Fi you can control the unit with no hub at all; the hub only matters for away-from-home control and automations. No Apple TV or HomePod, and no plan to buy one? That's the single biggest reason to lean ESPHome instead.
One honesty note. This firmware is not MFi-certified. It implements the HomeKit Accessory Protocol independently, the way plenty of open-source projects do. So when you add it in the Home app, Apple flags it as an uncertified accessory and makes you tap Add Anyway before it pairs. That prompt is expected, not a warning sign. It works normally afterward, and it doesn't pretend to be a certified Apple accessory.
The ESPHome Path
The ESPHome firmware is built on echavet's open-source MitsubishiCN105ESPHome component, packaged as a browser-flashable build in Serin's serin-cn105 repo. The build you flash from the browser is one fixed configuration, identical on every unit: climate control, vertical and horizontal vane control, a web server UI, and OTA updates.
The real power shows up after you adopt the device in the ESPHome dashboard inside Home Assistant. From there, the YAML generator lets you build a config matched to your actual unit and push it over Wi-Fi, no USB needed after the first flash. That's how you add the things the fixed build leaves out:
- A remote temperature sensor fed from any sensor Home Assistant already knows about (the room-level upgrade from earlier).
- Dual setpoint support and extra diagnostics like compressor frequency and outside air temperature.
- Removing vane controls your unit doesn't have, so you're not staring at buttons that do nothing.
Once it's in Home Assistant, the mini-split is a standard climate entity, and every HA trick applies. Presence-based setbacks. Syncing multiple heads. Dashboards, history graphs, the lot. Got several indoor units? Each gets its own controller (every head has its own CN105 port), and they all land in one ESPHome dashboard.
The trade-off is the dependency. This path assumes you run Home Assistant and are comfortable with the adopt-and-install flow. It's well-trodden, and the ESPHome setup guide walks through it, but it's more moving parts than scanning a QR code.
The Apple Home Path
The Apple Home compatible firmware is free and open source (full source on GitHub), and it speaks HAP, the HomeKit Accessory Protocol, natively. No bridge, no Home Assistant in the middle. The ESP32 itself is the accessory. Setup is short: after flashing, the device broadcasts a Wi-Fi hotspot, you join it and enter your home network credentials, then scan a QR code with your iPhone. The Home app shows the uncertified-accessory prompt from earlier; tap Add Anyway and it pairs. The full flow is in the Apple Home setup guide.
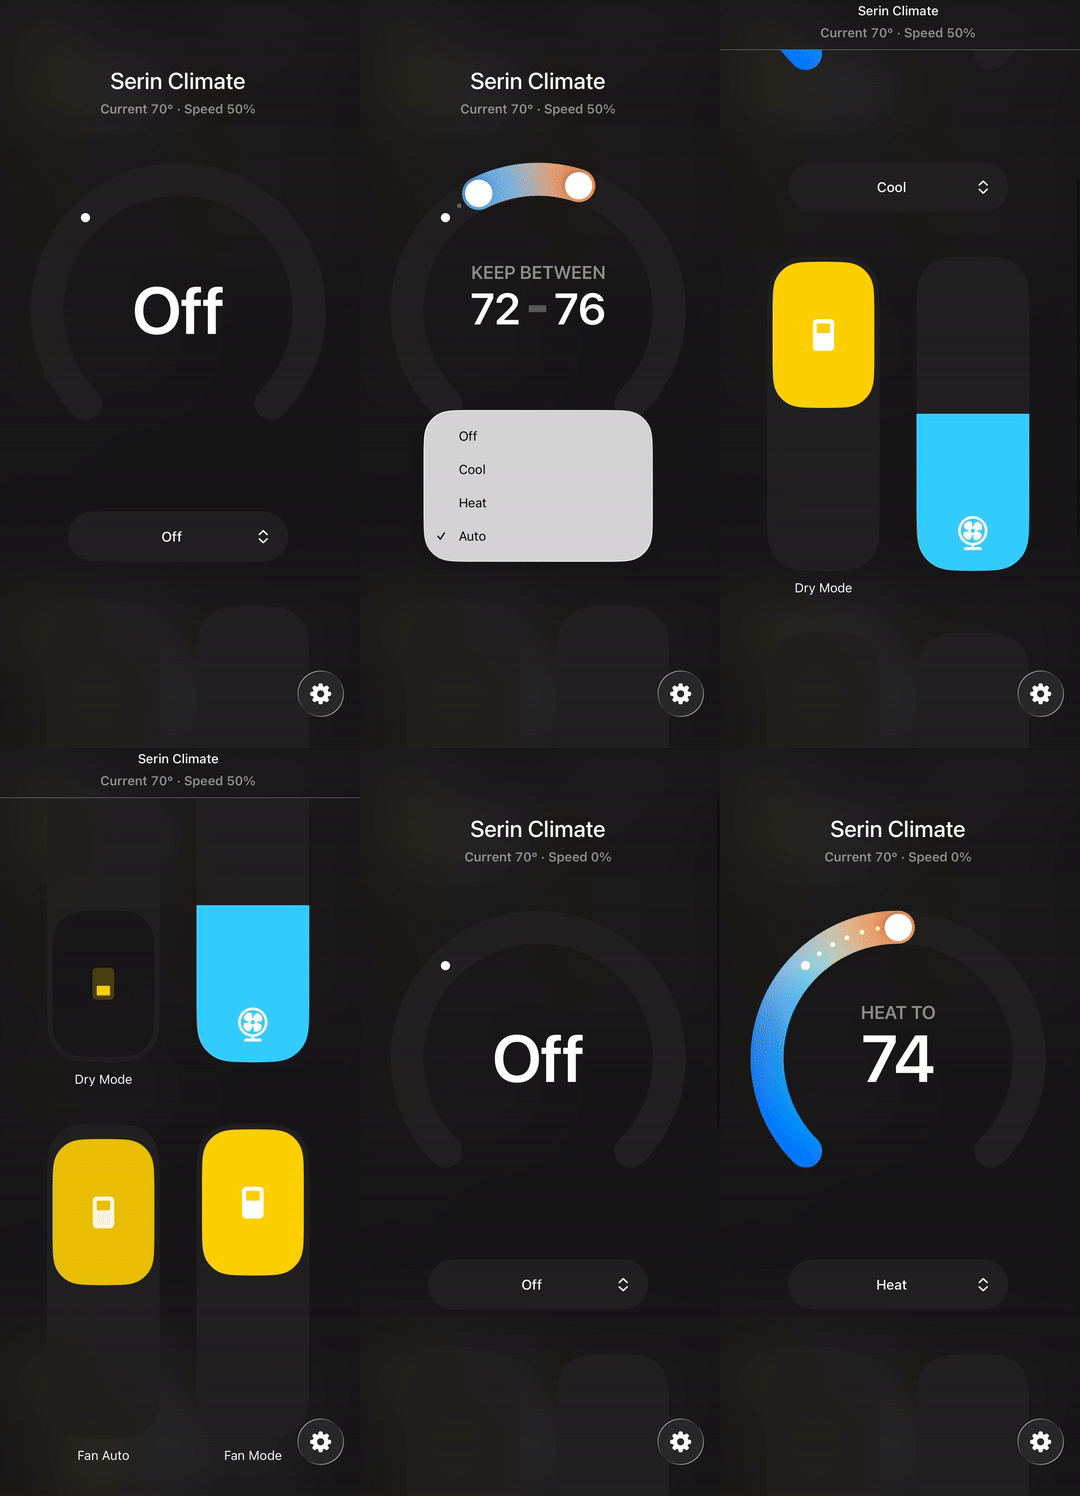
In the Home app you get the standard thermostat experience: modes (heat, cool, auto, dry, fan), temperature in 0.5°C steps, fan speed, vane control, plus Siri. Apple Home automations (schedules, scenes, "set the bedroom to 20° when the last person leaves") run through your Home Hub. Starting from zero — no board yet, not even sure your unit has the port? Adding a Mitsubishi mini-split to Apple Home walks the whole path, hardware to Siri.
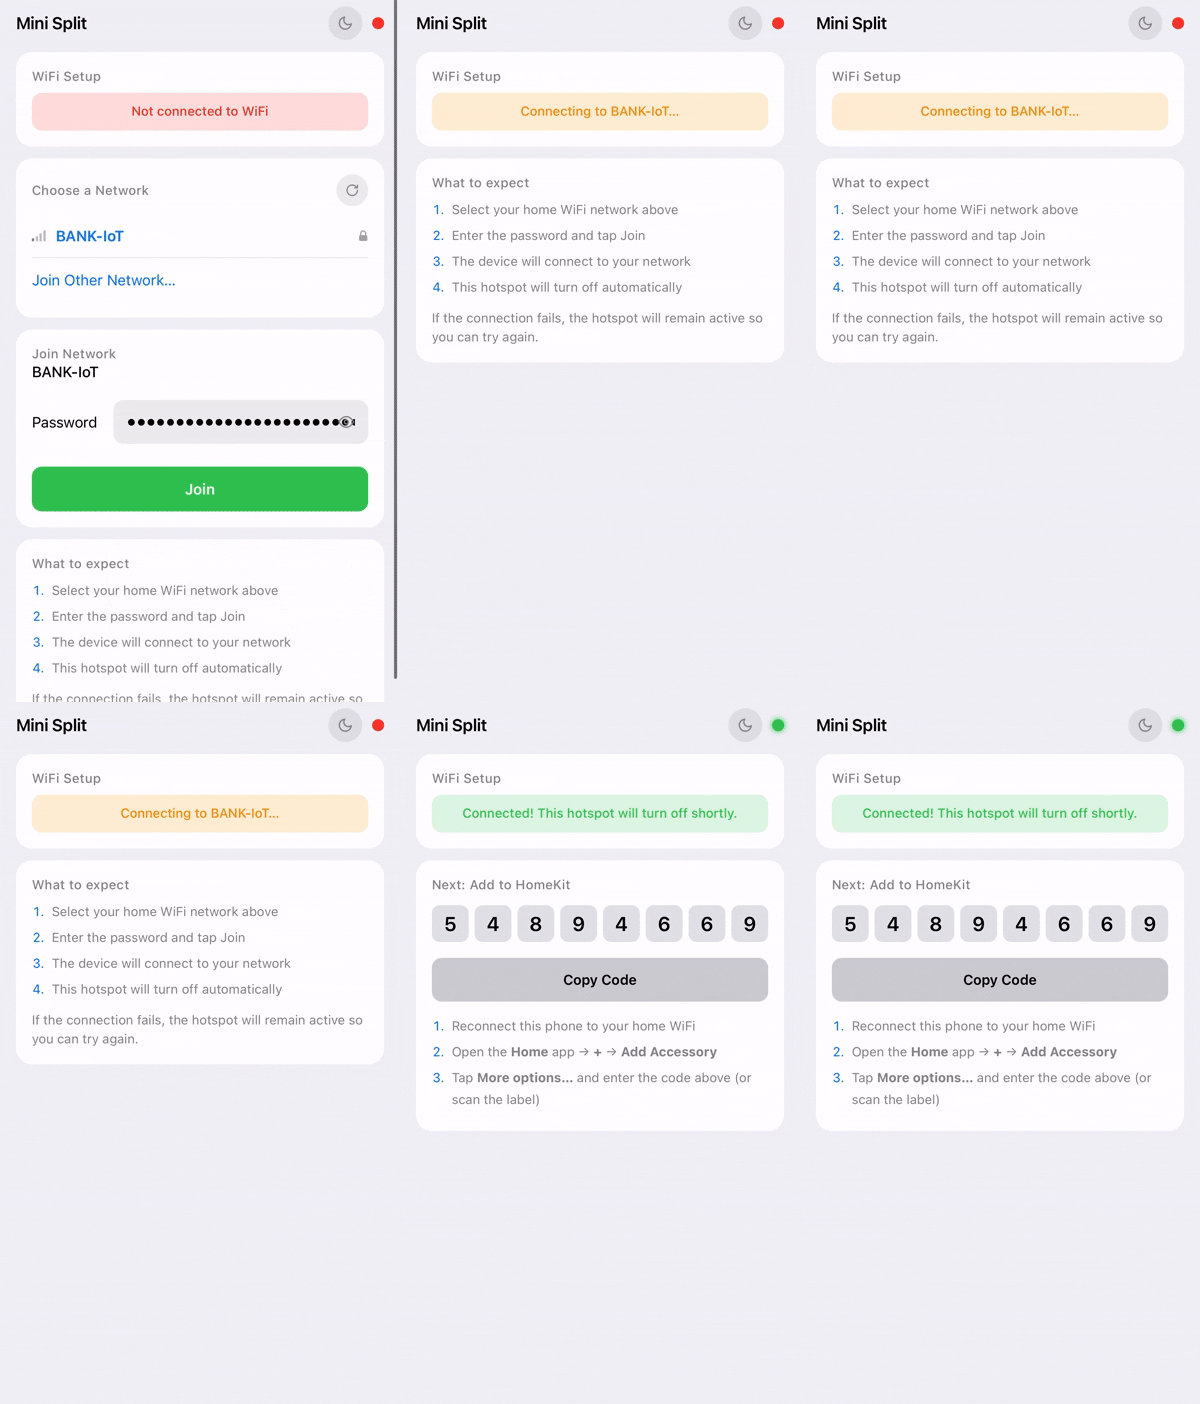
Where this firmware punches above its weight is the built-in web UI. It surfaces things Apple's Home app has no concept of: compressor frequency, outside temperature, runtime hours, error codes, live log streaming, and device settings. So even with zero Apple devices in the house, the controller is fully usable from a browser.
Two features earn a callout:
- BLE remote temperature sensors. Instead of an HA sensor, this firmware listens for Bluetooth Low Energy thermometers directly. Govee, Xiaomi (with PVVX firmware), and BTHome v2 sensors are auto-detected from their advertisements, no pairing required. Drop an inexpensive BLE thermometer at seating height and the heat pump regulates off that. If the sensor drops out, the firmware falls back to the unit's internal thermistor.
- Self-maintaining updates. The web UI has a one-tap update check that downloads the latest release, verifies its checksum, and rolls back automatically if the new firmware fails validation. There's also a crash-loop safe mode that keeps Wi-Fi and the web UI alive for recovery if something goes badly wrong.
The trade-off mirrors ESPHome's. Automations are limited to what the Apple Home app can express, which is a much smaller vocabulary than Home Assistant's.
Personally, I run Home Assistant at home and love it. But when I put a controller on my parents' mini-splits, there was no chance I was standing up a Home Assistant server in their house and teaching them to drive it. They already have iPhones and know the Home app. So I flashed the Apple Home compatible firmware, scanned the QR code, and walked away. That's the case this firmware is built for: someone who wants local control without becoming the family sysadmin.
What If You Use Both Home Assistant and Apple Home?
Flash ESPHome. Home Assistant can expose its climate entities to Apple Home through HA's own HomeKit bridge integration, so you keep HA's automation depth and still get the tile in the Home app plus Siri control. The reverse (the Apple Home firmware into HA) works via HA's HomeKit controller integration, but you give up the ESPHome-side customization for no real gain. When HA is in the picture, ESPHome is the strictly more flexible starting point.
Switching Later Is Cheap
This isn't a life sentence. Both firmwares flash from the same browser tool, so switching means plugging the board into USB and flashing the other image. A few minutes, tops. You'll redo the platform-side setup afterward (adopt in ESPHome, or pair in the Home app), and it's polite to remove the old accessory or entity first, but nothing about the hardware or wiring changes. Starting on the Apple Home compatible firmware for the fast setup, then reflashing to ESPHome once you fall down the Home Assistant rabbit hole, is a perfectly sensible order. The board doesn't mind.
The Bottom Line
- Running Home Assistant? Flash ESPHome. Native climate entity, HA-grade automations, remote temperature from any HA sensor, deep customization through the YAML generator. Follow the ESPHome setup guide.
- Apple household, no HA, no server ambitions? Flash the Apple Home compatible firmware. Direct pairing (past the one-time uncertified-accessory prompt), Siri, BLE room sensors, and a genuinely useful web UI. Just make sure you have, or will get, an Apple TV or HomePod for remote access and automations. Follow the Apple Home setup guide.
- Both ecosystems? ESPHome, bridged into Apple Home through Home Assistant.
- Neither yet? Either one runs from its web UI alone, and you can adopt a platform later.
Whichever you pick, the path is the same. Confirm your unit has a CN105 port, grab the board and cable, and flash the firmware from your browser. Still deciding whether to leave the factory app behind at all? That's the Kumo Cloud alternative question, and I wrote that one up separately. The flash tool installs either firmware, and you can change your mind any time.
Related
- Add your mini-split to Apple Home, step by step
- ESPHome setup guide
- Apple Home setup guide
- Flash the firmware
Next step
Check your unit first
Type your indoor unit's model number for a verdict in under a minute. If it fits, the firmware flashes in the browser in about two minutes.