 serin labs
How to Add a Mitsubishi Mini-Split to Samsung SmartThings
Your lights and door sensors are already in SmartThings. The Mitsubishi mini-split still has its own remote, so the routine that turns the room off stops short of the heat pump.
You can bring a compatible Mitsubishi indoor unit into Samsung SmartThings using a controller on its CN105 service port. Install the Matter-compatible firmware, add it through a compatible SmartThings hub, and the unit appears as a thermostat. No Mitsubishi Wi-Fi adapter or Kumo Cloud account is required.
The important purchase check is the hub. Having the SmartThings app on your phone does not, by itself, provide everything this route needs.
Quick Facts
- Connection: one CN105 ESP32 controller per compatible indoor unit.
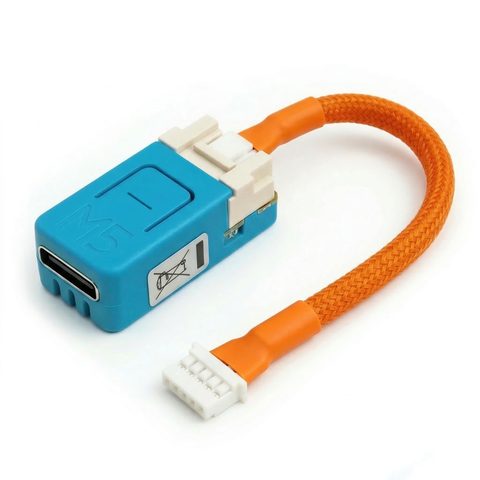
- Hardware: a supported board and cable, or the pre-assembled Serin Controller. Hardware arrives without firmware installed.
- Firmware: free to install, beta, not Matter-certified, and not open source.
- SmartThings requirement: the app, your Samsung account, and a compatible Matter hub.
- Network: 2.4 GHz Wi-Fi with IPv6 enabled; Bluetooth is used during setup.
- Everyday controls: power, Heat, Cool, Auto, target temperature, and reported room temperature.
- Additional controls: use the controller's web interface for functions missing from the app.
- Subscription: no Serin Labs subscription or account is required.
How a Mitsubishi Becomes a SmartThings Thermostat
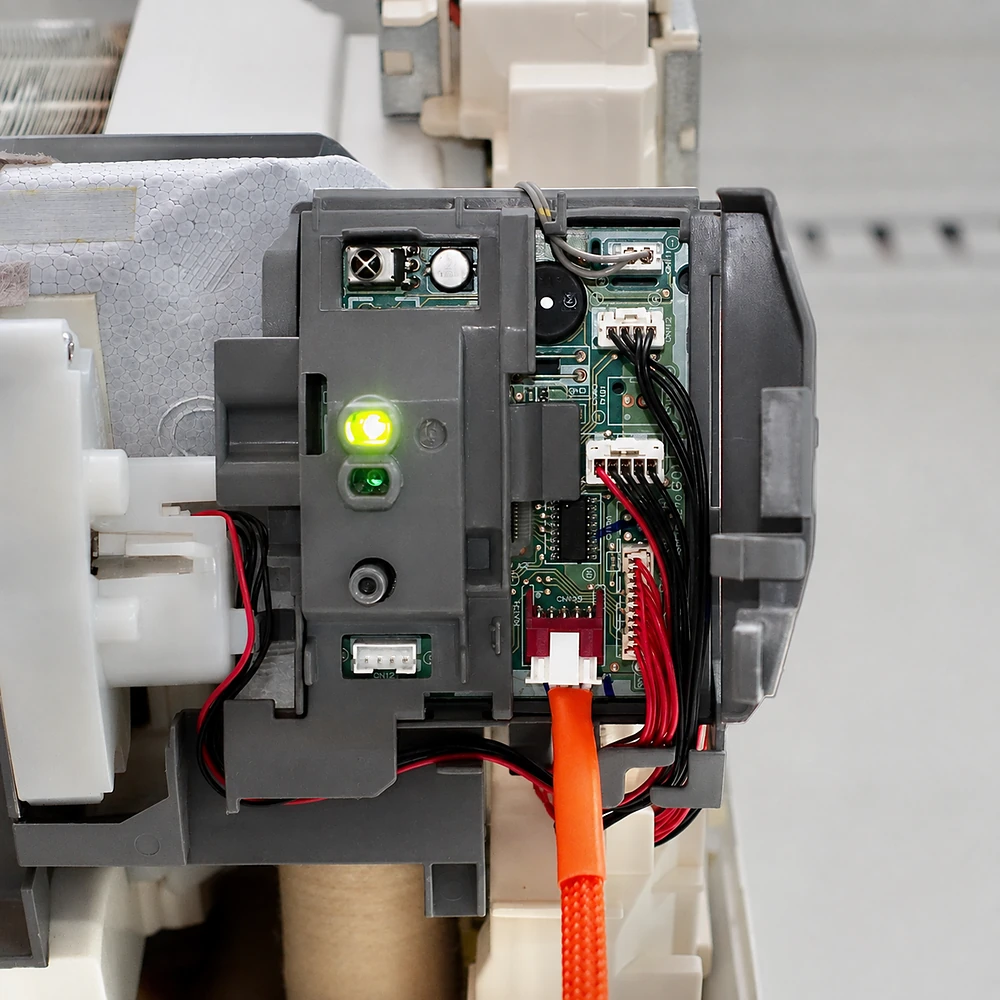
The connection starts inside the indoor unit, not with a Samsung appliance integration. CN105 is the service connector used by compatible Mitsubishi equipment. The controller exchanges commands and status with the heat pump over that connection.
Matter supplies the other half: a standard way for the controller to present itself to SmartThings. The hub talks to the controller over your home network; the controller talks to the indoor unit through the cable. You do not need a Home Assistant server between them.
This is a two-way connection. The controller can read the unit's reported state rather than merely send an infrared command and hope it arrived. The factory handheld remote remains usable, too. After installation, checking that a remote change appears in the controller is a useful part of verifying the connection.
It is still a thermostat integration. Adding the heat pump to SmartThings does not turn every Mitsubishi setting into an app button.
Check the Indoor Unit Before Buying Anything
Use the model number from the indoor unit, then enter it in the compatibility checker. Mitsubishi Electric model families differ, and some require closer attention to the suffix or an adapter. An outdoor-unit model number cannot settle which connector is available inside each head.
The same check matters for Mitsubishi-built Trane and American Standard ductless systems. A familiar-looking cabinet is not enough evidence. This controller is not a universal accessory for Samsung, Daikin, Fujitsu, or other unrelated air conditioners.
Count indoor units separately. Three heads on one outdoor system need three controllers if you want independent control of all three rooms. Putting one board in the living room does not expose the bedroom head.
Also check whether CN105 is occupied. A factory Wi-Fi adapter or another controller may already use the connection. Do not plan on stacking accessories onto that port; review the installation guide before replacing an existing connection.
Which SmartThings Hub Do You Need?
Samsung states that Matter devices need a compatible SmartThings hub. Check the exact model you own against its current guidance before ordering hardware. The SmartThings app and a Samsung phone are not substitutes for that hub.
The distinction between Matter and Thread matters here. This firmware uses Matter over Wi-Fi. It does not need a Thread border router for its own connection, even if other accessories in your home do. Buying extra Thread hardware does not fix an unsupported SmartThings hub.
Keep the hub, app, and phone software updated. The controller needs a usable 2.4 GHz Wi-Fi network, and the Serin Matter setup guide requires IPv6 on the home network. During initial setup, keep your phone close to the board for the Bluetooth exchange.
If you are starting without a hub, include that purchase in your comparison. The controller is only one part of the setup. If you already have a suitable Google or Amazon hub, the Google Home or Alexa route may fit the hardware you own better.
Install the Firmware and Connect the Cable
The pre-assembled controller saves you soldering and cable assembly. It still needs firmware. Open the browser flasher on a computer with Chrome, Edge, or Brave, using a USB-C cable that carries data.
Choose Google Home, Alexa & SmartThings, the flasher's label for the Matter-compatible build. Use a board supported by the installer; the parts list identifies suitable hardware if you are assembling your own. Save the Matter QR code or manual pairing code shown after installation.
There is no separate Wi-Fi form for a fresh Matter setup. SmartThings supplies the network credentials during pairing. Following the HomeKit hotspot instructions at this stage would mix two different firmware workflows.
Disconnect USB before connecting CN105. Turn off HVAC power at the breaker, leave it off while the indoor unit is open, and follow the installation guide to seat the cable and position the board. Replace the cover before restoring power. Have an installer make that connection if opening the unit is outside your comfort level.
Add the Controller in SmartThings
With the board powered and your phone nearby:
- Open SmartThings, tap Add (+), and choose Add device.
- Use the QR scanning option to scan the Matter code. Enter the manual code if scanning is inconvenient.
- Select the compatible hub and room when prompted.
- Follow the network prompts to supply your 2.4 GHz Wi-Fi credentials.
- Review any uncertified-device notice. This beta firmware has not been Matter-certified.
- Give the thermostat a useful name, such as Bedroom Heat Pump, and finish setup.
Samsung documents the app flow in its Matter integration instructions. Labels can vary with app versions; the essential path is adding a Matter device with its pairing code.
Then verify more than the presence of a tile. Check the reported room temperature, change the target or mode, and confirm the indoor unit responds. Pairing proves the app can reach the controller; it does not prove the cable is carrying heat-pump data.
What You Can Control from SmartThings
The SmartThings controller overview describes the supported thermostat controls. Plan your routines around those controls, rather than assuming the entire handheld remote appears in the app.
| Function | Where to use it |
|---|---|
| Power, Heat, Cool, and Auto | SmartThings thermostat controls |
| Target and reported room temperature | SmartThings thermostat controls |
| Scenes and routines using exposed thermostat actions | SmartThings |
| Fan speed and vane position | Controller web interface or handheld remote |
| Dry and fan-only modes | Use the web interface or remote if absent from SmartThings |
| Available diagnostics and logs | Controller web interface |
Actual heating and cooling capabilities still depend on the indoor unit. A thermostat card cannot add heating to cooling-only equipment or remove a multi-zone system's operating constraints.
To reach the extra controls, find the controller in your router's device list and open its local address in a browser. The web-interface guide explains the hostname and IP-address options. Keep that address bookmarked for adjustments the SmartThings card does not offer.
Start with One Simple Routine
A useful first routine is a scheduled temperature change in one room. Set it up using the actions SmartThings actually offers for that thermostat, run it manually, and check the result before relying on the schedule.
Once that works, consider an away setting or a routine linked to a room's occupancy sensor. Those are examples to configure around your household, not measured energy-saving claims. A sensor going quiet does not necessarily mean everyone has left the room.
For multiple heads, choose distinct names and check every action's target. A routine that changes the wrong bedroom can look like a heat-pump problem when it is simply pointing at another thermostat.
The Matter connection between hub and controller is local. That does not mean every SmartThings feature is independent of the internet: account access, remote operation, and routines involving cloud services have their own dependencies. Test any particular routine you expect to survive an outage.
If Pairing Works but the Heat Pump Does Not
Separate the network side from the cable side. If SmartThings cannot add the accessory, check the hub's compatibility and availability, the Wi-Fi network, IPv6, and proximity during setup. If the QR code will not scan, try the manual code before reinstalling firmware.
If a thermostat appears but reports no useful temperature or cannot change the unit, follow the CN105 troubleshooting checks. Repeatedly deleting the SmartThings tile will not reseat a connector.
If you lost the code, reconnect to the flash tool or use the saved record in the browser that performed the installation. A missing browser record does not mean the board needs erasing. The Matter troubleshooting guide covers recovery without starting with a factory reset.
Who This Route Fits
Choose this route if SmartThings already runs your home, you have a compatible hub, and you want the heat pump in the same routines as the rest of the room. It avoids adding a Mitsubishi cloud account or a separate automation server.
Choose a different route if unpublished beta firmware is a deal-breaker. The same supported hardware can run the established, open-source ESPHome or HomeKit-compatible builds, but those serve Home Assistant and Apple Home respectively. For another mini-split brand, investigate a compatible infrared controller or the manufacturer's own integration instead.
To get started:
- Check the exact indoor-unit model.
- Confirm your SmartThings hub supports Matter.
- Choose the assembled controller or DIY parts, then follow the SmartThings setup guide.
The thermostat belongs in the room's routine. The cable is what gets it there.
Related
Next step
Check your unit first
Type your indoor unit's model number for a verdict in under a minute. If it fits, the firmware flashes in the browser in about two minutes.