 serin labs
How to Add a Mitsubishi Mini-Split to Google Home
For compatible Mitsubishi-family mini-splits
Add the heat pump to Google Home as a thermostat for temperature, Heat, Cool, Auto, voice commands, and routines. The simplest route uses one small controller inside each indoor unit—without Kumo Cloud or a Home Assistant server.
- From $35
- No subscription
- One per indoor unit
- Free beta firmware
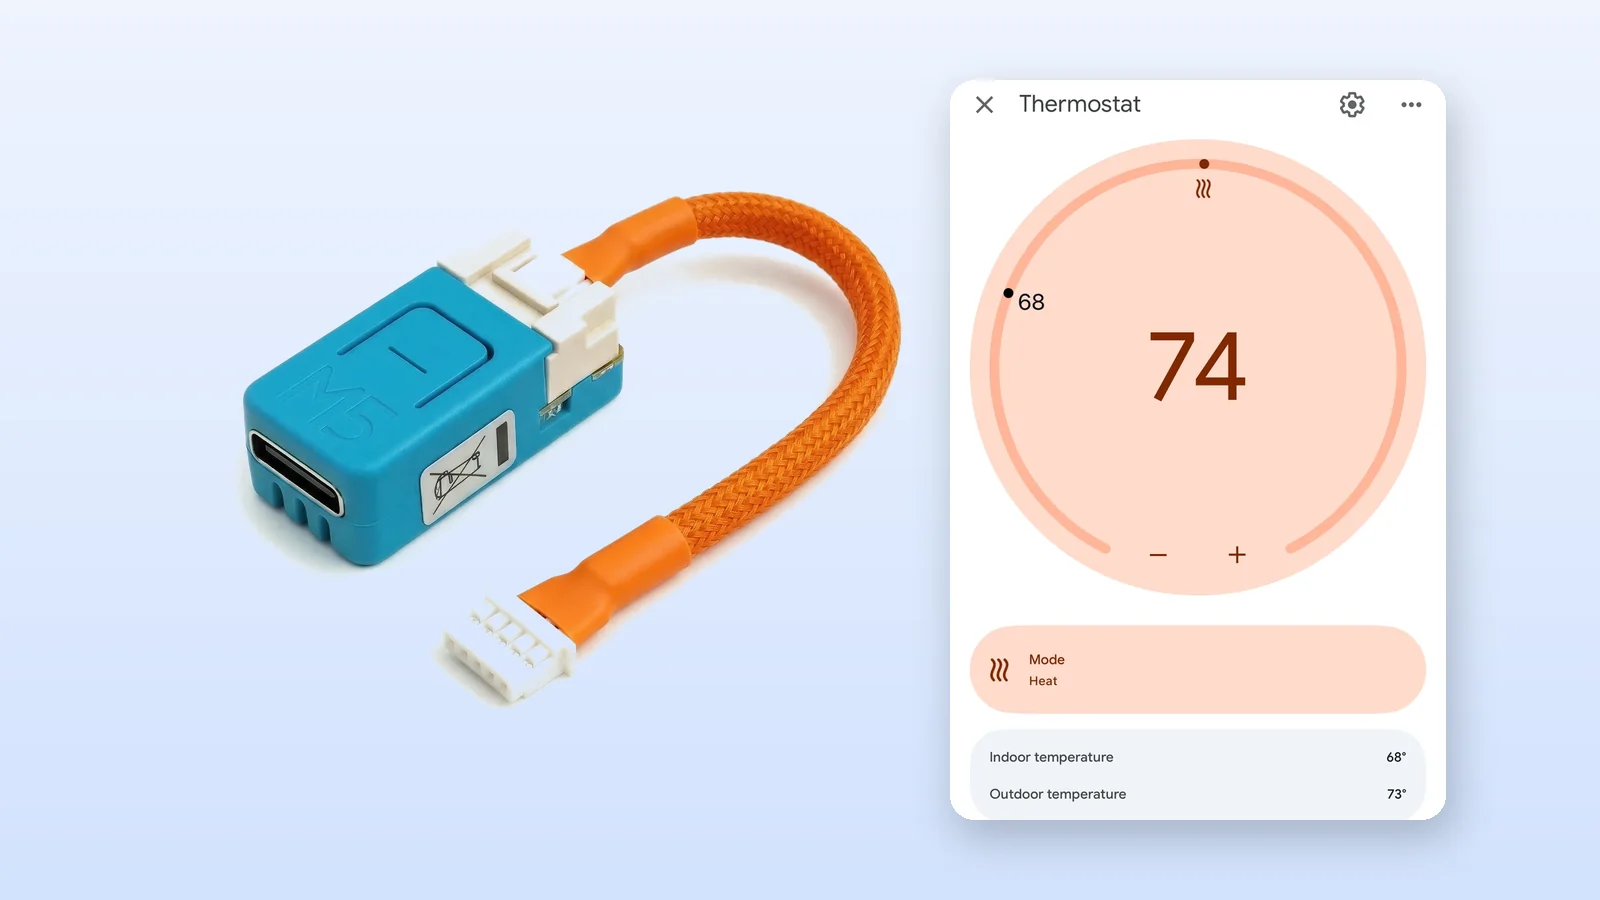 Plugs into the indoor unit, then pairs from Google Home
Can You Add a Mitsubishi Mini-Split to Google Home?
Yes. A compatible Mitsubishi mini-split can appear in Google Home as a thermostat even when it did not leave the factory with Google Home support.
The direct route uses a controller plugged into the service connection inside the indoor unit. You install the free Google Home-compatible firmware from a browser, connect the controller with the breaker off, and add it from the Google Home app. No Mitsubishi cloud account or Home Assistant server sits in the middle.
If you already run Home Assistant, the same controller can use ESPHome instead. Home Assistant holds the complete mini-split controls and sends a simpler thermostat onward to Google Home.
Choose Your Route
Recommended without Home Assistant
Pair directly with Google Home
- Nothing else needs to stay running
- No Mitsubishi or Serin account
- Google Home gets the standard thermostat controls
- Firmware is free, beta, and not open source
Best if it is already in your house
ESPHome through Home Assistant
- Full controls and diagnostics remain in Home Assistant
- Google Home still receives a simpler thermostat
- Home Assistant must remain available
- Cloud subscription or manual Google setup is required for the bridge
There is also a good no-purchase answer for some households: if the factory Mitsubishi Wi-Fi adapter is already installed, try its Kumo Cloud Google Assistant integration first. It is cloud-dependent, but it may already provide the voice control you wanted. Buying another controller would add cost without necessarily improving the Google Home card.
Will the Direct Route Work with Your Mini-Split?
The Serin Controller is for compatible Mitsubishi Electric indoor units and many Mitsubishi-built Trane and American Standard ductless systems. It does not fit Daikin, Fujitsu, LG, Gree, Midea, or other unrelated mini-split brands.
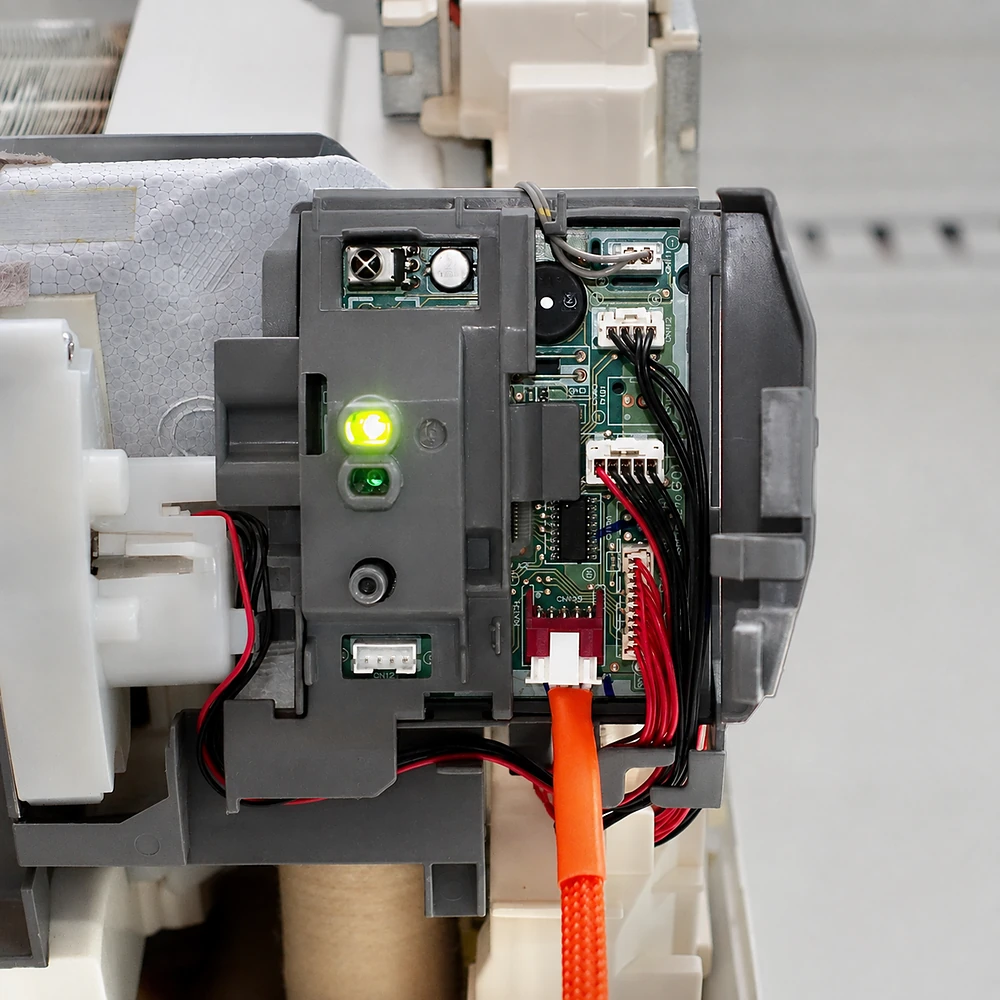
Compatible units have a small service connection commonly labelled CN105 on the indoor control board. The controller plugs into that connection and talks to the heat pump in both directions. Check the exact model before ordering because a few older and regional model families are exceptions.
Before you buy
Check your indoor-unit model
Find the model number on the label under the front cover or on the side of the indoor unit. Enter it for an instant compatibility verdict.
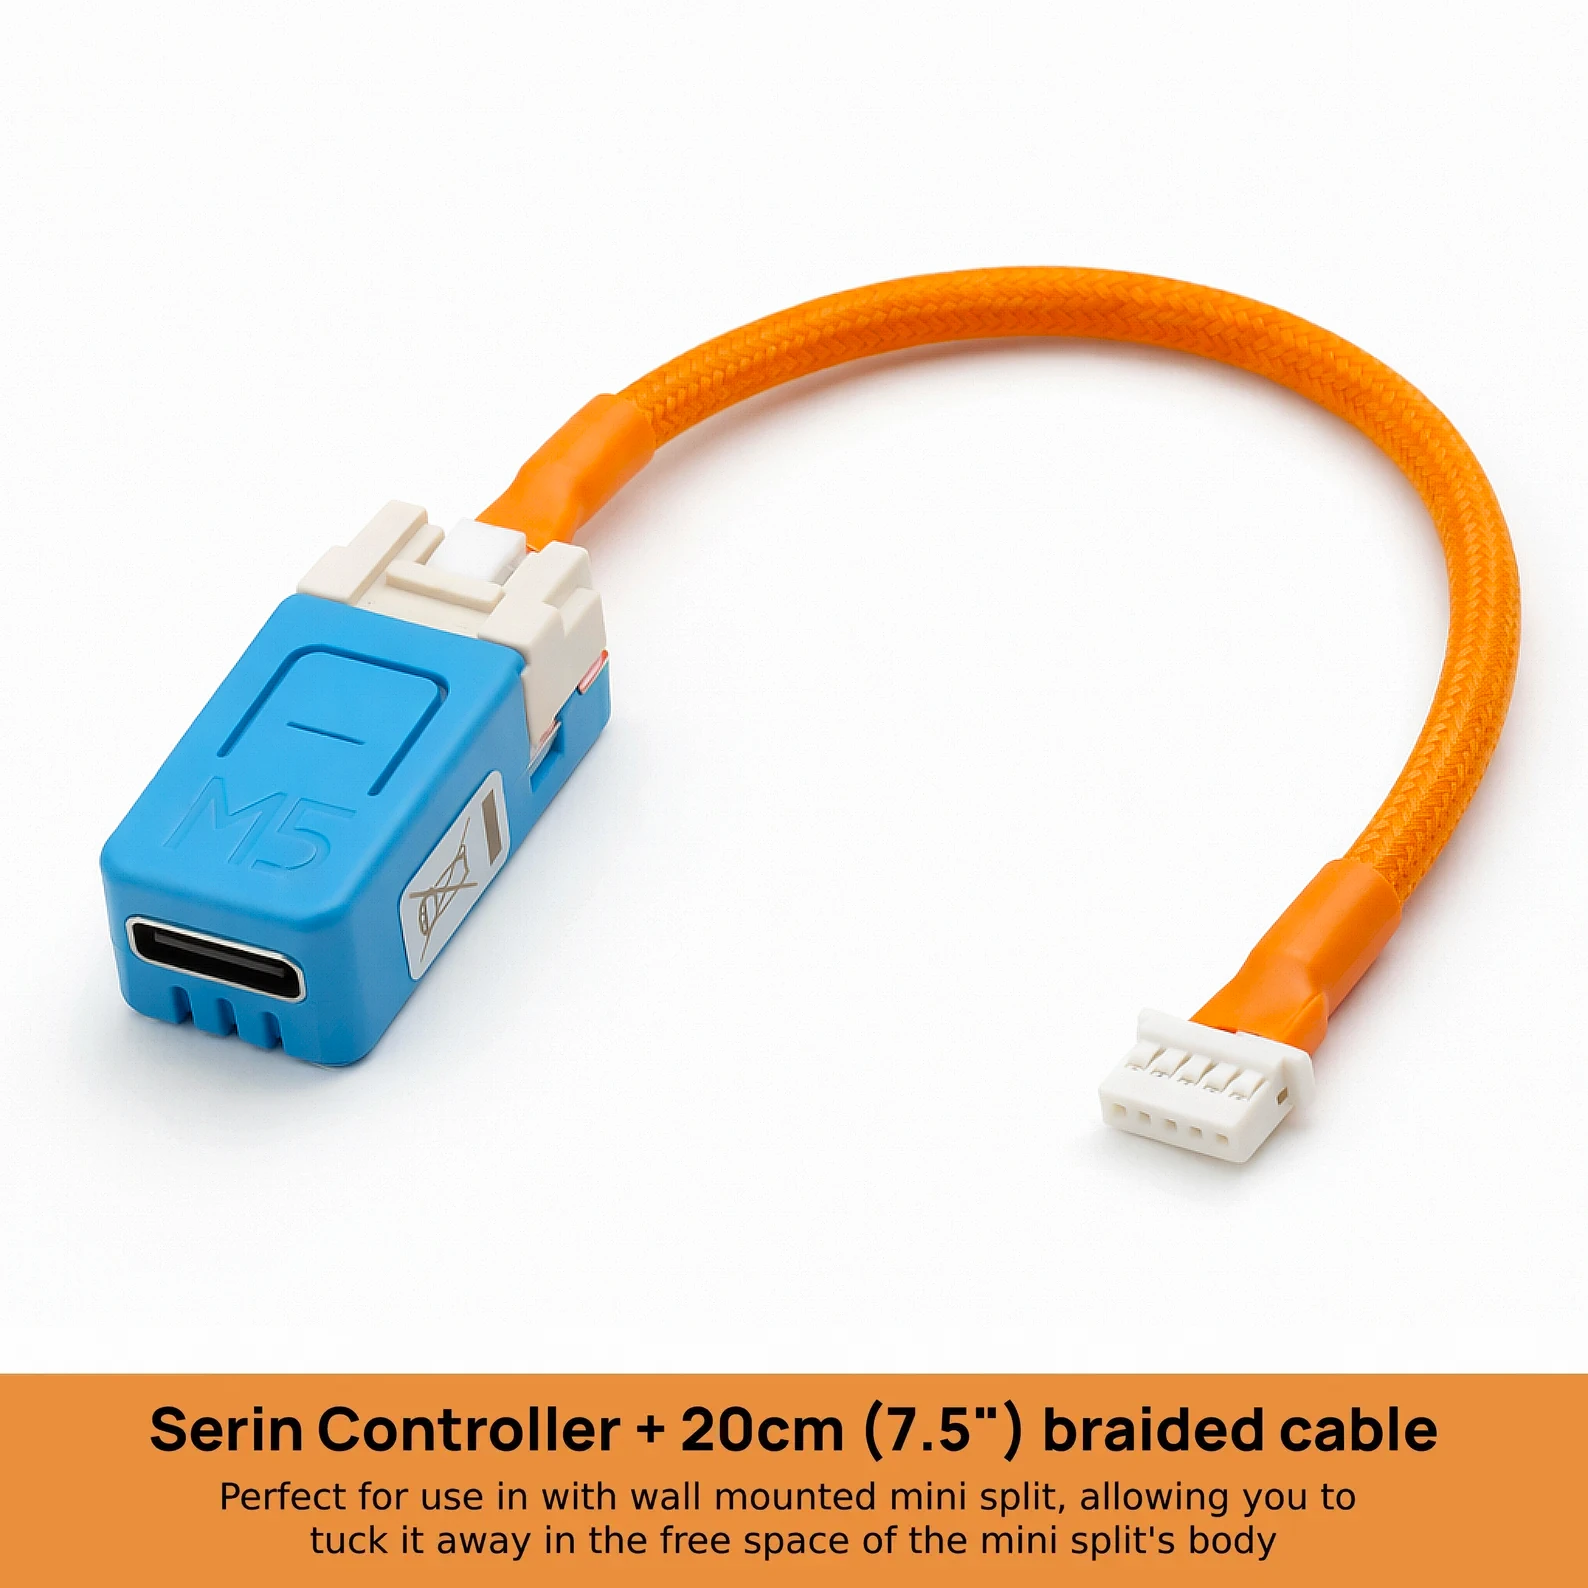
Hardware for the direct route
Serin Controller
The ESP32 board and tested cable arrive assembled. You install the free beta firmware from a supported browser before connecting it to the mini-split; the controller normally arrives without firmware installed.
From $35 · Free US shipping · 5.0 from 36 reviews
What You Need for Direct Google Home Control
A compatible indoor unit
One controller is needed for every indoor unit you want to control. A three-head system needs three controllers.
The controller and cable
Use the pre-assembled Serin Controller or a supported board and cable from the DIY parts list.
A computer and USB data cable
The one-time firmware installation requires Chrome, Edge, or Brave on a desktop or laptop.
A compatible Google or Nest hub
Google requires a supported hub, and IPv6 must be enabled on the home network. Check Google's current guidance.
There is no soldering, wire cutting, separate power supply, Serin account, or recurring Serin fee. You do need to turn off the breaker and open the indoor unit once. If you are not comfortable doing that, ask an HVAC technician to make the connection.
-
 1
1
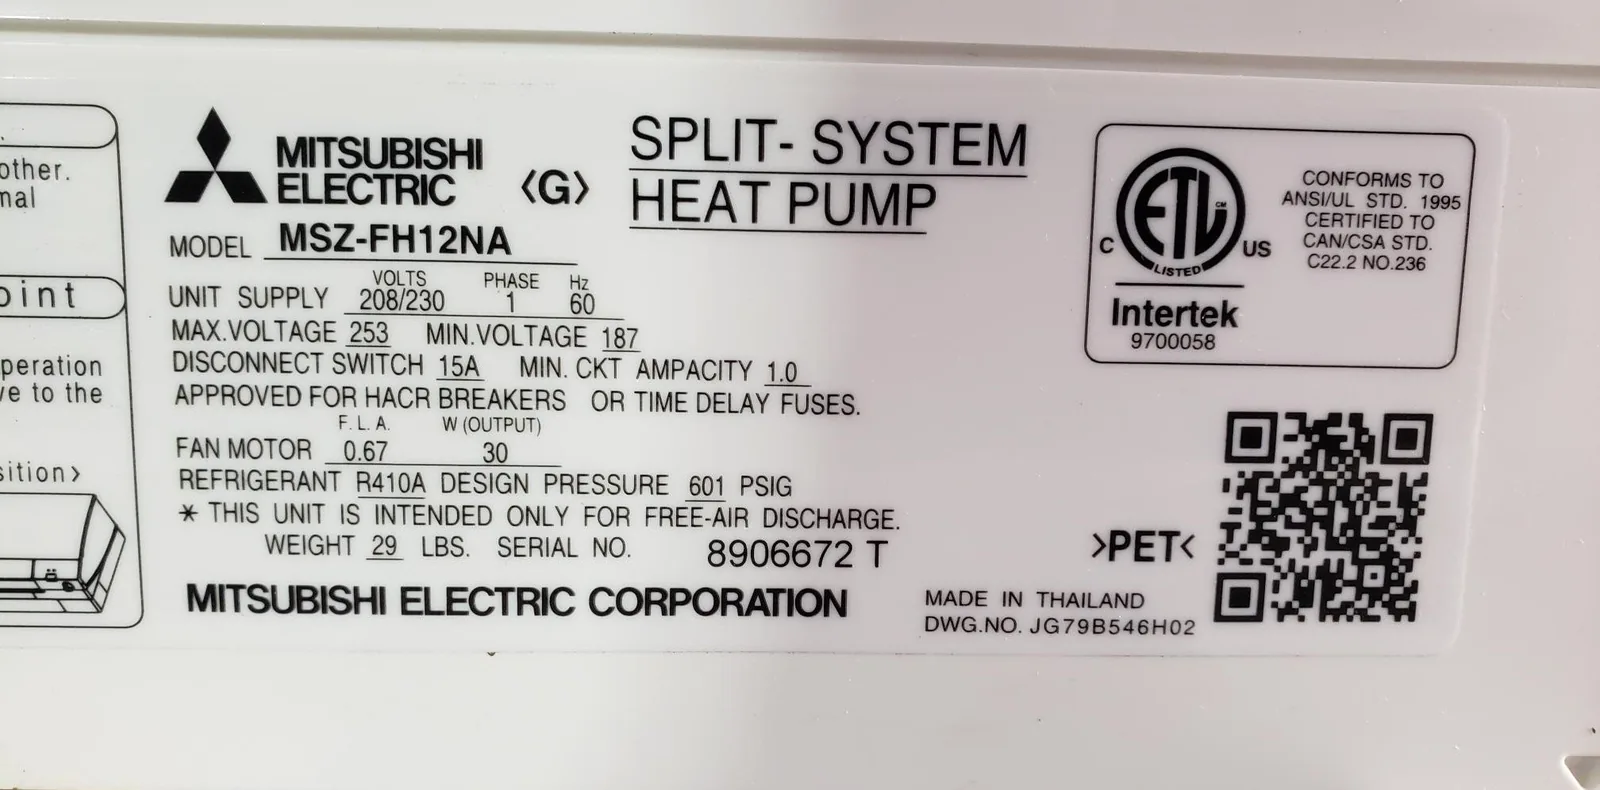
Check your model
The model number is on a label on the indoor unit, usually on the right side behind the front panel.
-
 2
2
Plug in the controller
Turn off the breaker, then plug the cable into the CN105 connector. It only fits one way.
-
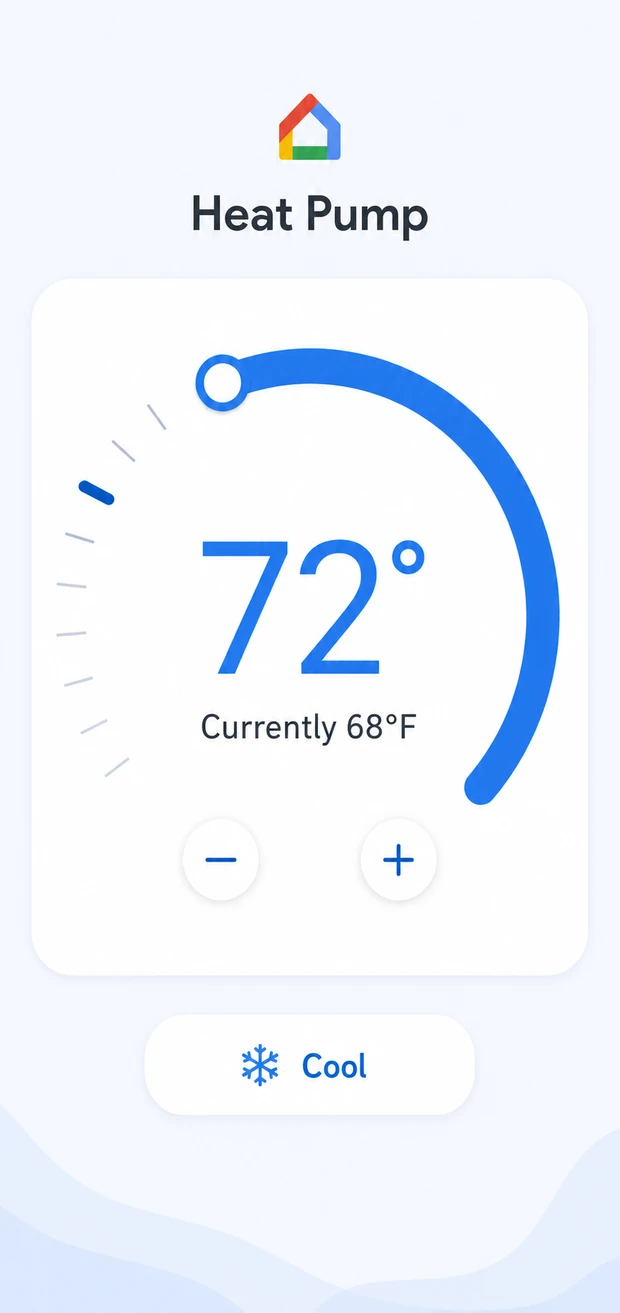 3
3
Add it to Google Home
Scan the pairing code once and the mini-split becomes a thermostat for temperature, voice, and routines.
The direct route at a glance. The Google Home panel is an illustration; the exact app layout can change between Google Home versions.
How the Direct Google Home Route Works
The hardware itself is a generic controller. It becomes Google Home-compatible only after you install the free firmware. That distinction matters: the product does not normally arrive with Google Home software pre-installed, and it does not carry a Works with Google Home certification badge.
After the browser installation, the controller plugs into the indoor unit. The Google Home app then adds it as a thermostat and passes the home Wi-Fi details to it over Bluetooth. There is no Wi-Fi form in the browser installer and no temporary hotspot to join.
The firmware is currently beta, newer and less tested than the ESPHome and Apple Home-compatible options. It is free to install, but its source code is not published. Those are meaningful trade-offs if open-source firmware or long field history is a requirement.
Pairing Walkthrough
- Install the free beta firmware. Connect the controller to a computer over USB and open the browser installer. Choose the Google Home and Alexa-compatible option. Nothing needs to be downloaded or compiled.
- Save the pairing code. The installer displays a QR code and a manual code after flashing. Keep either one available for the Google Home app. Reconnecting the board over USB lets the installer show it again.
- Connect the controller to the mini-split. Turn off HVAC power at the breaker, open the indoor unit, and plug the keyed cable into its service connector. Follow the wiring guide for placement and photos.
- Add it from Google Home. Choose the add-device path for an accessory with a pairing code, scan the code, approve the one-time uncertified-accessory notice, and assign the thermostat to a room.
-
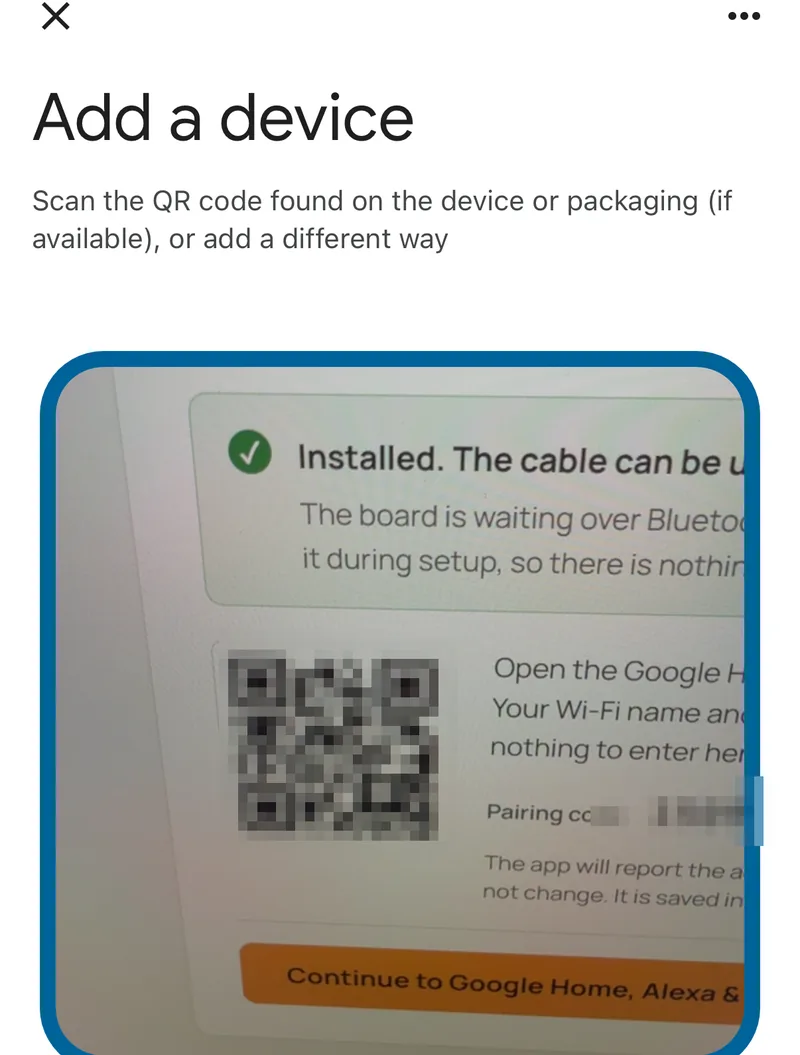
1Point Google Home at the pairing code the installer shows when flashing finishes. -
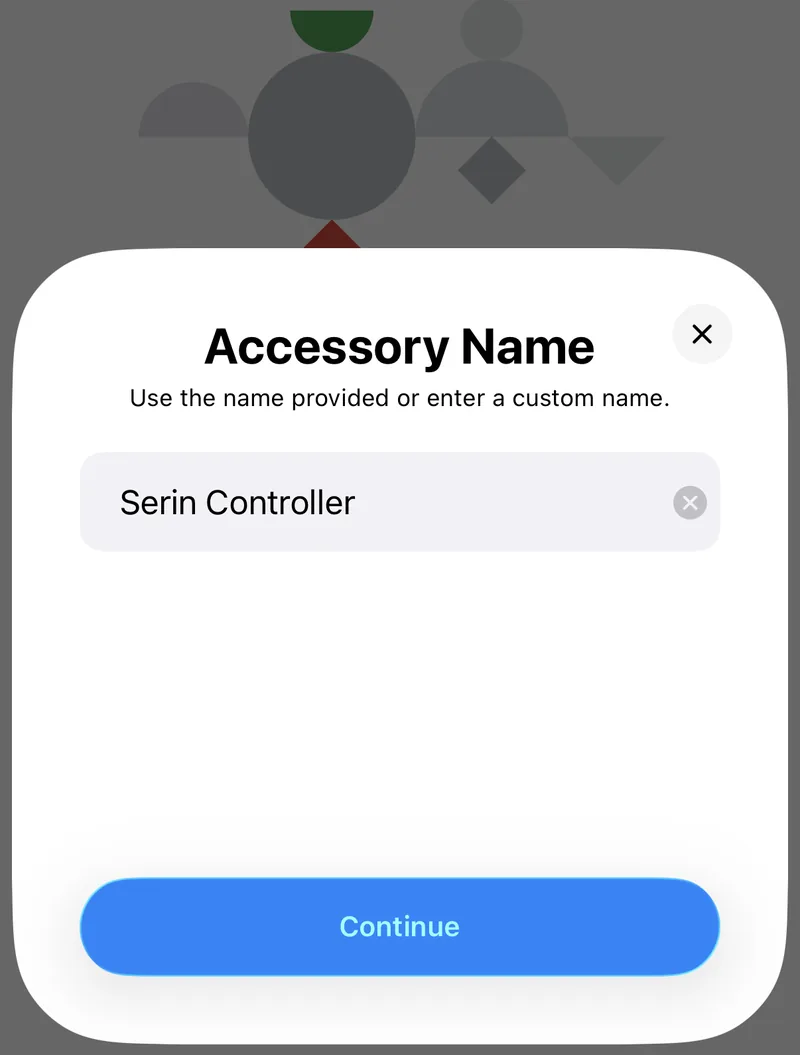
2Accept the suggested name or type your own. -
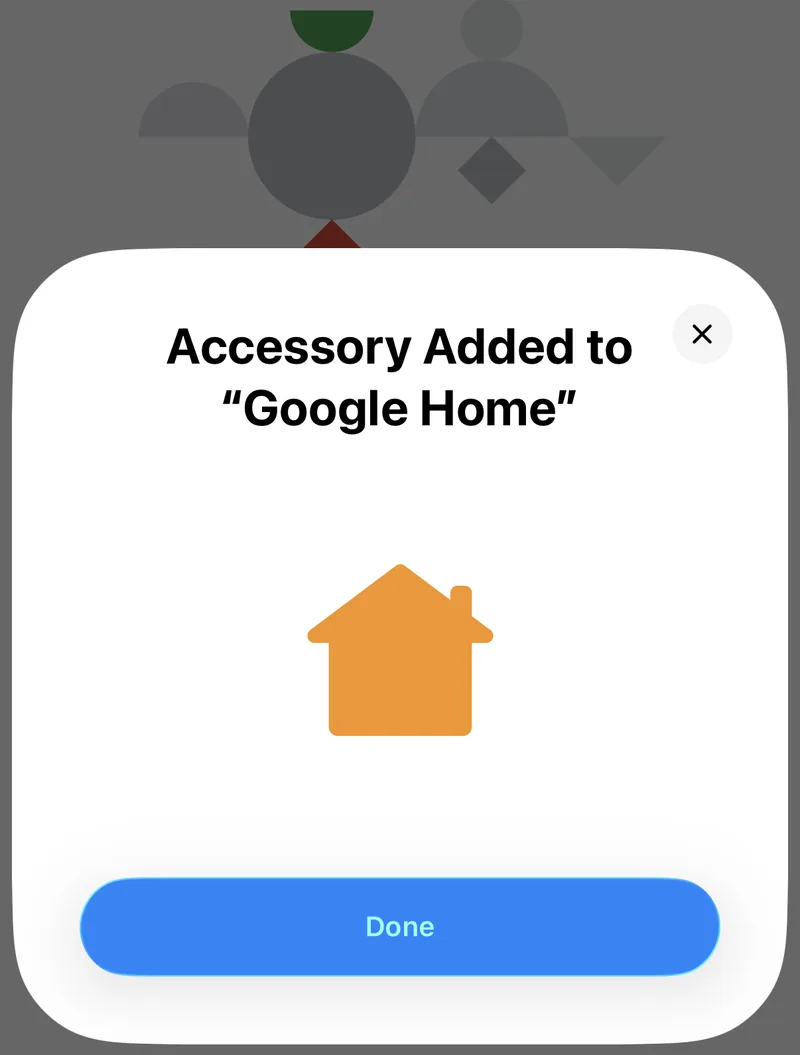
3Done. The controller is now a Google Home device.
The uncertified-accessory message is not a recurring alert. It appears because this free beta build has not been through the applicable certification program. Approving it completes pairing; it does not change the controls the thermostat exposes afterward.
What Google Home Can Control
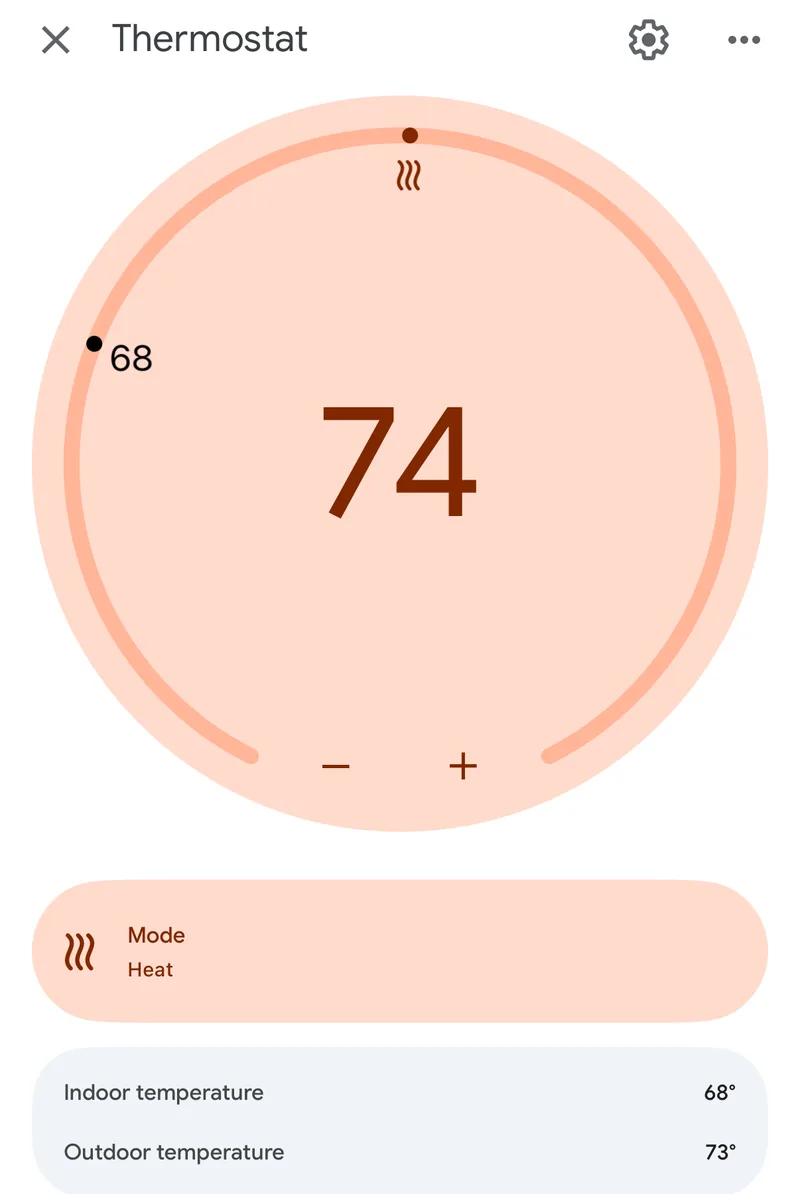
Google Home receives a standard thermostat rather than a complete mini-split remote. That keeps the common controls simple, but it also leaves several Mitsubishi features outside the app.
Available in Google Home
- Turn the unit on and off
- Heat, Cool, and Auto modes
- Target temperature
- Current room temperature
- Voice commands and household routines
Not reliably available there
- Dry and fan-only modes
- Fan speed
- Vane direction and swing
- Compressor and runtime diagnostics
- Error codes and live logs
The controller's built-in web interface retains controls and operating information that Google Home's thermostat card has nowhere to display. The factory handheld remote also continues to work for fan and vane adjustments.
Voice Commands and Routines
Voice follows the same thermostat controls. You can turn the room on or off, set a target temperature, switch between Heat, Cool, and Auto, or ask for the current temperature. Use the room name assigned during pairing, just as you would with a Nest thermostat.
Requests for dry mode, a particular fan speed, or vane direction have nothing to control in Google Home's thermostat view. No alternate wording fixes that limitation. Use the handheld remote or the controller's web interface for those settings.
Once paired, the thermostat can join Google Home routines alongside lights, plugs, and other devices. The routine can run without adding a Mitsubishi cloud account.
Route 2: ESPHome Through Home Assistant
If Home Assistant already runs the house, install ESPHome on the same controller instead. Home Assistant receives the full climate entity: additional modes, fan speed, vane position, and operating diagnostics. Its Google Assistant integration then exposes a thermostat to Google Home.
Google Home still receives the simpler thermostat controls listed above. The benefit is everything that remains available in Home Assistant for dashboards and automations—not a richer Google Home card.
This route also adds a dependency. Home Assistant must remain running and reachable for Google Home to control the mini-split. Home Assistant Cloud provides the easier bridge; the manual Google Assistant configuration is more involved. The Home Assistant integration guide compares the available routes in detail.
What If You Already Have Kumo Cloud?
Use it before buying anything else. Mitsubishi's Kumo Cloud integration can link its account to Google Assistant, and an already-installed adapter may cover the voice commands you need.
That route is cloud-to-cloud and depends on the factory adapter, Mitsubishi account, internet connection, and vendor services. It also has one practical advantage over the direct thermostat route: Mitsubishi documents voice control for features including vane direction. If you already own the adapter and voice is the only goal, keeping it is the sensible recommendation.
The Honest Limits
- The controller only fits compatible Mitsubishi-family equipment. Other mini-split brands need a universal infrared controller or their own platform-specific hardware.
- You open the indoor unit once. Power must be off at the breaker. There is no soldering or wire cutting, but it is still work inside HVAC equipment.
- The firmware is beta and not open source. It is newer and less field-tested than the other supported firmware choices.
- The build is not certified. Google Home shows a one-time uncertified-accessory notice during setup.
- A compatible hub and IPv6 are required. Confirm both before ordering, especially on managed or older home networks.
- Google Home does not expose every mini-split feature. Fan speed, vane direction, diagnostics, and some modes remain outside its thermostat card.
- The service connection is occupied. It generally cannot be shared with a factory Wi-Fi adapter or wired Mitsubishi wall controller. The handheld remote is unaffected.
Which Route Should You Take?
- Google Home is your main platform and you do not run Home Assistant: pair directly. It is the shortest local route and has no server in the middle.
- Home Assistant already runs your smart home: use ESPHome and bridge the resulting thermostat to Google Home.
- The factory Wi-Fi adapter is already installed: try Kumo Cloud's Google Assistant integration before spending more money.
- You cannot open the mini-split or own another brand: use a compatible infrared controller and accept the one-way-control trade-off.
- Fan speed, vane direction, or dry mode must appear inside Google Home: none of these routes reliably delivers that today.
For the direct route:
- Check your indoor-unit model.
- Get the pre-assembled Serin Controller or the DIY parts, one per indoor unit.
- Install the free beta firmware in the browser installer.
- Connect it with the breaker off and finish pairing with the setup guide.
The result is the mini-split you already own, now available beside the rest of your home in Google Home—without putting another vendor account between the app and the thermostat.
Related
- Google Home-compatible controller details
- Check your Mitsubishi model
- See the Serin Controller
- Every way into Home Assistant
Next step
Check your unit first
Type your indoor unit's model number for a verdict in under a minute. If it fits, the firmware flashes in the browser in about two minutes.