 serin labs
Every Way to Get a Mitsubishi Mini-Split into Home Assistant
You have a Mitsubishi mini-split on the wall and Home Assistant on a box in a closet. Somewhere between them is a climate.living_room entity that ought to exist and doesn't.
Four routes cross that gap, and they're genuinely different animals. Two go through a Mitsubishi cloud account and need no new hardware if you already own the factory Wi-Fi adapter. One talks to the indoor unit's own serial port and needs a $35 board. A fourth runs a different firmware build on that same board, added from the app. Which is right for you is mostly what's already screwed to your wall.
I sell the hardware both local routes use, so read the first two with that in mind. Everything below was verified against the projects' own repositories and docs in August 2026. These facts age in months, not years — check the dates in the table before trusting them.
Quick Facts: Mitsubishi mini-splits in Home Assistant, as of August 2026
- Four practical routes: Kumo (North America), MELCloud (Europe and most other markets), and a CN105 adapter running either ESPHome or the beta firmware (anywhere).
- Kumo is not a built-in Home Assistant integration. It's
dlarrick/hass-kumo, MIT-licensed, installed through HACS and listed in the HACS default store. Latest stable release v0.4.6, 29 May 2026. - MELCloud is a built-in Home Assistant integration (
melcloud), configured from the UI with your MELCloud email and password. IoT class: cloud polling. - CN105 + ESPHome uses
echavet/MitsubishiCN105ESPHome, an ESPHome external component, ~1,050 stars, committed as recently as 4 August 2026. It carries no license file. - The firmware is the newest of the three options on that same board, version 0.4.0, flashed from our browser flasher with binaries published via
Serin-Labs/serin-cn105. Local, free to install, not open source, and beta. Home Assistant adds it through a built-in integration, no ESPHome involved. - Hardware cost: Kumo and MELCloud need a Mitsubishi Wi-Fi interface — $0 if your unit already has one, roughly $227 new in North America, priced regionally elsewhere. The CN105 route needs an ESP32 board and cable per indoor unit, from about $15 DIY or $35 pre-assembled.
- What breaks: the cloud routes break when Mitsubishi changes its API or your account; the local route breaks where a firmware quirk meets a community-maintained protocol implementation.
Route 1: The Kumo Integration (North America)
If you're in the US or Canada and your unit already has a Kumo Cloud Wi-Fi interface fitted, this is your cheapest first move. It costs nothing.
The integration is Mitsubishi Kumo Cloud, maintained by @dlarrick at dlarrick/hass-kumo. MIT-licensed, and not shipped with Home Assistant — there is no kumo component in core. Its own README is blunt about it: "Kumo is not included in Home Assistant as an official integration."
It's in good shape. Latest stable release v0.4.6 (29 May 2026), v0.4.7-beta on 20 June 2026, commits landing as recently as 1 August 2026. It depends on pykumo, the same author's Python library, also MIT and last updated 26 July 2026.
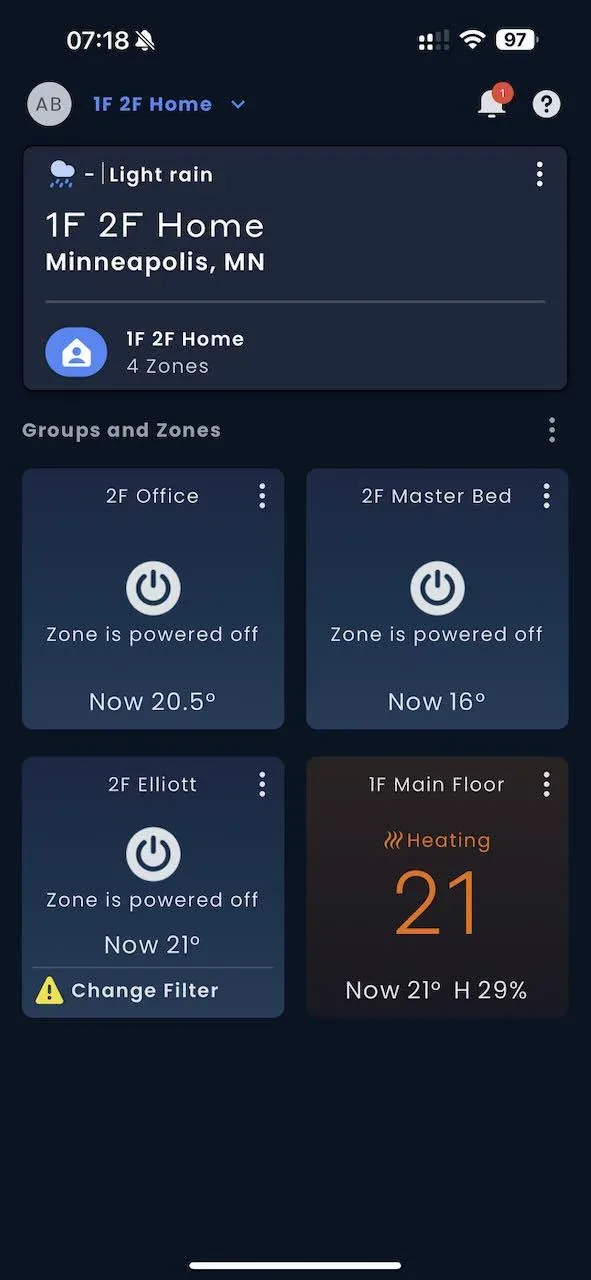
The setup sketch:
- Install HACS if you haven't. Search its Integrations panel for "Kumo," open Mitsubishi Kumo Cloud, Install, restart Home Assistant. It's in the HACS default store, so there's no custom repository to add.
- Go to Settings ▸ Devices & Services ▸ Add Integration and search for Kumo.
- Enter your KumoCloud email and password. The integration pulls your units, their IP addresses, and their local security keys from Mitsubishi's service.
- Assign each discovered unit to an Area. With Home Assistant's DHCP integration enabled, Kumo finds adapter IPs automatically from known MAC prefixes; otherwise you type them in.
- Set DHCP reservations for each indoor unit on your router. The README calls this "strongly recommended," and it is — the integration reaches the adapters by IP.
Is the Kumo Integration Actually Local?
More than its name suggests. The manifest declares its IoT class as local polling, not cloud polling: once Kumo has credentials, it talks to each Wi-Fi adapter directly on your LAN, and a prefer_cache option skips the startup call to Mitsubishi's servers entirely. The cloud is a credential broker here, not a relay for every command.
The catch is that the broker is still a single point of failure at the moments you need it: first install, and any reconfiguration.
Route 2: The MELCloud Integration (Europe and Most Other Markets)
Outside North America, Mitsubishi's app is MELCloud, and this route is the easiest of the three by a distance: you install nothing.
MELCloud is a built-in Home Assistant integration. The melcloud component ships in core, has a UI config flow, and its current code owner is @erwindouna. It's under active development — changes landed through 2 August 2026, including new select and number entities for air-to-water zones in late July.
MELCloud's history is the messy one, and it's worth knowing how it resolved. The integration originally ran on pymelcloud, which is now archived — last commit February 2024. Home Assistant replaced it with python-melcloud in April 2025, and that library has been maintained since, most recently in June 2026. So if you read that MELCloud was riding a dead dependency: true once, not any more.
The setup sketch:
- Go to Settings ▸ Devices & Services ▸ Add Integration and search for MELCloud.
- Enter the email address and password for your MELCloud account.
- Your units appear. Air-to-air heat pumps get a climate entity plus sensors; air-to-water systems get per-zone climate entities, a water heater entity, and more.
The honest limitation is in the manifest: MELCloud's IoT class is cloud polling. Unlike Kumo, there's no local path. Every state read and every command goes to Mitsubishi's servers and back. Internet down, MELCloud down, or account trouble, and your climate entity is a decoration. Open issues in Home Assistant core report authentication loops and setup errors that don't retry — not universal, but the shape of failure to expect here.
Route 3: CN105 and ESPHome (Local, Anywhere)
Every Mitsubishi Electric indoor unit that works with Kumo Cloud or MELCloud has a CN105 serial port on its control board. That port is how the factory adapter talks to the unit — the MAC-587IF-E's own installation manual routes its cable to CN105. An ESP32 board on the same port speaks the same protocol, with no Mitsubishi account in the picture.
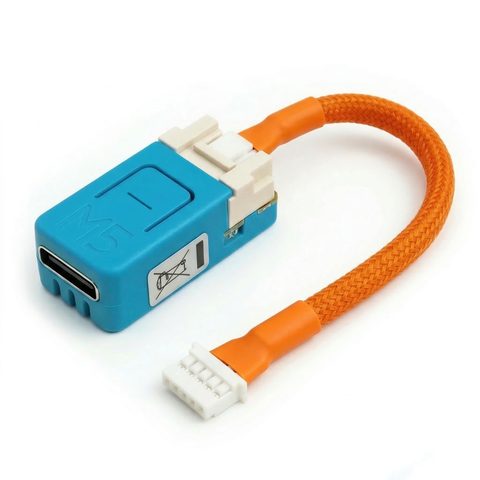
The software is echavet/MitsubishiCN105ESPHome, an ESPHome external component with about 1,050 stars and commits as recently as 4 August 2026, the latest adding a setpoint table for the MSZ-A24NA. Its most recent tagged release is 2026.5.2, 11 May 2026.
The setup sketch, DIY: build a level-shifted circuit per the SwiCago README, write an ESPHome YAML with external_components: - source: github://echavet/MitsubishiCN105ESPHome, a uart: block at 2400 baud, and climate: - platform: cn105, then compile and flash.
The setup sketch, the way we package it:
- Confirm your unit has a CN105 port. If it runs Kumo Cloud or MELCloud today, it almost certainly does.
- Flash the ESPHome firmware from your browser over USB. Nothing to install, nothing to compile.
- Join it to Wi-Fi, then Adopt it in the ESPHome dashboard inside Home Assistant and click Install. Home Assistant discovers the adopted device; you click Configure.
- Power down the indoor unit at the breaker, clip the cable onto CN105, close the cover, power back up.
- Use the YAML generator to add a remote temperature sensor, dual setpoints, or compressor-frequency diagnostics, and push it over Wi-Fi. Full walkthrough: the ESPHome setup guide.
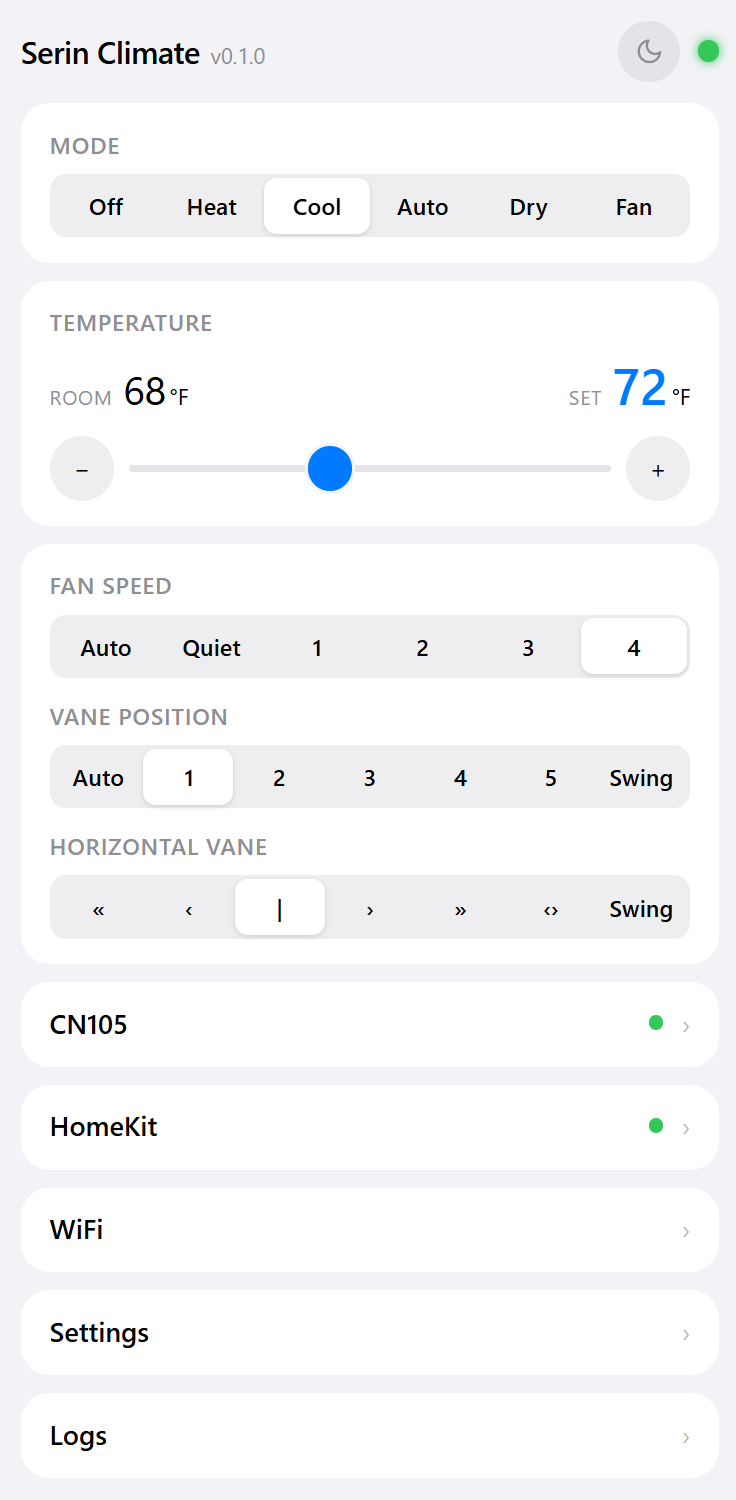
One board per indoor unit, because there's one CN105 port per indoor unit. On a multi-head system that's a real cost multiplier — here's what it looks like across five zones.
Who Maintains the ESPHome Route?
Three things about its provenance, none of them in the marketing:
- It's an adaptation of
geoffdavis/esphome-mitsubishiheatpump, now archived — the upstream stopped, the fork carried on. So the maintained project and the one most old forum posts link to aren't the same repository. - It builds on SwiCago/HeatPump, the Arduino library that reverse-engineered the CN105 protocol in the first place. Credit belongs there. That library ships GPL-3.0 in its repo while its README says LGPL-3.0; full picture on our licenses page.
MitsubishiCN105ESPHomeitself declares no license. Its README cautions that it's an unofficial implementation of a reverse-engineered protocol, that not all units support every feature, and that you use it at your own risk. It's an external component, not managed by the core ESPHome project.
ESPHome itself is a different story: the esphome integration ships in Home Assistant core, is local push rather than polled, and carries HA's platinum quality scale — the top tier.
Route 4: The Firmware (Local, No ESPHome)
Same $35 board and CN105 port as Route 3. Only the firmware changes. The browser flasher offers this firmware alongside ESPHome, version 0.4.0 in its manifest.
The mechanics are shorter. No ESPHome dashboard, no adoption step, no YAML. Home Assistant adds the board through a built-in integration that runs its own controller app. Home Assistant OS is the only supported way to run it.
The board is added from the Home Assistant companion app rather than the browser. Hold the phone near it and it takes your Wi-Fi credentials over Bluetooth. There's no hotspot to join, and pairing shows a one-time uncertified accessory notice.
Now the honest part. The firmware is beta, less tested than ESPHome, and free to install but not open source. A plain thermostat entity also expresses less. Heat, cool, and auto setpoints pair reliably; dry mode, fan mode, fan speed, and vane control don't, and compressor diagnostics are gone.
If you're all-in on Home Assistant, ESPHome stays the deeper route. The firmware earns its place when the same board must also answer to Apple Home, Google Home, or Alexa without a bridge. Those get their own posts.
The Comparison, Date-Stamped
| Kumo (HACS) | MELCloud (built-in) | CN105 + ESPHome | CN105 + firmware | |
|---|---|---|---|---|
| Region | North America | Europe and most other markets | Anywhere | Anywhere |
| In Home Assistant core? | No — custom component via HACS | Yes | No — ESPHome external component | Yes, a built-in integration (runs its own controller app) |
| Project | dlarrick/hass-kumo |
homeassistant/core ▸ melcloud |
echavet/MitsubishiCN105ESPHome |
Binaries via Serin-Labs/serin-cn105; source not published |
| License | MIT | Apache-2.0 (HA core) | None declared | Free, not open source |
| Status, Aug 2026 | v0.4.6 stable (29 May 2026); commits to 1 Aug 2026 | Commits to 2 Aug 2026 | Commits to 4 Aug 2026; release 2026.5.2 | v0.4.0 (manifest); beta |
| IoT class | Local polling (cloud for credentials) | Cloud polling | Local | Local |
| Mitsubishi account | Required at setup | Required, always | None | None |
| Extra hardware | None if the Kumo adapter is fitted | None if the Wi-Fi interface is fitted | ESP32 board + CN105 cable, per indoor unit | Same board and cable |
| Hardware cost | $0, or ~$227 for the adapter (NA) | $0, or the interface at regional pricing | ~$15 DIY, $35 pre-assembled | $35 pre-assembled |
| Setup effort | HACS install, restart, sign in | Sign in | Flash, adopt, open the unit's cover | Flash, commission in the app, open the cover |
| Opening the indoor unit | No | No | Yes, once | Yes, once |
| Works with internet down | Yes, with prefer_cache |
No | Yes | Yes |
| Diagnostics beyond climate | RSSI, outdoor temp on Kumo Station, filter/defrost attributes | Energy and temperature sensors; more on air-to-water | Compressor frequency, outside air temp, runtime, error codes | None; no compressor data on this route |
Verified 6 August 2026 against each project's repository, manifest, and README. Wi-Fi interface pricing comes from our smart-control comparison; ours is on the product page.
Which Route Breaks When the Vendor Changes Something?
Nobody asks this until it's too late, and each route answers it differently.
Kumo breaks at the API. In May 2026 the integration shipped a release titled "Update to use Kumo Cloud v3 API only" — a change its maintainer flagged in the beta as "a major change so I will wait for feedback before releasing as latest." It followed Mitsubishi's API because it had no choice. There's an open issue right now where a user can't regenerate their credential cache because the Kumo API isn't returning the fields the integration needs. That's the dependency in one line: a local connection you can't re-establish without a cloud that cooperates.
MELCloud breaks at the account and the library. The swap from an archived pymelcloud to a maintained python-melcloud is exactly this failure mode, caught and fixed. That it happened inside Home Assistant core is the argument for this route — a built-in integration has a code owner, a review process, and a release train behind it.
ESPHome breaks at the protocol edges. No vendor can revoke your access, but nobody can guarantee your specific unit either. The August 2026 commits included a setpoint-table fix for one model and a rounding fix for its temperature encoding — a long tail of per-model quirks, fixed as owners report them. Common unit, uneventful. Unusual unit, and you may be the person filing the report.
Do You Actually Need to Buy Anything?
Not necessarily, and this is where I'd rather lose the sale than mislead you.
If your indoor unit already has a Mitsubishi Wi-Fi interface fitted, Kumo or MELCloud gets you a climate entity this evening for nothing, without opening anything or touching a breaker. Try that first. If it works and you're content, you're done.
Buy hardware when one of these is true:
- You don't have the adapter. New, it's about $227 in North America. A CN105 board is $35 pre-assembled, or about $15 in parts if you'd rather build it.
- You want the cloud out of the loop entirely. Kumo gets close; MELCloud doesn't get there at all.
- You want the data. Compressor frequency, outside air temperature, runtime hours, and error codes come off the serial port. No cloud API exposes that set.
One thing to check first: the factory adapter and a CN105 board both want the CN105 port, and most indoor units have exactly one. Some newer units carry a separate CN110 for the factory Wi-Fi module alongside CN105, so check yours rather than assuming. On a single-port unit you're choosing one occupant, not stacking two.
Who Should Take Which Route
- North America, adapter already fitted, and you'd rather not open the unit. Install Kumo through HACS. It polls locally once set up, and
prefer_cachekeeps it running through an outage. Zero cost. - Europe or another MELCloud market, interface already fitted. Add the built-in MELCloud integration. Nothing to install, maintained inside Home Assistant core. Accept that it's cloud-polled.
- No adapter, or you want it genuinely local. CN105 with ESPHome. Cheapest per zone, the only route that shows you what the compressor is doing, and the only one where nobody can change the terms on you.
- You want one board in Home Assistant and a non-Apple voice ecosystem, no bridge. Flash the firmware instead of ESPHome. It's beta and gives up the compressor diagnostics.
- You're on Apple Home rather than Home Assistant. Different question, answered separately — including bridging one into the other.
If the third route is yours:
- Check your unit for a CN105 port. Five minutes, and it's the only step that can disqualify you.
- Get the board and cable, one set per indoor unit, or the pre-assembled CN105 ESP32 controller.
- Flash the ESPHome firmware from your browser, then follow the setup guide to adopt it. If the flash stalls, it's usually the cable.
- Regenerate your config in the YAML generator once you know what your unit supports.
Still weighing whether to leave the factory app at all? That's a separate argument.
Two of these routes borrow Mitsubishi's cloud to reach a heat pump ten feet away. The other two just pick up the wire that was already there.
Related
- ESPHome setup guide
- The ESPHome YAML generator
- The Kumo Cloud alternative
- Every smart-control option compared
Next step
Check your unit first
Type your indoor unit's model number for a verdict in under a minute. If it fits, the firmware flashes in the browser in about two minutes.