 serin labs
How to Add a Mitsubishi Mini-Split to Alexa
Ask Alexa to turn the bedroom heat pump down and the answer is that no device by that name exists. Not a phrasing problem. There really is no device.
A Mitsubishi mini-split arrives with a handheld remote and, if someone paid for it, a factory Wi-Fi adapter. Neither is an Alexa device. The gap between a good heat pump and a house full of Echo speakers is why this search exists.
Two things close it. A $35 board on the indoor unit's CN105 service port can pair into Alexa through an Echo you probably already own. Or, in a house already running Home Assistant, the same board on ESPHome reaches Alexa through it. There's also a factory answer worth taking seriously first.
Quick Facts: Mitsubishi mini-splits in Alexa, as of August 2026
- Direct route: an ESP32 board on the indoor unit's CN105 port running the firmware, added from the Alexa app. One board per indoor unit.
- Cost: about $35 pre-assembled, or roughly $15 in DIY parts.
- The firmware: version 0.4.0, free to install, beta, and not open source. Boards ship unflashed.
- Alexa-side requirement: a compatible Echo, which does the pairing locally, plus the Alexa app.
- Flashing: from a browser over USB, about two minutes. No app, no compiler.
- Pairing: Alexa hands the board your Wi-Fi credentials over Bluetooth while it is being added.
- What Alexa gets: on and off, heat, cool and auto with setpoints, and the current room temperature.
- What it doesn't: dry mode, fan-only mode, fan speed, and vane direction don't come through this route.
- Factory alternative: Mitsubishi publishes a Kumo Cloud skill for Alexa, for households that already own the Wireless Interface. Cloud and account based, not local.
Can Alexa Control a Mitsubishi Mini-Split?
Yes, and this question has three real answers rather than one grudging workaround.
Start with the factory option, because for some readers it's free and it's better. Mitsubishi Electric Trane HVAC US released a Kumo Cloud skill for Amazon Alexa. Enable it in the Alexa app, link the account, and voice commands can turn a zone or the whole system on and off, change the mode for a zone or a group, set a setpoint, and ask for zone status including current temperature and humidity. A genuine feature list, and wider voice reach than the route this site sells.
The requirement is the expensive part. Every indoor unit needs a Mitsubishi Electric Wireless Interface fitted, the adapter that runs about $227 new in North America. Already on the wall? Enable the skill and stop reading. Buying them for voice control is a strange way to spend money.
The other two answers start with the same $35 board on the unit's service port. One pairs it straight to Alexa. The other runs it on ESPHome inside Home Assistant, which hands a thermostat to Alexa.
Route 1: Pairing Through an Echo
The factory Wi-Fi adapter has to plug into something. On nearly every Mitsubishi Electric indoor unit that something is CN105, a small serial connector on the control board, and the protocol crossing it is no secret. Put a different device on that connector and the heat pump answers it exactly the same way.
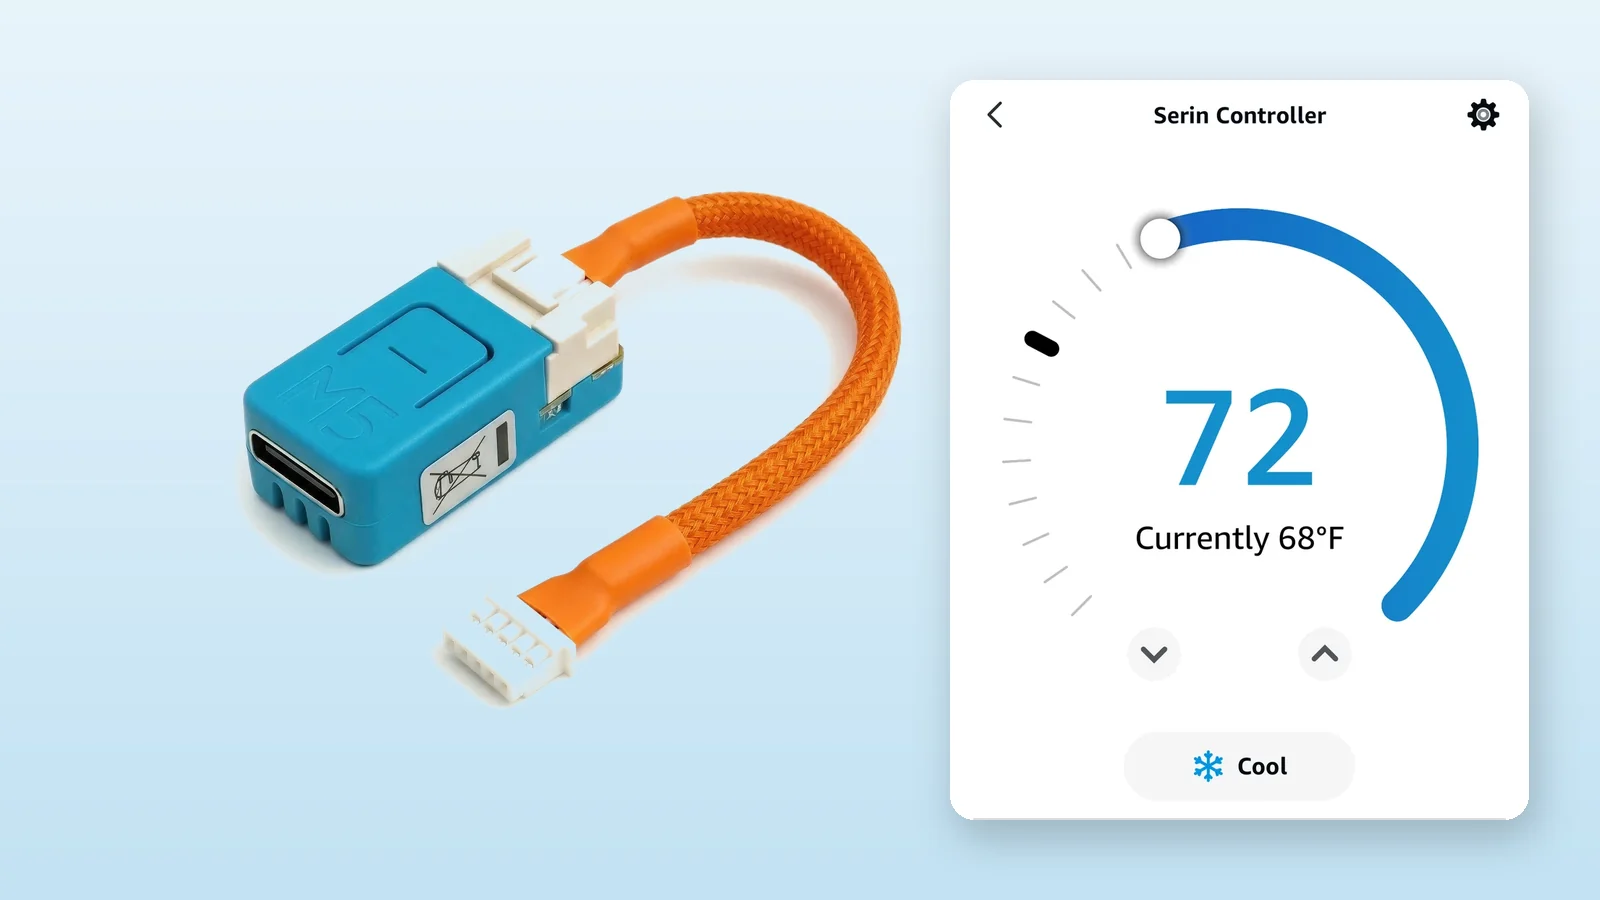
The Serin controller is that different device: an M5Stack ESP32 module, off the shelf, with a CN105 cable on the end. Hardware alone gets nobody to Alexa. The Alexa part arrives afterward, as firmware selected on a web page and written to the board over USB.
Three firmware options run on it, and the newest one is the one that pairs straight into Alexa. That's version 0.4.0 today, for the M5Stack Atom S3 Lite and the NanoC6, and it costs nothing to install. Its source, unlike the other two options, isn't published. The flasher labels it beta, which is honest arithmetic: months on customer walls against years for the ESPHome and Apple Home firmware.
What makes this pleasant on Alexa specifically: no bridge, no hub purchase, no skill to enable. Amazon's documentation describes a compatible Echo as the thing that discovers and connects a new device to Alexa locally. The speaker on the shelf is the infrastructure.
Which Echo Models Can Do the Pairing
This step decides whether Route 1 exists for a given house, so it deserves a straight answer rather than a confident-sounding list.
The capability arrived on Echo hardware as a software update rather than a new product line, so an Echo bought in the last several years and kept updated is likely on the right side of it. Amazon publishes the current model list in its own documentation, and that's what to check before ordering a board. I'm not printing a table, because that list moves and a snapshot ages badly. The Alexa app answers the question too: if adding a device offers to scan a pairing code, the path exists.
There's also a purpose-built option. The Echo Hub is a dedicated smart home controller rather than a speaker, bridging Wi-Fi, Bluetooth, Zigbee, Sidewalk, and Thread devices. For a house with a lot of local gear in it, that's the tidier center.
And the consequence, because a post that only lists happy paths is useless: no qualifying Echo means no direct route. The pairing needs a controller, Alexa's controller is the Echo, and nothing on the board substitutes for one. The remaining choices are an Echo purchase, Home Assistant, or the Kumo skill.
Pairing Walkthrough
Anyone who has set up an ESP32 before is bracing for a temporary hotspot and a network password typed into a form. Neither one shows up. The flasher never asks which Wi-Fi the board should join.
The app runs that errand from the other end, over Bluetooth, while the device is being added. Flash first, mount second, and let Alexa put the board on the network last.
- Flash the board at the browser flasher in Chrome or Edge. Boards ship unflashed, so this is required, and it takes about two minutes. Pick the Google Home and Alexa firmware, click install, and accept the erase option when switching firmware.
- Mount the board, connect the cable to CN105 on the indoor unit, restore power.
- In the Alexa app, add a device and choose the path for an accessory with its own pairing code. Scan the QR code the flasher displayed, or type the manual code under it. The code never changes, and the flasher keeps a copy in that browser. Reconnect over USB any time to read it back.
- Let Alexa hand over the credentials, approve the notice below, and assign the device to a room.
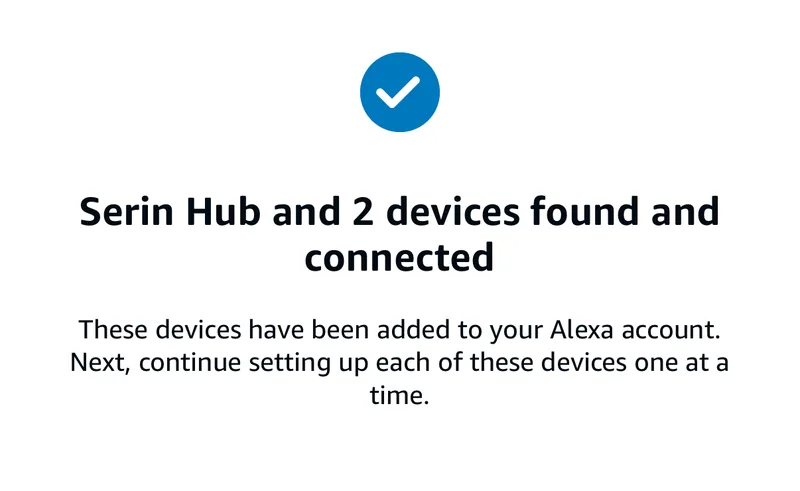
About that notice in step four. Alexa isn't inventing it and neither am I: this firmware has not been certified. A one-time prompt calls the accessory uncertified and asks for confirmation before continuing, and confirming is the right move. Certification is a compliance program with a fee attached rather than a verdict on whether the pairing holds, and Alexa stops raising it once the device is in.
What the Alexa App Can Control
Alexa has one description for a thermostat, and that description is where the ceiling sits. Not an Alexa limitation, not a firmware limitation. The shape of the category.
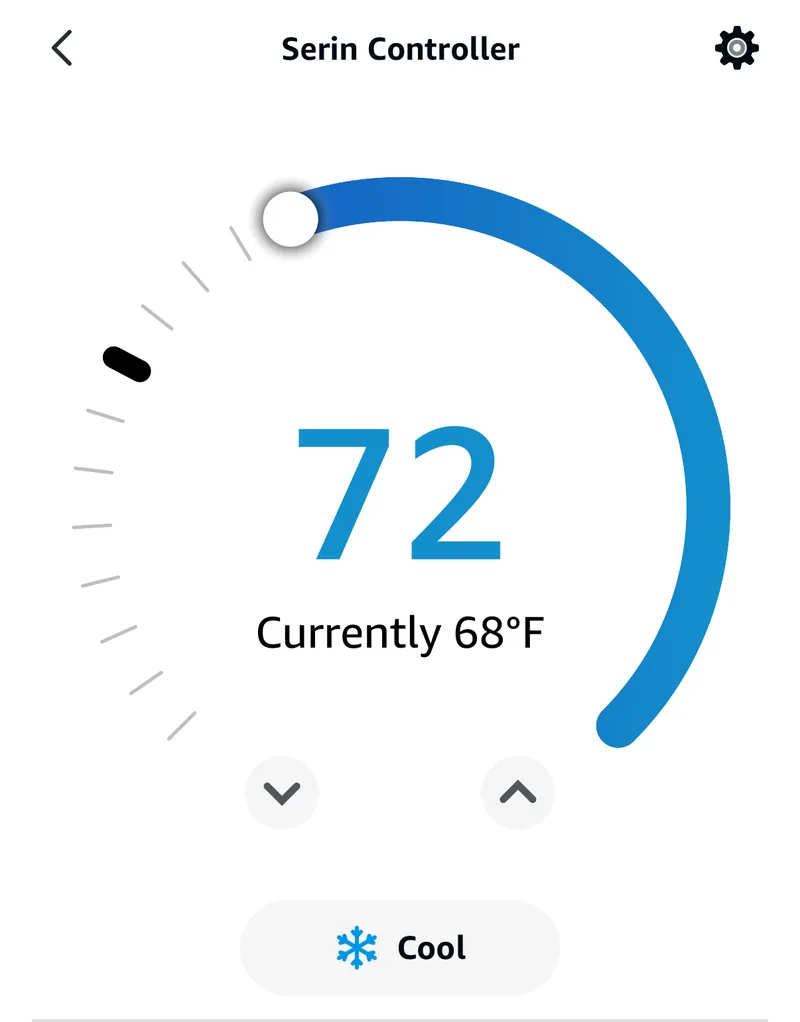
Reliable: power on and off, heat, cool, and auto modes each with a setpoint, and the current room temperature reported back. Those setpoints have been core to what a thermostat means for years, and they cover nearly every real interaction with a mini-split.
Not reliable: dry mode, fan-only mode, fan speed, and vane or swing direction. Dry and fan-only do appear in the underlying mode list, but no standardized way exists for a device to advertise which of them it supports, so apps apply their own assumptions and often show neither. Fan speed and vane are a flatter gap: a thermostat has no representation for them at all. There is a separate room air conditioner category that carries fan control, but pairing a mini-split as a thermostat doesn't produce it.
Absent completely: compressor frequency, outside air temperature, runtime, and error codes. The thermostat model has nowhere to put them.
Which makes for an uncomfortable comparison, better made here than discovered later. The Kumo skill reaches further by voice: whole-system modes, groups of zones, humidity. The direct route trades all three for a heat pump answering to an Echo in the same house, with no Mitsubishi account and no adapter purchase in the path.
Voice Commands
Voice can't exceed the card. Whatever the app can't show, no phrasing will reach, so treat "Alexa, ..." as spoken access to the same short list.
That list is setting a target temperature, switching among heat, cool, and auto, turning the thermostat off, and asking the current temperature. Whatever the card exposes, voice reaches, keyed off the name and room assigned during pairing. Naming the device something a person would say out loud is the best move at setup time.
Requests for dry mode, a fan speed, or a vane position have nothing to bind to and will fail. The bundled remote still does all three, and so does an ESPHome install. Routines are the compensation: once the mini-split is an Alexa thermostat it can sit in a routine with everything else, triggered on a schedule, by a sensor, or by voice, with no vendor cloud in between.
Route 2: ESPHome Through Home Assistant
If Home Assistant is already running, the calculus changes, and the extra hop buys a lot.
Same board, same port, different firmware. Flashed with ESPHome, the controller becomes a Home Assistant climate entity with everything the serial port exposes: every mode including dry and fan-only, fan speed, vane position, and the compressor diagnostics a thermostat card has no words for. Home Assistant can then expose selected entities onward to Alexa by one of two documented paths: a Home Assistant Cloud subscription, which spares the dynamic DNS, certificate, and router-port work, or a self-built Alexa Smart Home skill, which needs an Amazon developer account, an AWS account, and Home Assistant reachable over HTTPS.
What survives the hop is the thing to weigh. Home Assistant keeps the rich entity, Alexa receives a thermostat. Voice and the Alexa card land close to where Route 1 leaves them, while every Home Assistant dashboard and automation gets the full heat pump.
The comparison of the ways into Home Assistant, with verified project status for each, is already written up in every way to get a Mitsubishi mini-split into Home Assistant. No sense repeating it.
Route 2 costs a dependency. Home Assistant has to be running and reachable or Alexa loses the mini-split entirely. Route 1 has no such box in the middle, only an Echo that was going to be plugged in anyway.
Which Route Should You Take?
What's already in the house decides this, more than any feature list.
- Echo speakers, no Home Assistant, no factory adapter. Take Route 1. Confirm the Echo qualifies, flash the firmware, and pair it in the Alexa app. It is beta and the only route with nothing between the Echo and the unit.
- Home Assistant already running. Take Route 2. ESPHome is the deeper integration and Home Assistant forwards a thermostat to Alexa. What Alexa shows is similar either way, so decide based on what the dashboard should hold.
- Wireless Interface already fitted, voice control is the entire goal. Enable the Kumo Cloud skill first. It costs nothing extra, and its voice coverage beats the direct route on modes, groups, and humidity.
- No qualifying Echo in the house. There is no direct route. Add an Echo, go through Home Assistant, or use the Kumo skill.
- Fan speed, vane direction, or dry mode from the Alexa app specifically. Nothing delivers that today, and no firmware update will, because the limit is in what a thermostat means to Alexa.
If Route 1 is the one, it's three steps.
- Check that the unit has a CN105 port. Five minutes, and the only step that can rule a unit out.
- Get the board and cable, one set per indoor unit, or the pre-assembled CN105 ESP32 controller.
- Flash the firmware, then add it in the Alexa app and scan the code. Full walkthrough in the setup guide.
Amazon is never going to teach Alexa about Mitsubishi heat pumps, and it doesn't have to. The missing piece was a device on the wall willing to answer as a thermostat. That turns out to cost $35 and one open service port.
Related
- Alexa-compatible controller details
- The Google Home route
- The browser flasher
- ESPHome or Apple Home
- Every way into Home Assistant
Next step
Check your unit first
Type your indoor unit's model number for a verdict in under a minute. If it fits, the firmware flashes in the browser in about two minutes.