 serin labs
Flash the firmware
The entire install runs in this browser tab. Follow the steps on the left; the console on the right shows what the board reports.
Install ESPHome, the Apple Home compatible or the Google Home, Amazon Alexa & SmartThings compatible firmware on your board over USB. Every build is free, and flashing takes about two minutes.
Checking browser support…
Use a USB data cable. Charge-only cables will not be detected.
STEP 1 OF 5 — CONNECT

Scan with the Home app on your iPhone, or type the setup code. This is the same code from the initial setup; it does not change.
Scan from the Google Home or Amazon Alexa app, or type the pairing code. This is the same code from the initial setup; it does not change.
Setup code
Shown from this browser's saved record. The board itself was not accessed, and no cable is needed.
No device was selected
If the board did not appear in the list, confirm it is connected with a data cable, then click Connect again.
The board was disconnected
This does not harm the board. Reconnect it with the same cable and click Connect again.
The connection failed
Selected: . You can change it once the board is read.
Connect the board
Connect the board with a USB data cable, click the button below, and select the board from the list your browser shows. The console on the right displays what is read from the board. Nothing is written until you choose to install.
Connect the board
Click the button and select the board from the list your browser shows. It usually appears under the name of its USB chip, such as "USB JTAG/serial debug unit".
Flash another board
Connect the new board and click Connect. The saved device above is kept; each board receives its own entry and pairing code.
Works with: M5Stack NanoC6 and Atom S3 Lite, tested with every release. ESP32-C3 SuperMini boards and generic DevKits generally work as well.
STEP 1 OF 5 — CONNECT
The port opened, but the board did not respond
The most common causes are a charge-only cable, a board that requires the BOOT button held while plugging in, or missing USB serial drivers.
- Try a cable known to carry data, such as one used to sync a phone.
- Hold the board's BOOT button while plugging it in, then click Connect again.
- Older boards require a one-time installation of the CP210x or CH340 drivers.
STEP 1 OF 5 — CONNECT
This chip is not supported
The board identified itself as an older ESP32. The firmware requires an ESP32-C6, S3 or C3. The cable and connection are working; the chip generation is too old.
A newer board is required
The M5Stack NanoC6 costs about $7 and is the board every release is tested on. The parts list includes links and alternatives.
STEP 1 OF 5 — CONNECT
This browser does not support USB flashing
Safari and Firefox do not support Web Serial, which flashing requires. This is a browser limitation, not a problem with your board or cable.
Open this page in Chrome, Edge or Brave
All three work on Windows, macOS and Linux. Copy the link below and open it in one of them. The board does not need to be connected until then.
AVAILABLE IN THIS BROWSER
STEP 2 OF 5 — CHOOSE FIRMWARE
Supported chip, untested board
This ESP32 board is not recognized by its USB id. The firmware targets the chip, so it should work, but this exact board has not been tested.
An error occurred
Select the firmware to install
Your board is supported. All builds are free. Switching later takes another two-minute flash.
The Apple Home and the Google Home, Alexa & SmartThings builds are not certified by Apple, Google, Amazon or Samsung. Pairing shows a one-time uncertified accessory notice.
Not sure which? Compare the options →
The board already runs . Reinstalling the same version is safe and can repair a corrupted install.
This build is older than the installed version (). Settings from the newer version may be lost.
Switching away from Apple Home removes its HomeKit pairing. Remove the accessory in the Home app first, or it will show as "not responding".
"Erase everything first" is on. Wi-Fi credentials and any pairing on the board will be removed, and setup starts over. It was turned on automatically: this build cannot be installed over what is on the board. Uncheck it to keep the board's current contents.
Only need to change the Wi-Fi network? The board can be reconnected without reinstalling.
RESTARTING
Restarting the board
Nothing is being written. The board is leaving the update mode it was put into so its firmware can run and answer over the cable. Keep the cable connected.
Restarting the board…
This can take up to a minute if the board is trying to rejoin a network it can no longer reach.
STEP 3 OF 5 — INSTALL
Writing the firmware
Do not disconnect the cable. If it is unplugged, no harm is done; reconnect and start the write again. The console shows the raw write output.
Preparing the write
Next step: connect the board to Wi-Fi. 2.4 GHz networks only.
STEP 3 OF 5 — INSTALL
The write stopped at 0%. The board stopped responding.
The board remains in bootloader mode and can normally be recovered by starting the installation again.
Before trying again
- Reseat the USB cable at both ends. Avoid hubs; connect directly to the computer.
- Close other tabs or applications that may be using the port, such as a serial monitor or another flasher.
- If the write fails twice, see the troubleshooting guide for drivers and boot buttons.
STEP 4 OF 5 — WI-FI
The board could not join your network
The network rejected the password. Check the password and try again.
No 2.4 GHz networks were found
If your router is 5 GHz-only, turn on its 2.4 GHz band. If your network is hidden, type its name below.
Connect the board to Wi-Fi
The new firmware is running and responding over the cable. The password is sent directly to the board, not to any server. The board detects 2.4 GHz networks only.
STEP 5 OF 5 — PAIR
Firmware installed
Scan with the Home app on your iPhone, or type the setup code. iOS will report that the accessory is uncertified. Choose Add Anyway.
The setup code could not be read from the board, so it cannot be shown here. Reconnect the board over USB and read it again.
Setup code
The code does not change. It is saved in this browser.
Open Google Home, Alexa or SmartThings, add a Matter device, and scan this code. Your Wi-Fi name and password are passed to the board during setup; there is nothing to enter here.
The pairing code could not be read from the board, so it cannot be shown here. Reconnect the board over USB and read it again. The board also prints the code and QR on the serial console at boot.
Pairing code
The app will report the accessory as uncertified; choose to add it anyway. The code does not change. It is saved in this browser.
Once the board is on your Wi-Fi, continue with the ESPHome setup guide to adopt it in the ESPHome dashboard, install its personalized configuration, and add the integration to Home Assistant.
No pairing code is required. You can finish adoption at the bench or after installing the controller. Skip Wi-Fi setup in the guide if it is already complete, then verify control once CN105 is connected.
Scan the code to join the controller's backup setup network, or select the network from your Wi-Fi list. A setup page opens for entering your home network name and password.
Look for a setup network whose name begins with "serin-", followed by six characters unique to your controller, and join it with the password below. A setup page opens for entering your home network name and password.
The controller's exact setup network name could not be read. Look for a network whose name begins with "Serin-" and join it with the password below.
- Network
- Password
AVAILABLE FROM YOUR PHONE
Need a board? The Serin controller ships ready to flash. Parts list →
Board not detected?
The most common cause is a charge-only cable. Otherwise, install the USB serial drivers or see the troubleshooting guide.
After flashing: wiring the board
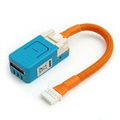
Turn off power at the breaker, seat the CN105-to-Grove cable, and place the board inside the indoor unit. Future updates are delivered over Wi-Fi.
What the firmware includes
Climate, vane and fan control, room sensors, and diagnostics the factory app does not expose. Sources and licenses.